Turnout: public registration & door check-in
Turnout runs a community programme that’s open to families beyond your own ecclesia — a holiday club, a youth event, a Junior CYC — where most people registering aren’t members and have no CDRoster account.
It gives you three things:
- a public registration link (and QR code) families fill in once, no sign-in;
- a door check-in page a parent scans on the night, so you know who’s present each session;
- a safety-check register and reports for the committee — working-with-children numbers, attendance, consents.
Reading time: about eight minutes.
Before you start
Turnout is an opt-in feature. An administrator turns it on under Manage › Settings (the Turnout toggle). Once it’s on, a Turnout entry appears in the Manage menu for coordinators and administrators. Only administrators create events and edit their settings; coordinators run the door and see registrations.
You’ll also want two forms built in the form builder (a registration form and a check-in form), or you can start from the built-in Junior CYC templates — see step 1.
Create an event
Open Manage › Turnout. You’ll see your events and an Overview table of registrations, attendance and returning children.
The quickest start is “Start from the Junior CYC templates”: one click imports a ready-made registration and check-in form, creates the event wired to them, and applies the suggested field bindings — then drops you on the event page with a checklist of what’s left. Otherwise click New event and pick your own forms.
On the event form you can also set an age window (with a tolerance before registration is refused), a committee email (shown to families and used as the confirmation email’s reply-to), and an optional schedule — a recurring pattern (“every 2nd Friday”, “4th Friday of the month”) that generates the sessions for you, honouring school-holiday skips and seasonal start times, exactly like a recurring event.
Tell Turnout what each field means
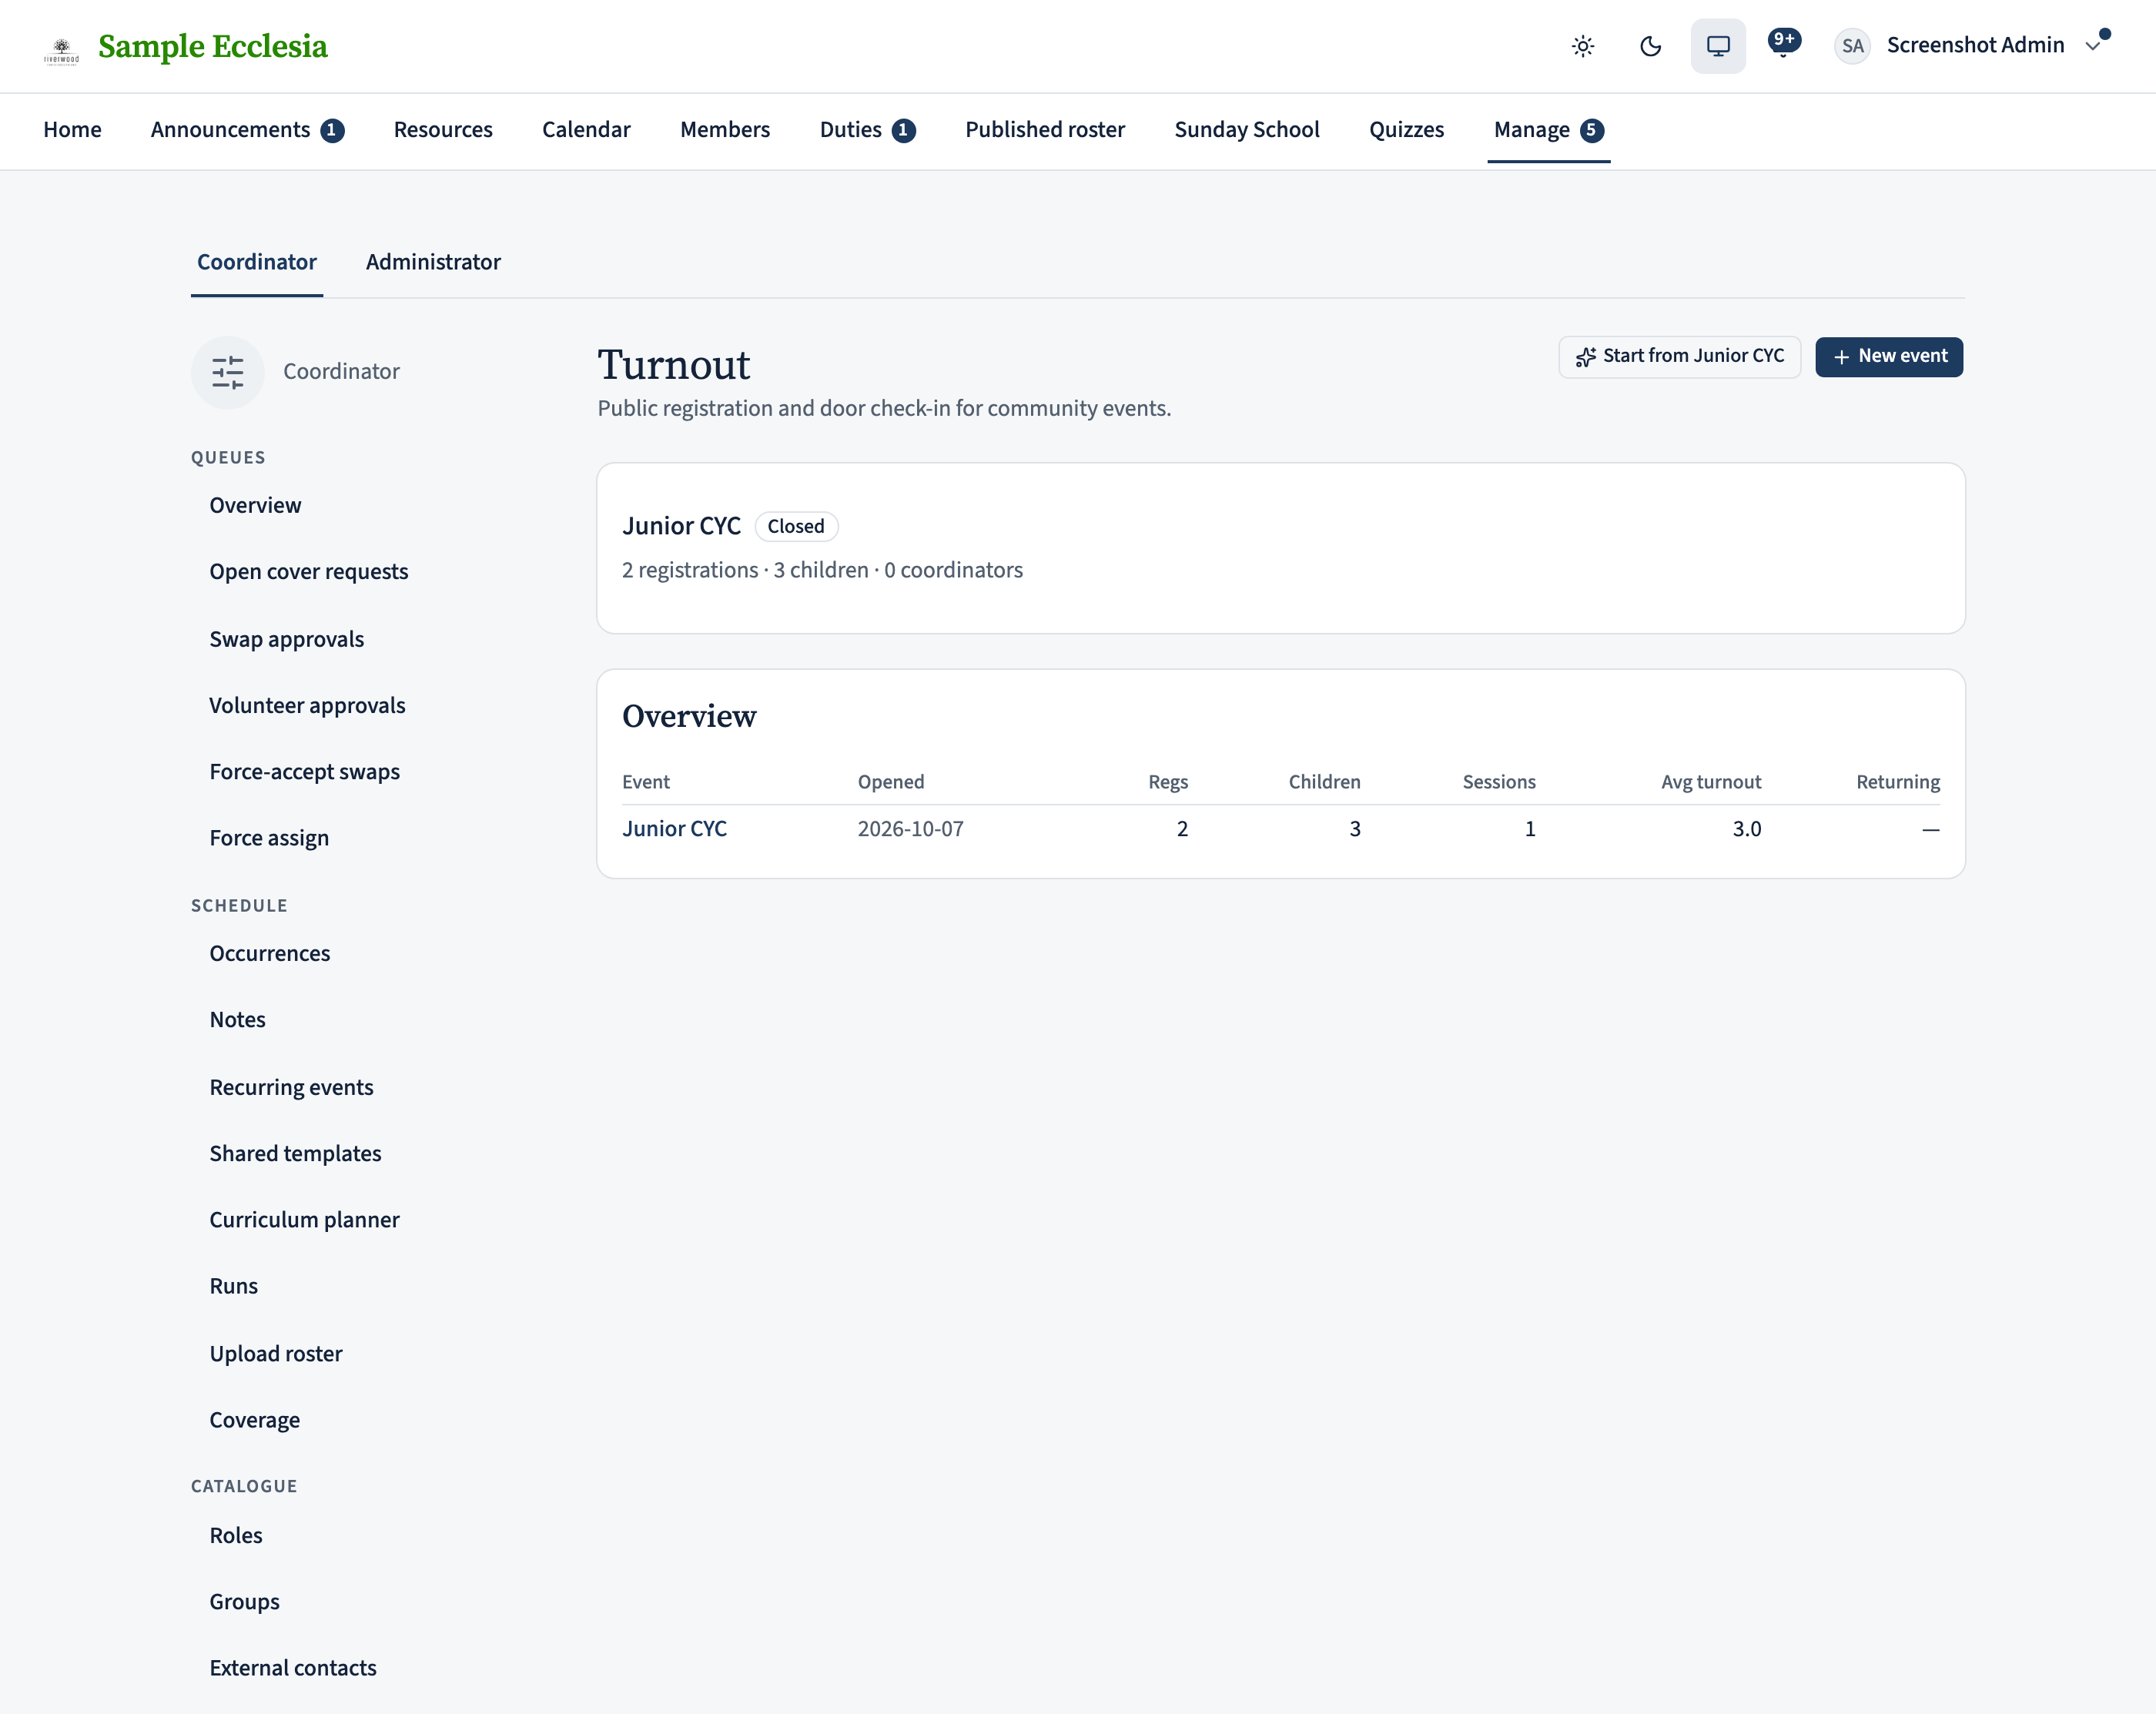
Turnout needs to know which form field is the child’s name, which is the guardian’s phone, which is the safety-check number, and so on. Open the event and set the Field bindings — a meaning per item. (If you started from the template these are already filled in.)
The repeating “Add child” group is bound on the group row itself. For a safety-check number you also pick the scheme (NSW WWCC, Blue Card QLD, …) so the number is checked against the right register; the check’s expiry is its own date field. Mark medical / check-number fields Sensitive (masked in lists) and any field you want as a report column Report by.
The readiness checklist at the top tells you what’s still needed before the event can open. If a binding is wrong, the reason shows right on that row.
Open it, and share the link
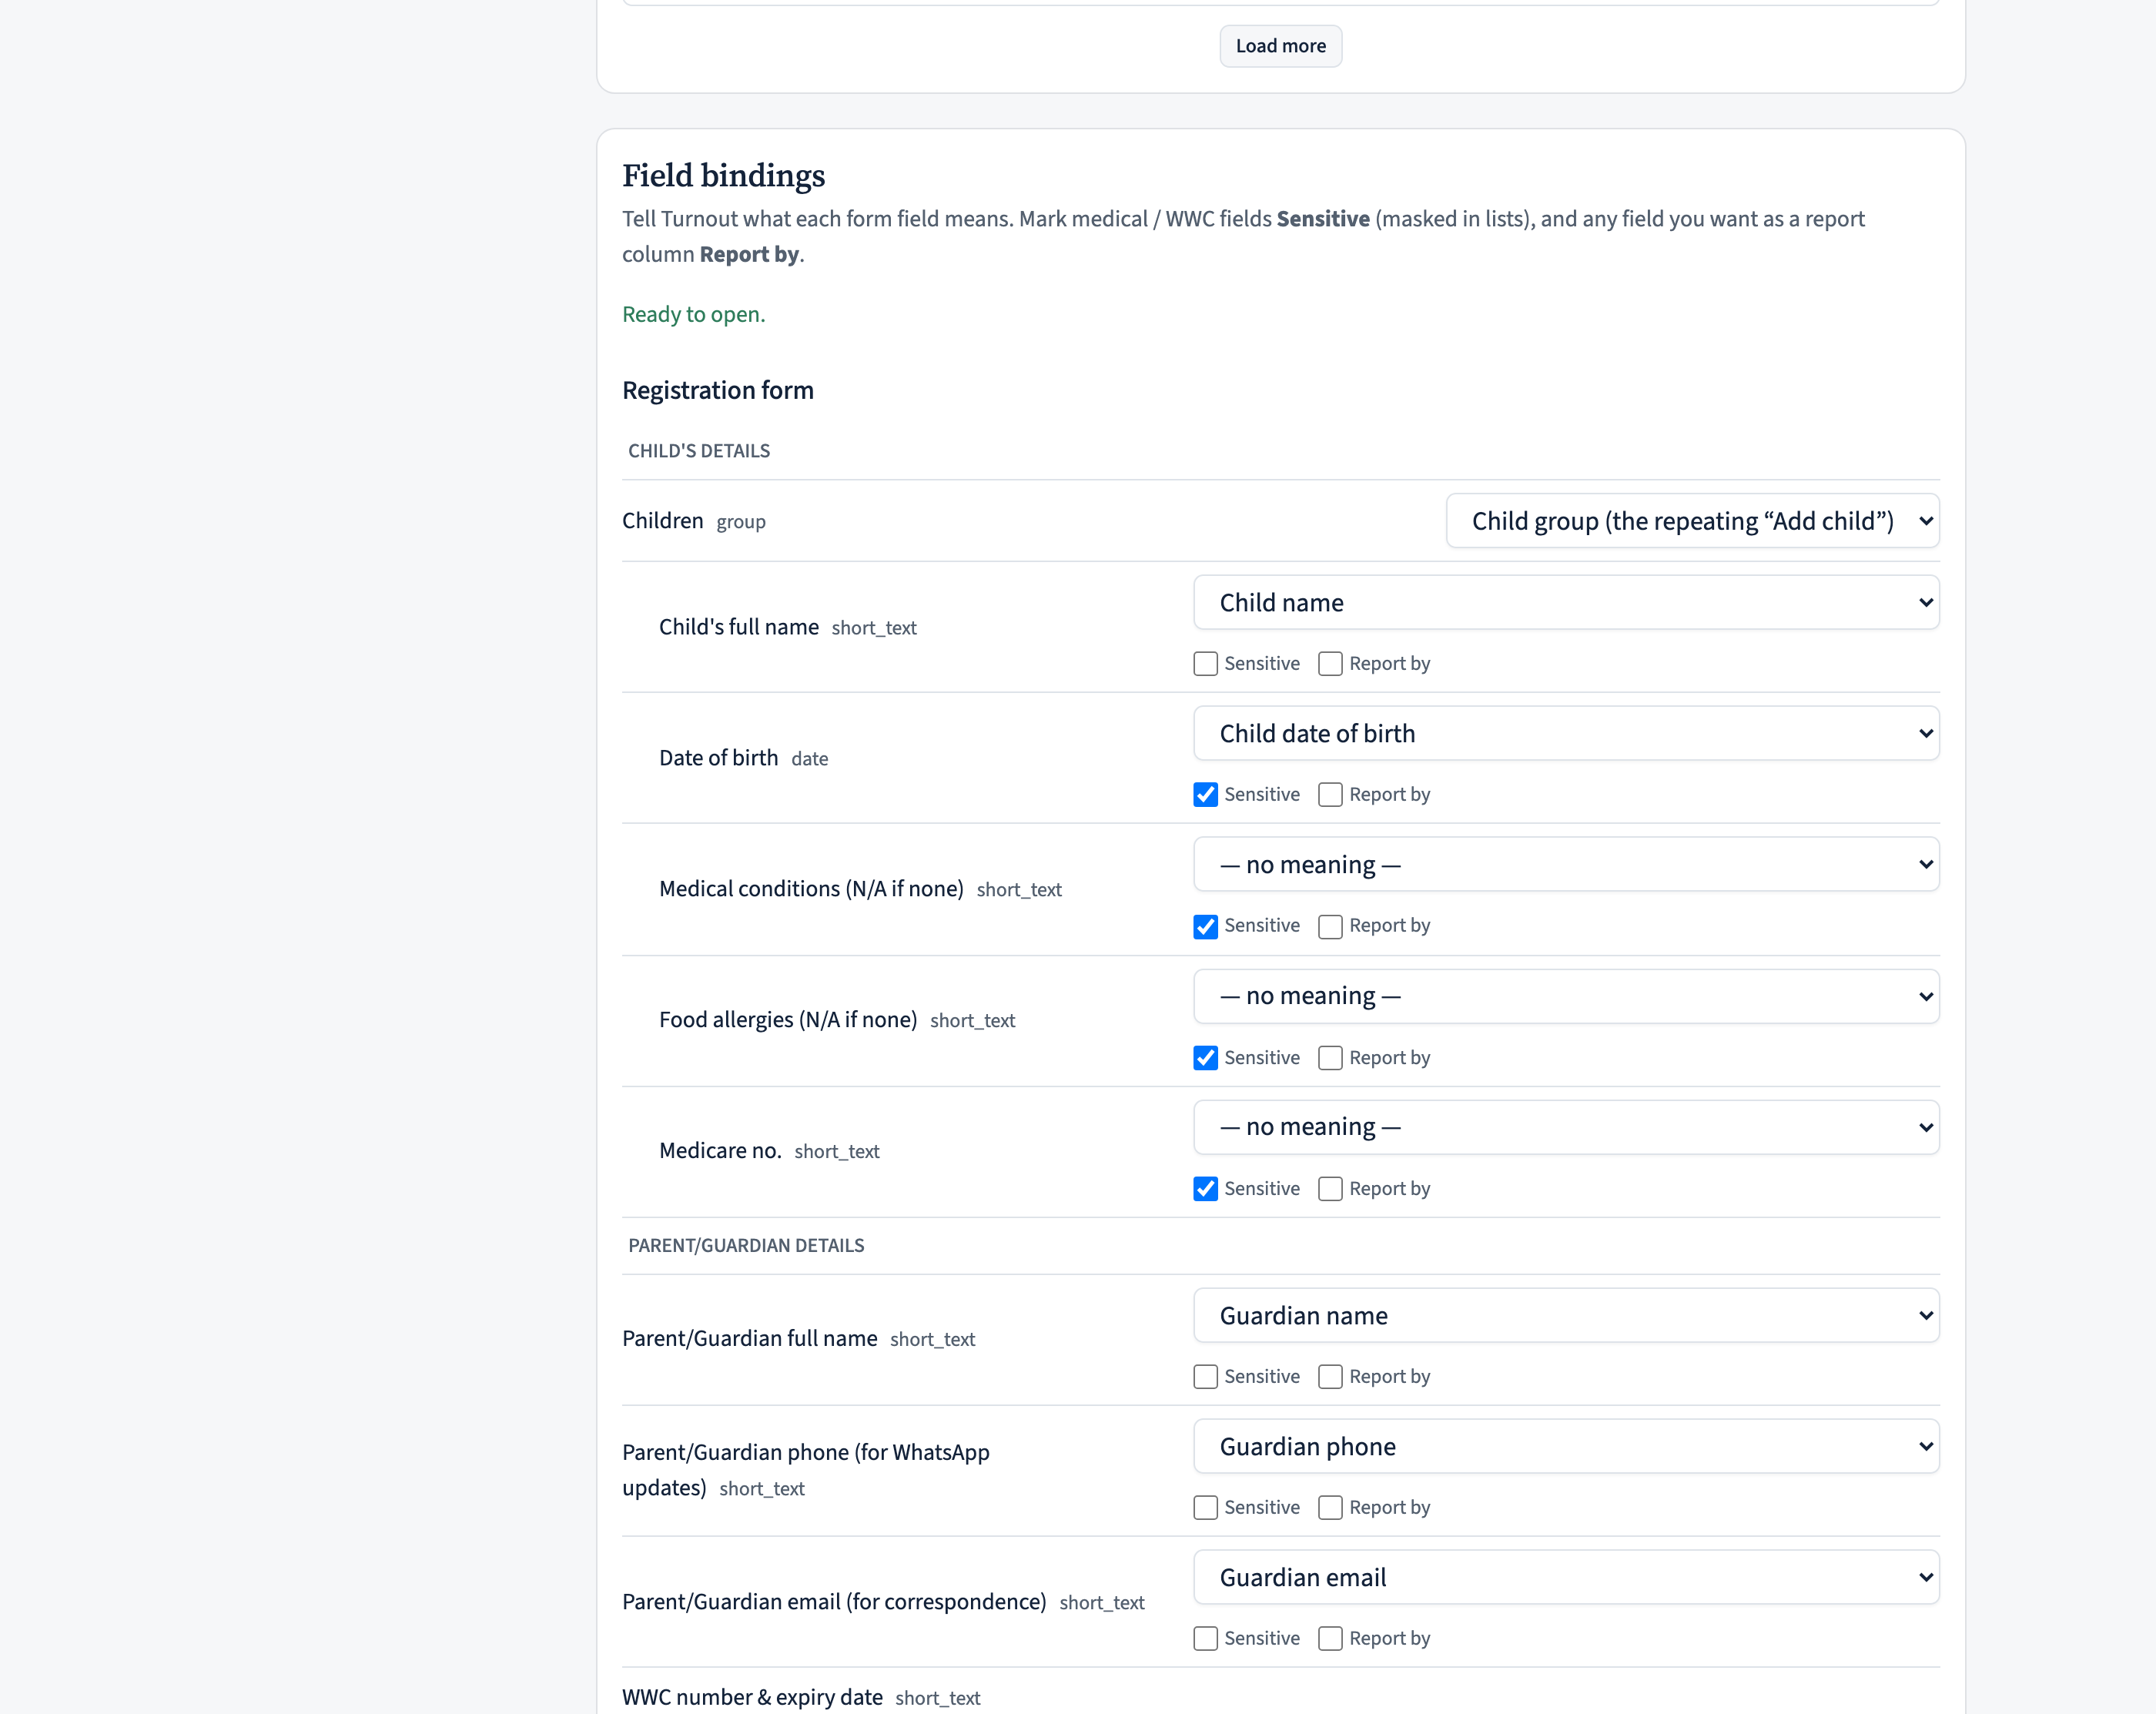
When the checklist is green, set the event Open (Status card). Opening mints the public links. In the Links & QR panel you can copy the registration link for a newsletter or a website, print the poster, or show the QR code on a screen — families scan it to register with no sign-in.
Add your helpers as Coordinators on the event so they can see registrations and run the door — they don’t need to be administrators. (Administrators always can.)
Registrations come in
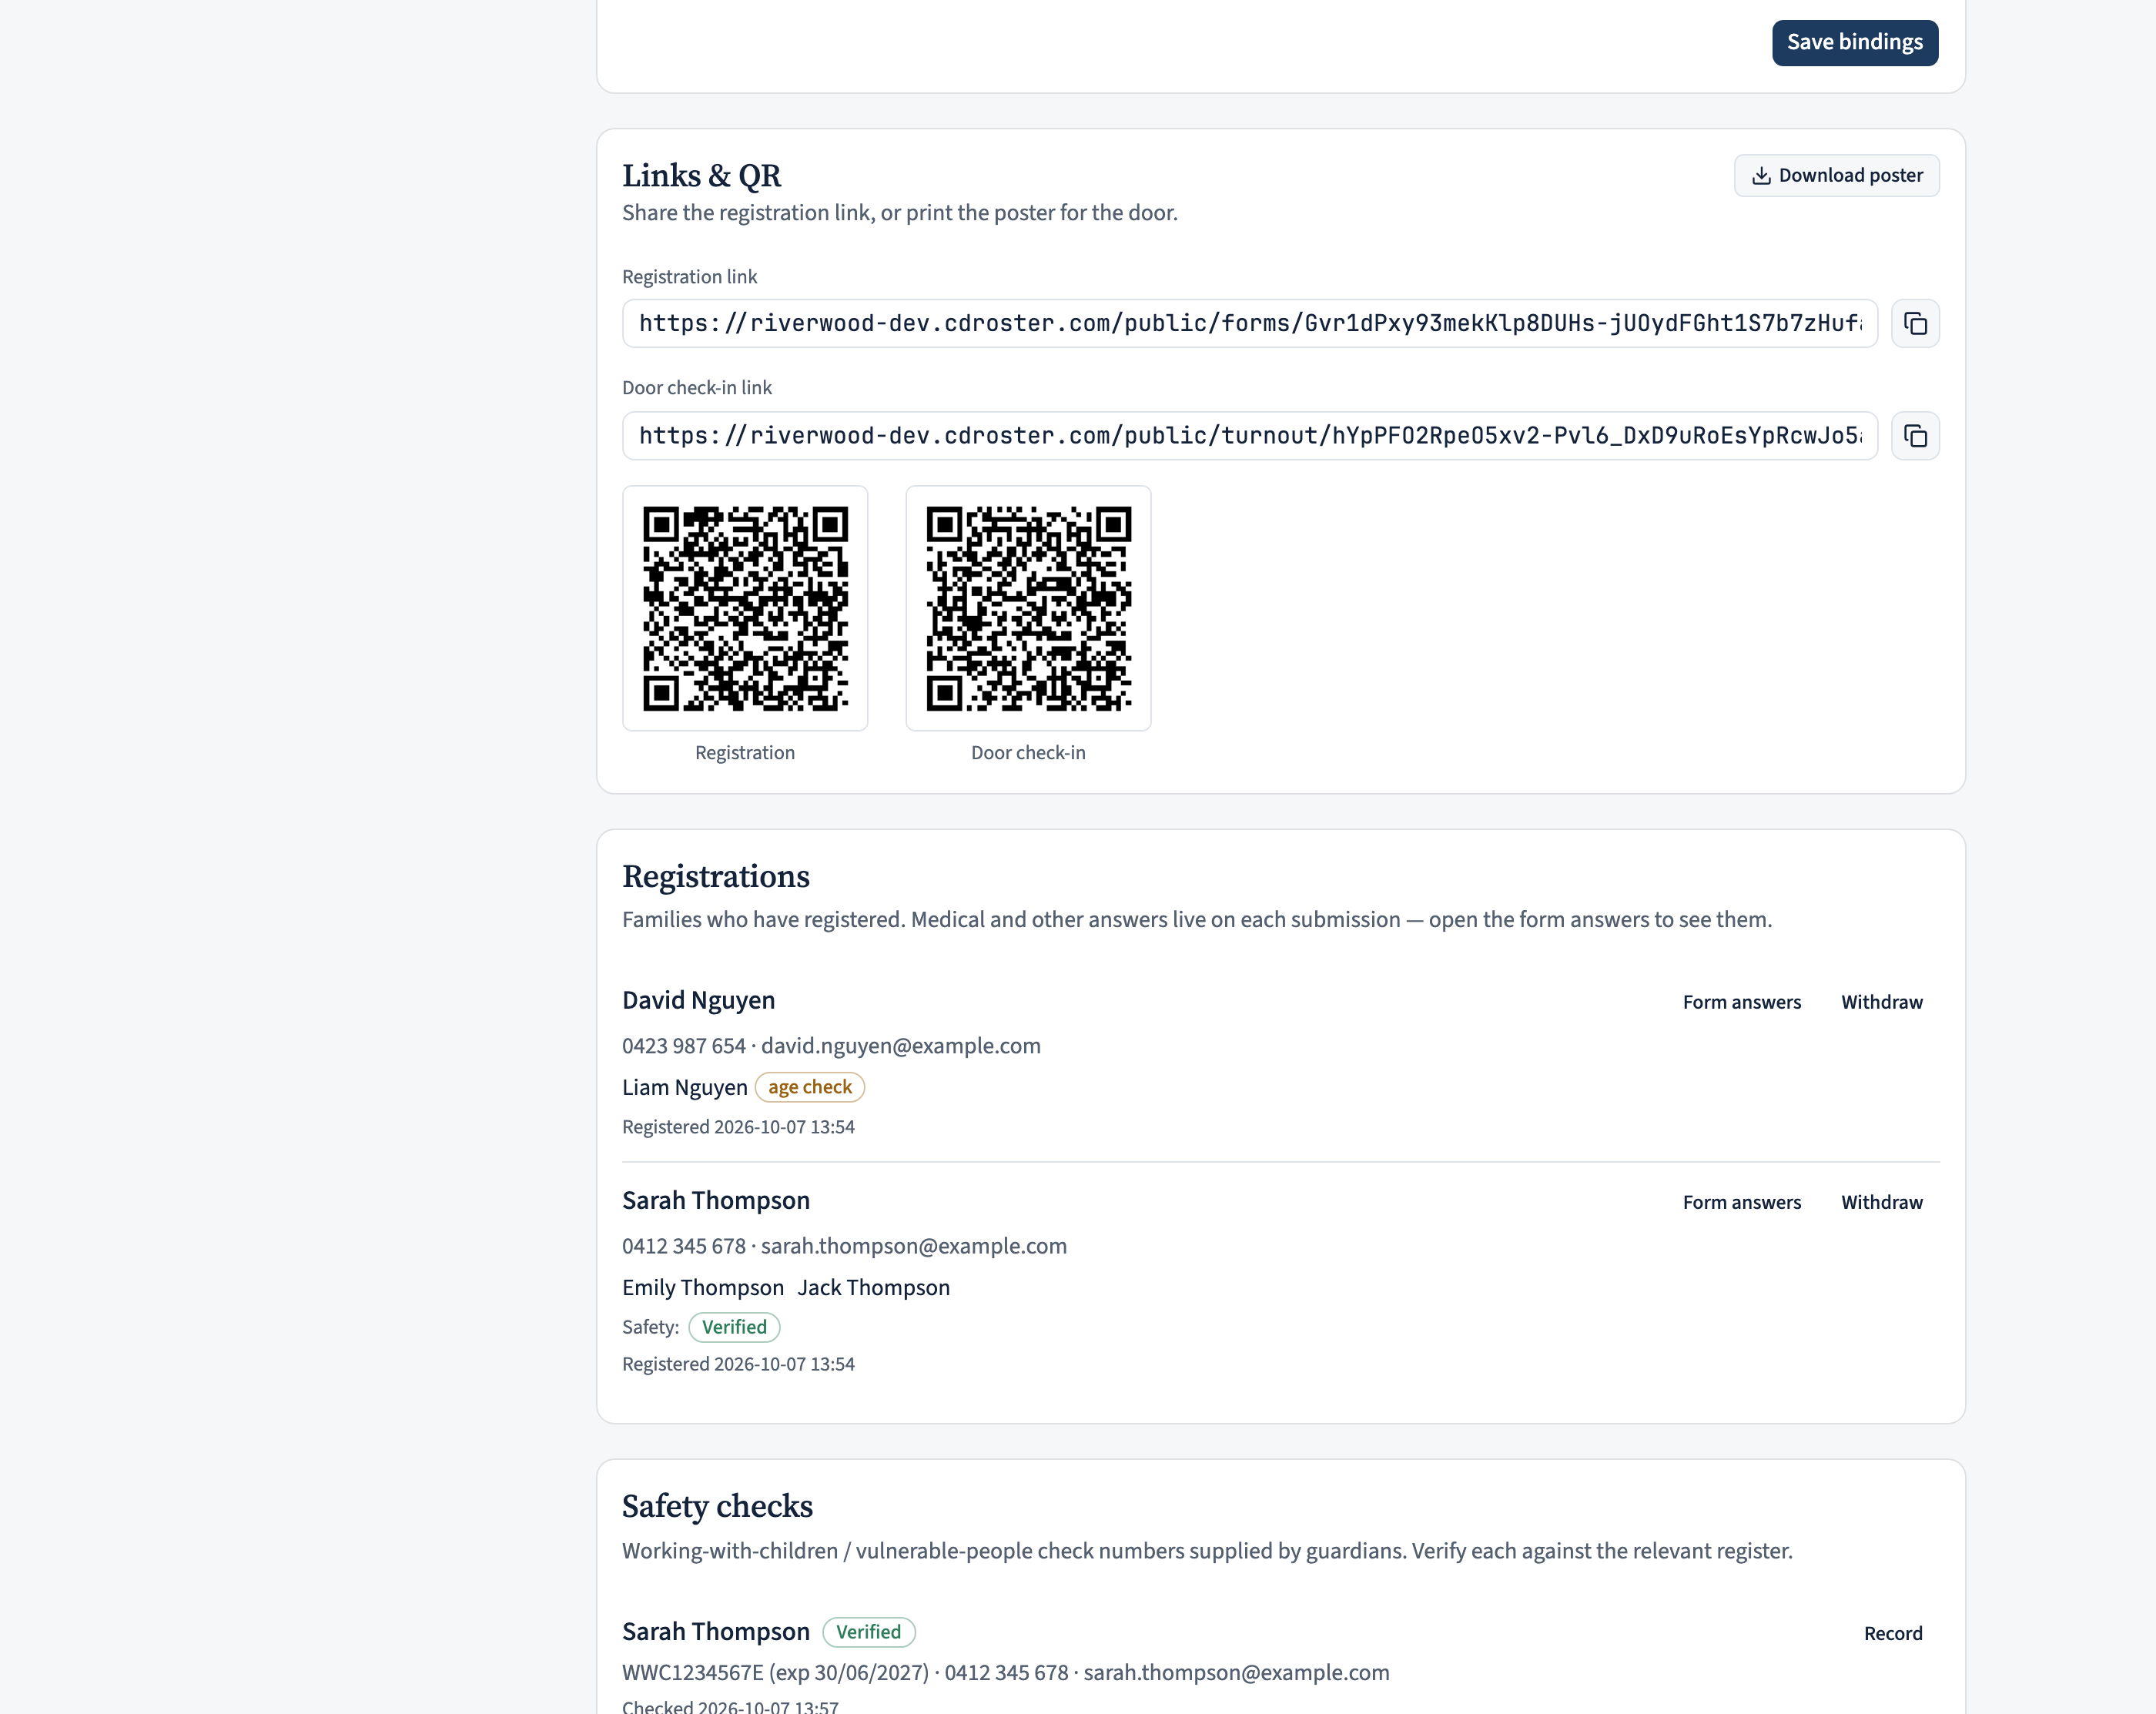
As families register, they appear under Registrations — the guardian, their children (with an age check chip if a child is near the edge of the age window), and the safety-check outcomes. Open Form answers to read everything they submitted, including the medical and consent fields.
A family can change their own registration later from the “Change my registration” link in their confirmation email — add or remove a child, fix a number. When they do, the row shows “Updated by family on …”. A child whose name is unchanged keeps their place and attendance history.
Verify the safety checks
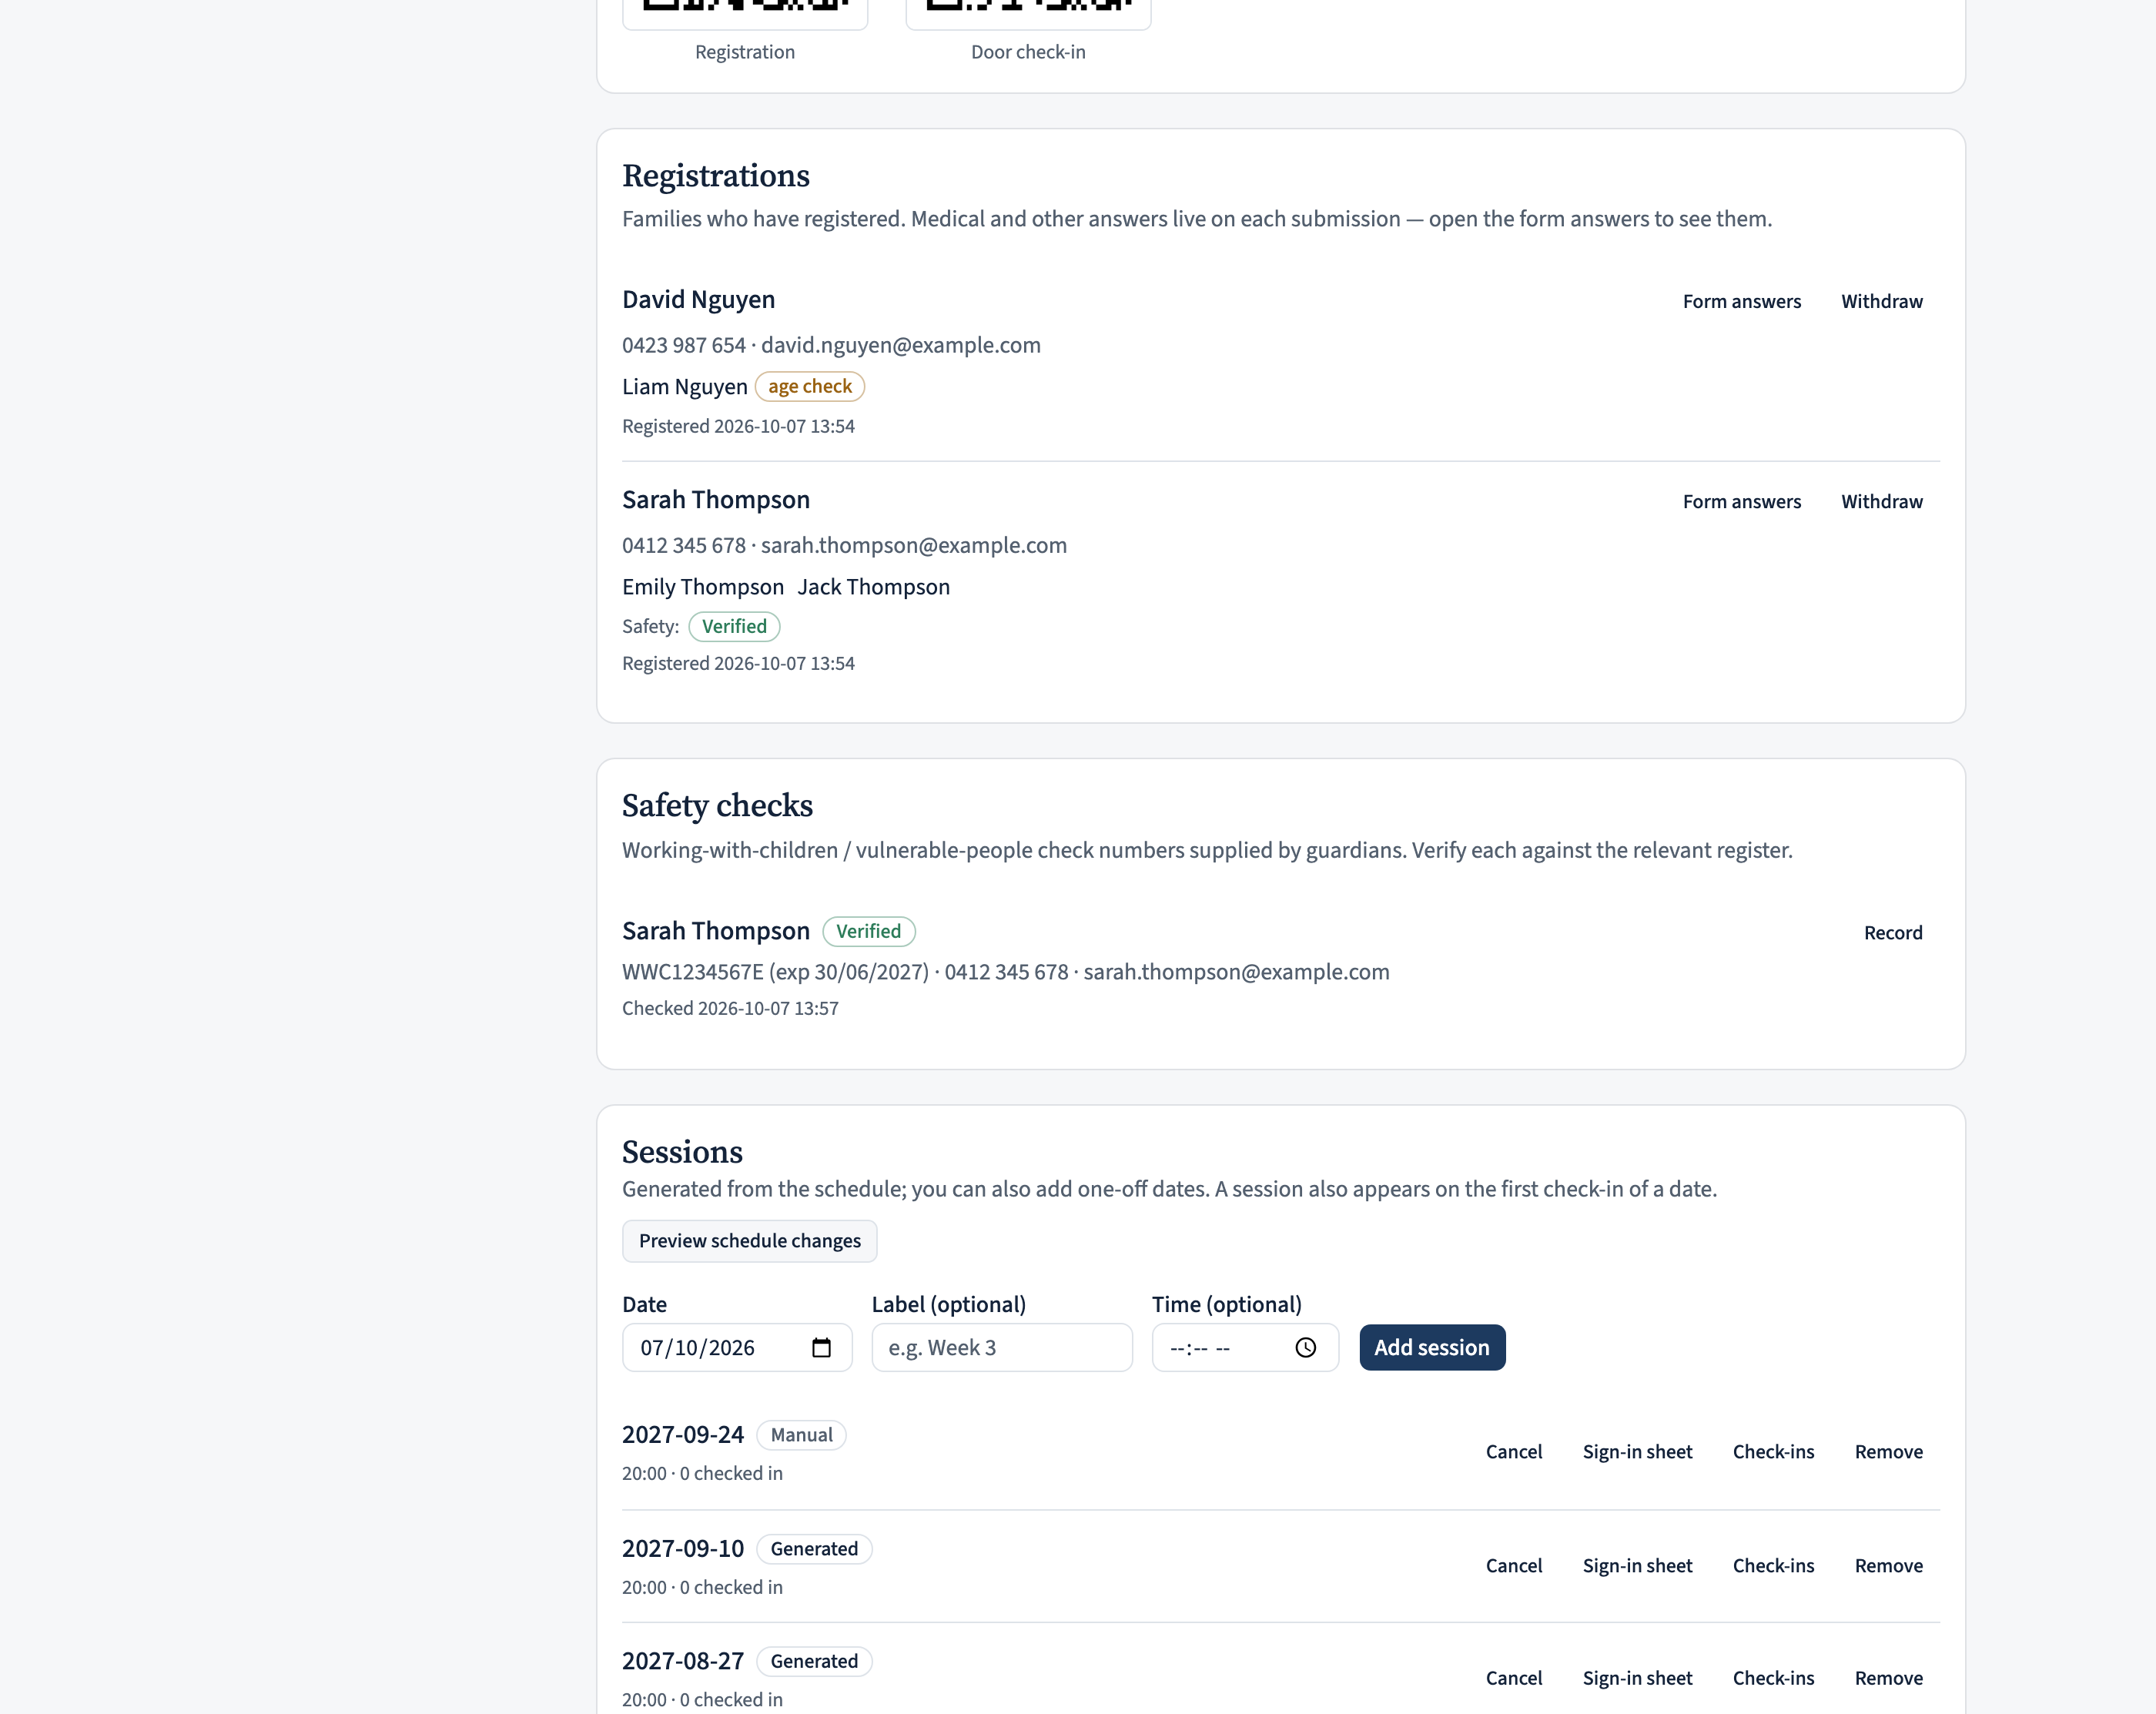
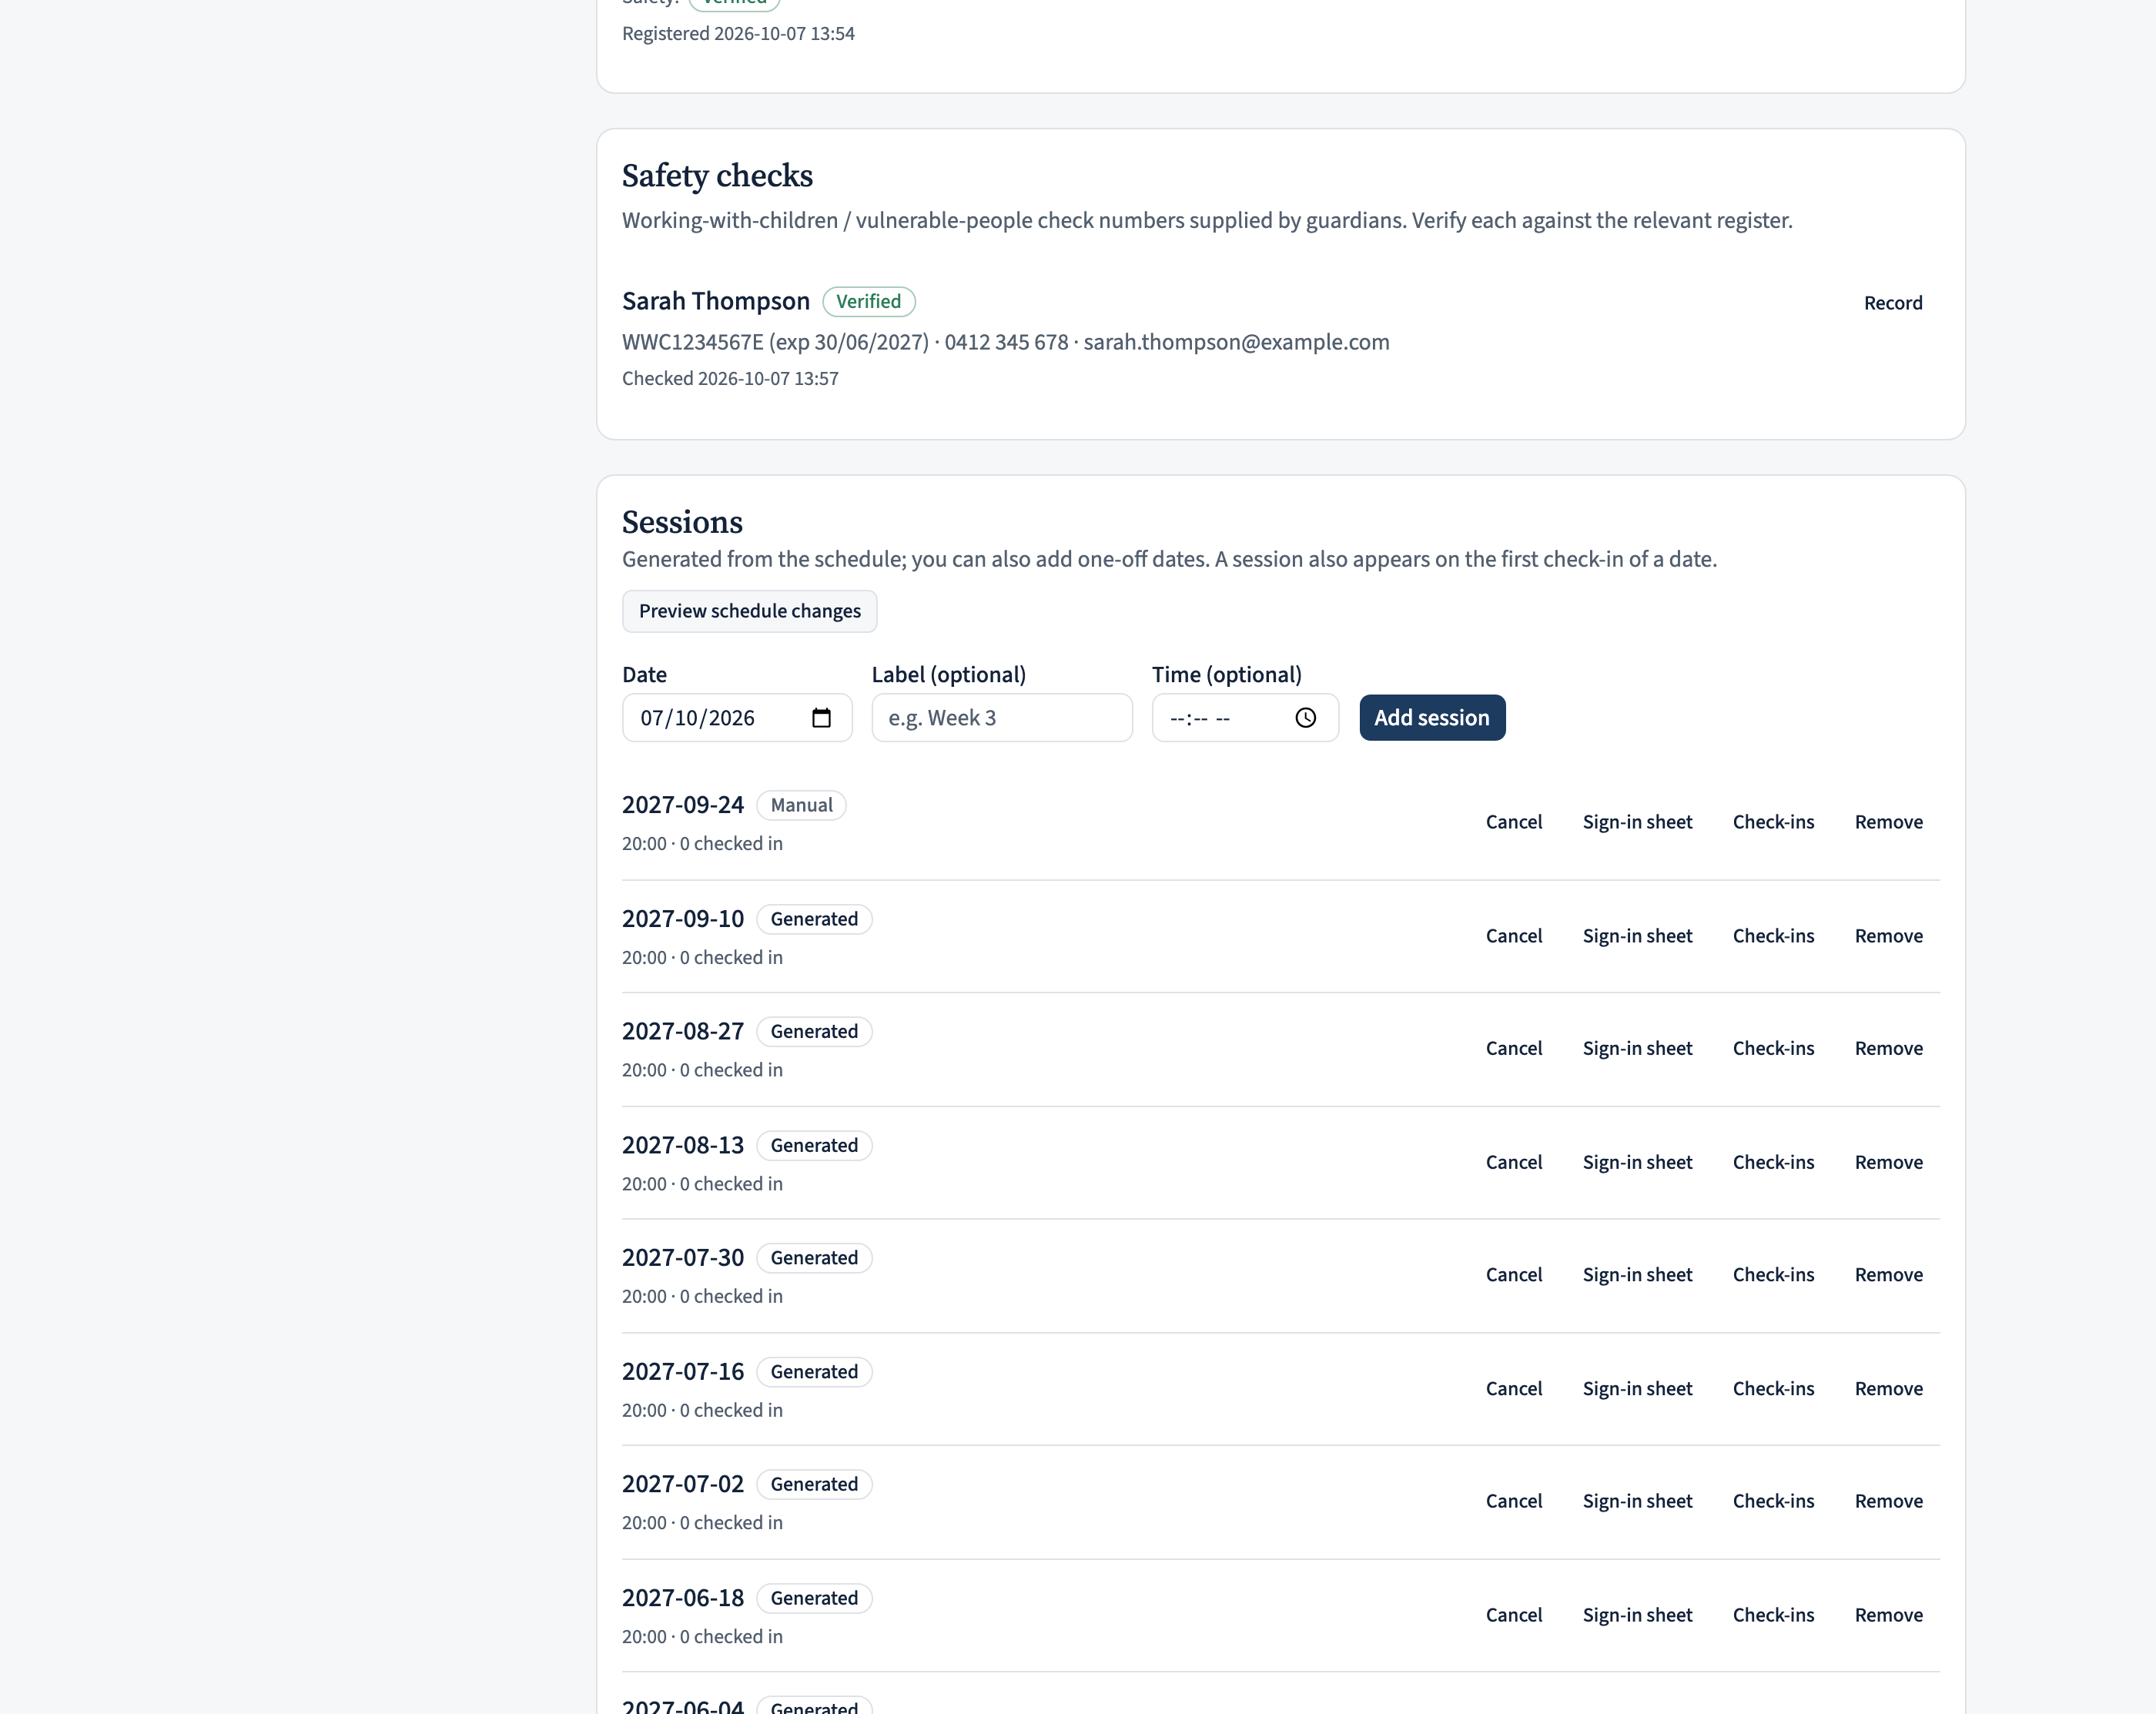
The Safety checks screen is the committee’s verification list — the working-with-children / vulnerable-people numbers guardians entered, newest-unverified first. Each shows the number, the expiry they entered (badged Expiring soon or Expired as entered), and the scheme.
When the guardian is also a member with that credential on file, Turnout shows an “on register” line — the name, the number, the expiry, and whether it matches. If it matches and is current, “Mark verified from register” records it in one tap. Otherwise record the outcome by hand (verified / not valid / expired) with a note.
Run the door
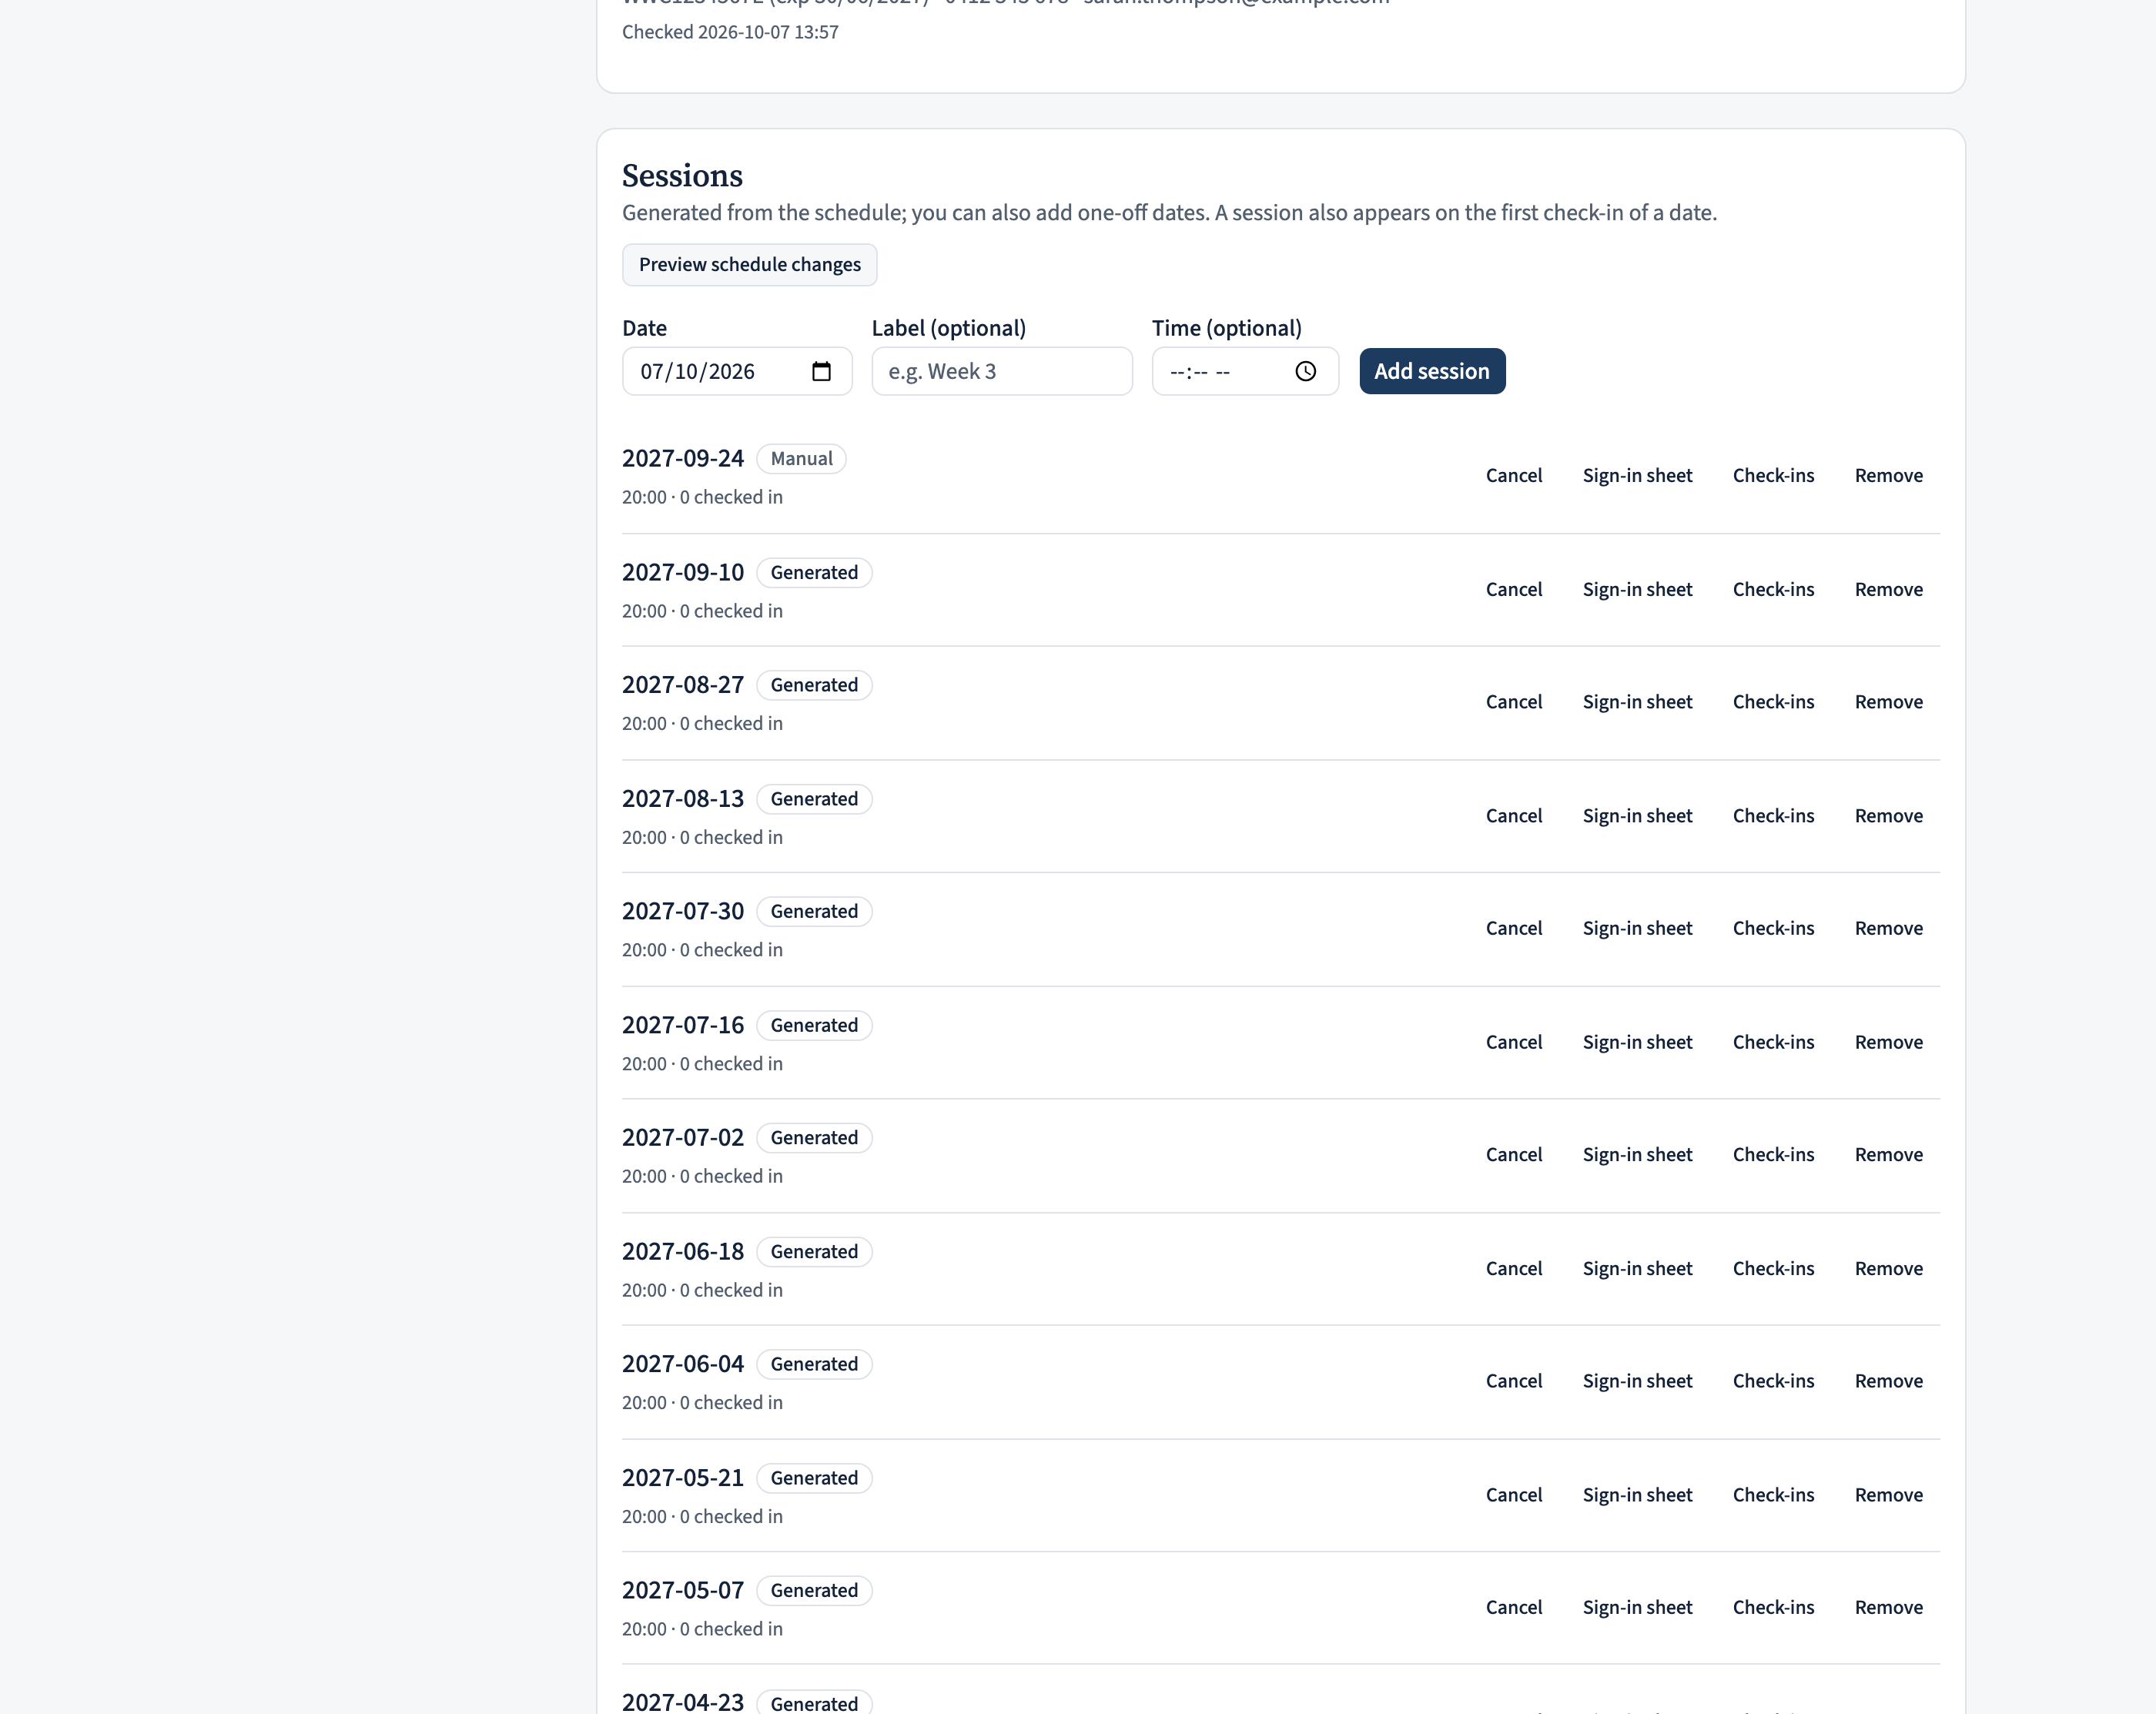
Each date the programme runs is a session. If you gave the event a schedule, the sessions are generated for you; you can also add one-off dates. Print the sign-in sheet for a paper backup.
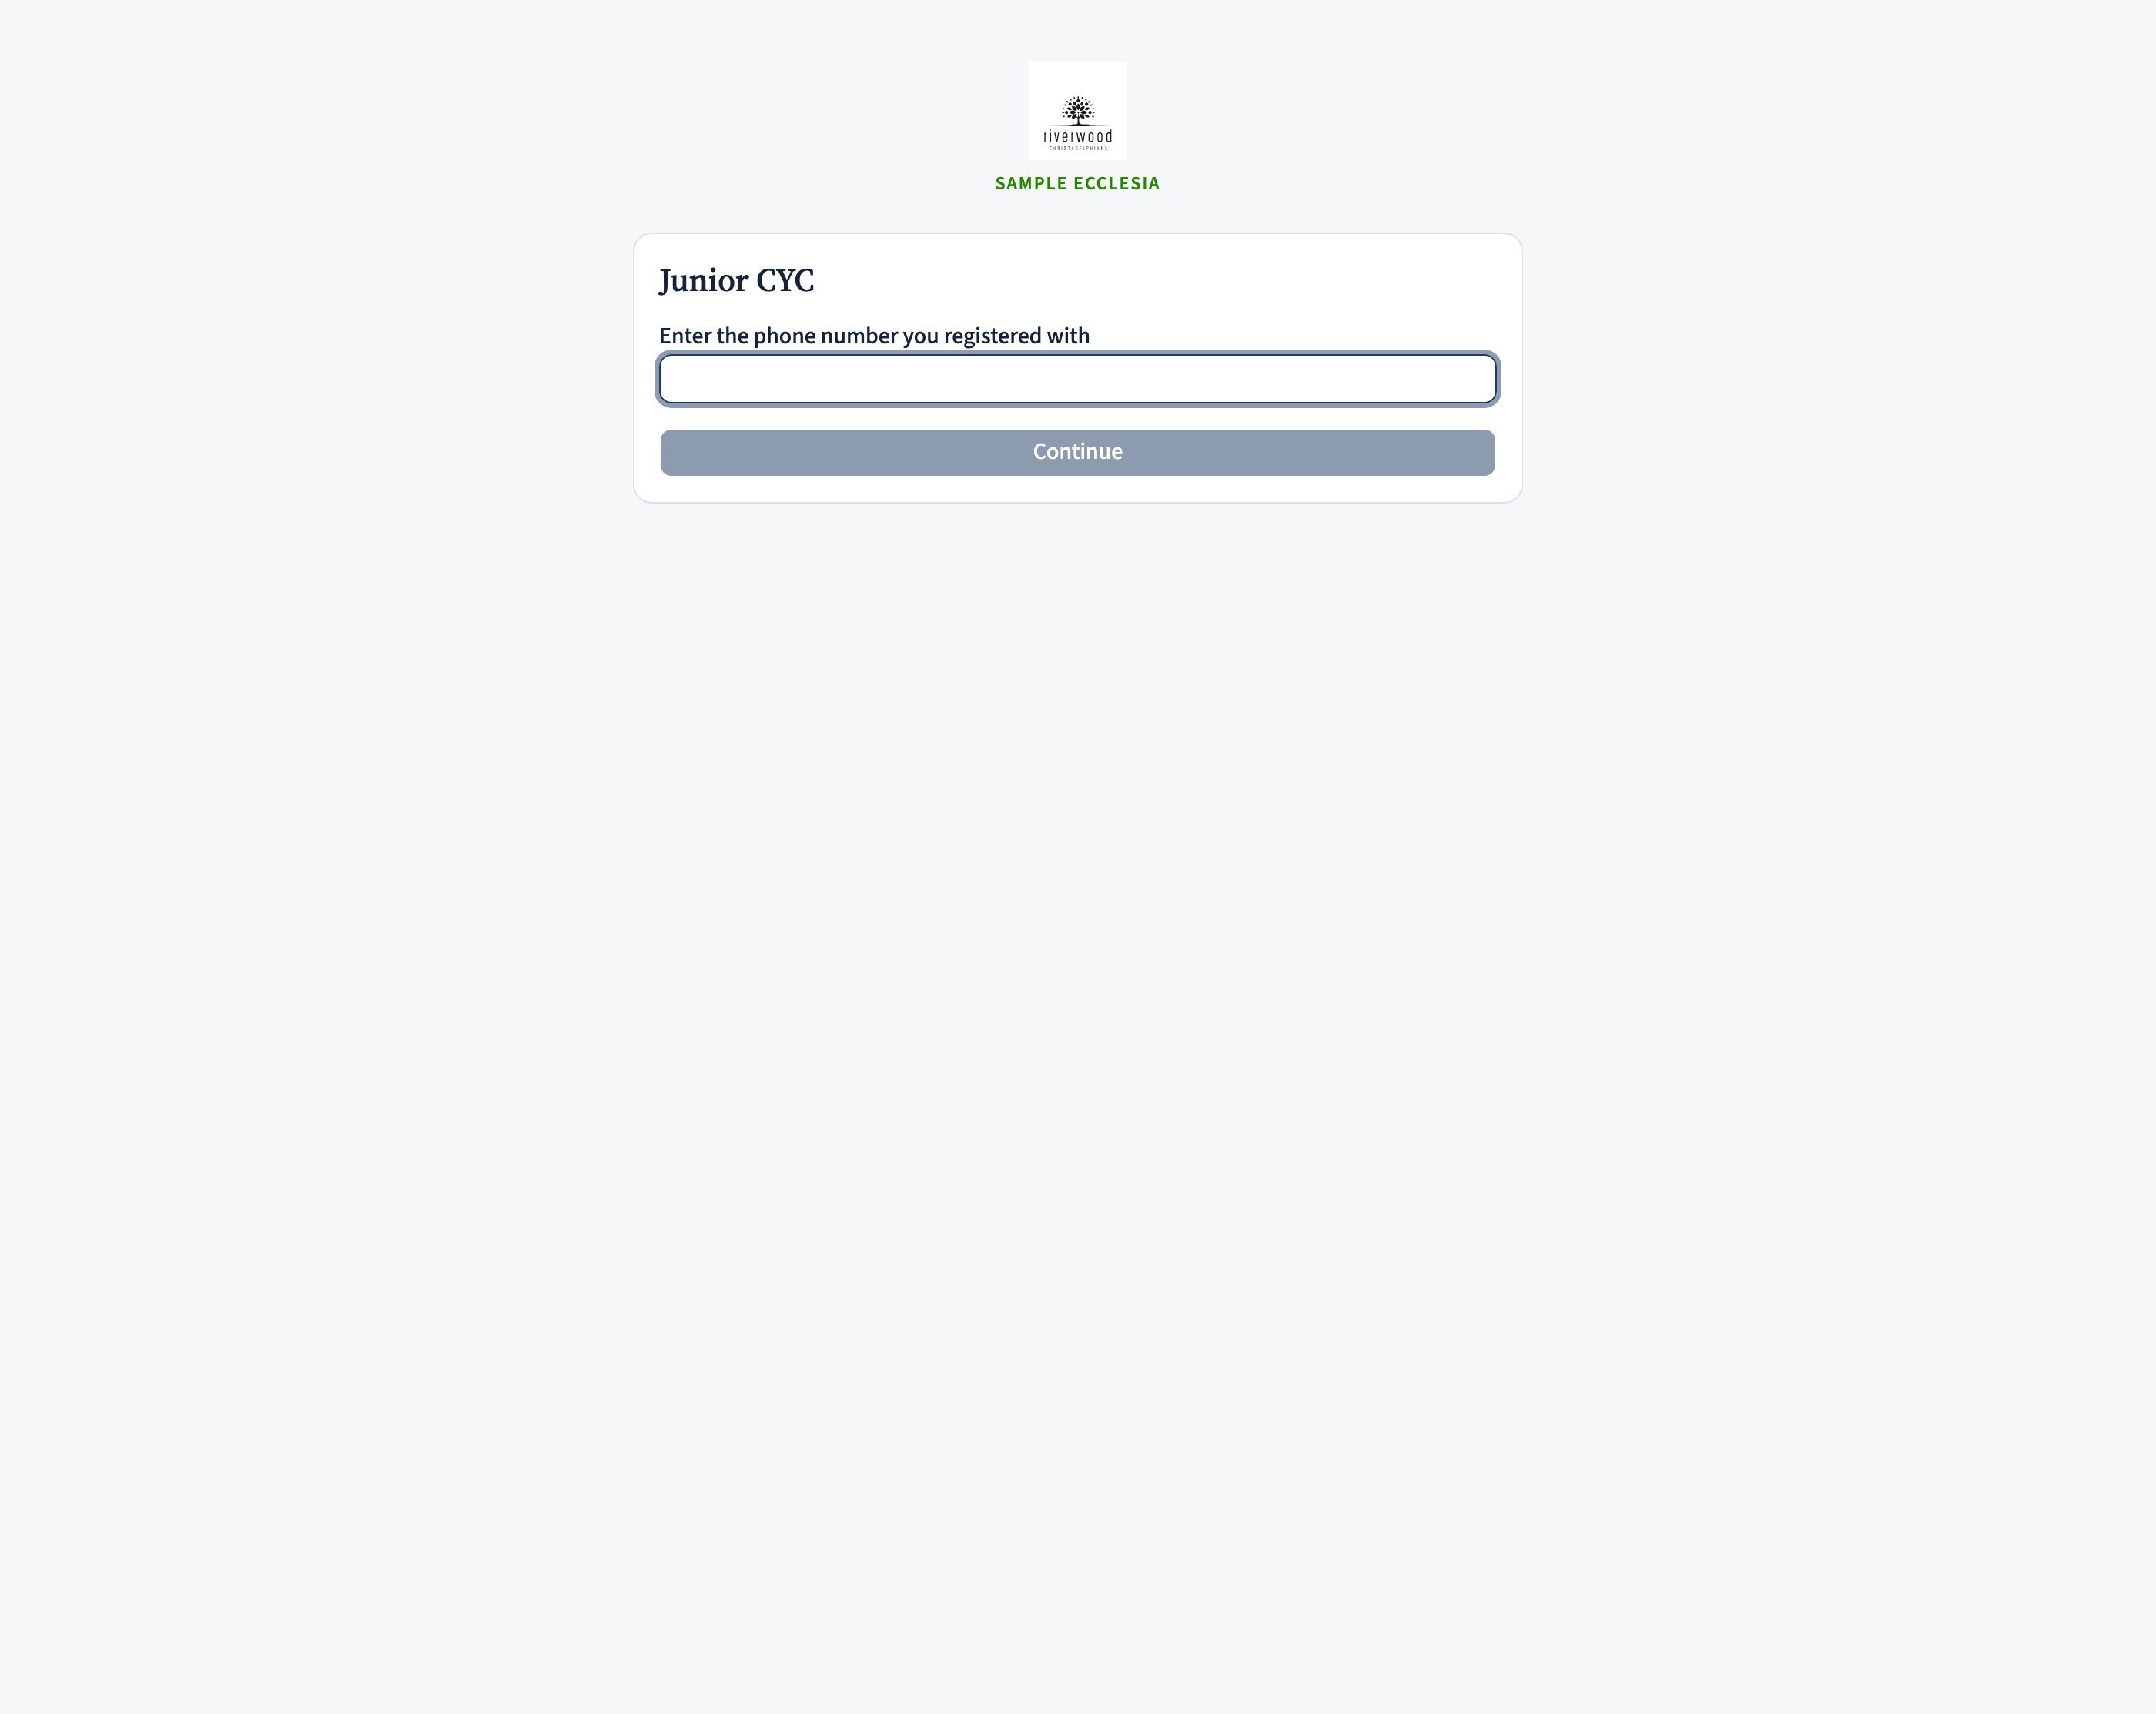
On the night, parents open the door check-in page (the QR on the poster), enter the phone number they registered with, tick which of their children are here, and sign. You can also check a family in from the desk with the Staff check-in panel. A quiet dot next to a family flags a safety check that needs attention — it never blocks check-in.
What the parent sees at the door
The door page is deliberately plain — your ecclesia’s logo, a phone field, then a tick-list of the family’s children and a signature. No login, nothing to install. It’s built for a parent holding a phone at a hall door.
A child already checked in for the night shows as such and can’t be double-counted; after they sign they get a “Checked in: …” confirmation and a “Check in another family” button, so one phone at the door can process a queue.
Reports for the committee
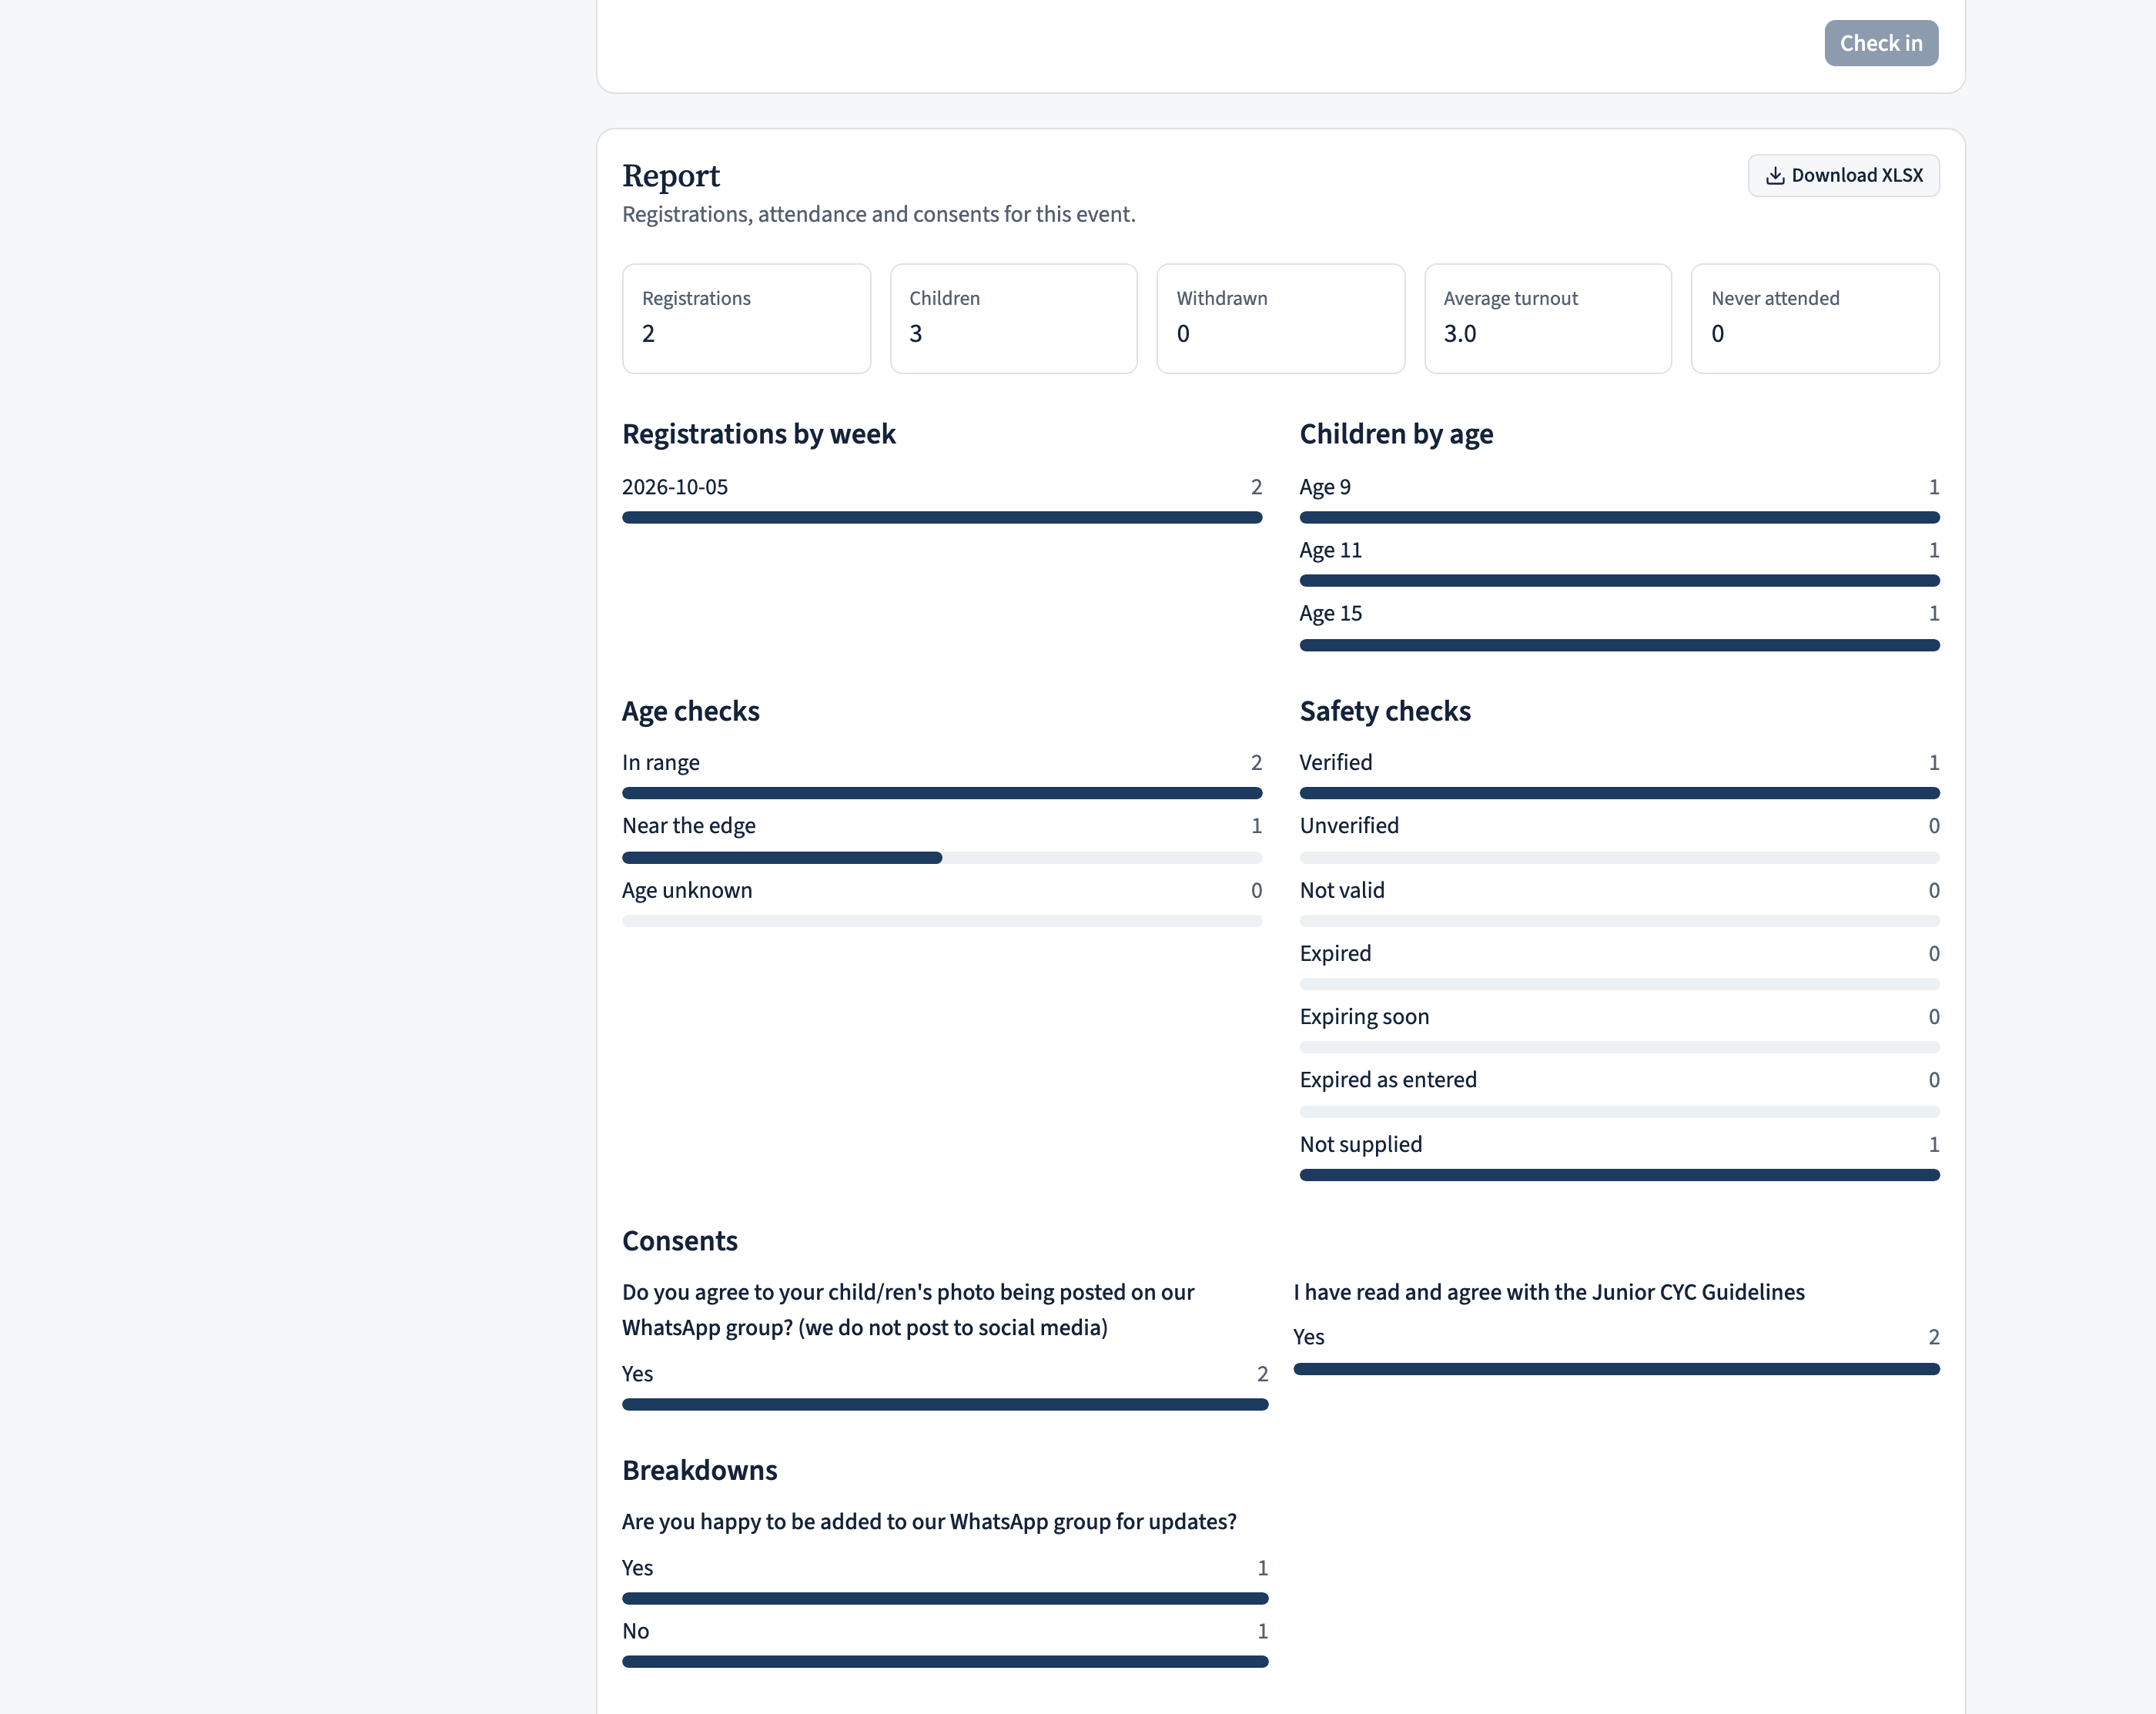
The Report pulls it all together — registrations and average turnout, a breakdown by age, the safety-check status, the consent questions, the per-session numbers, and an attendance cross-tab (each child against each session, with their rate and streak). Download it as an XLSX for the committee minutes.
When the programme is over, an administrator can close the event and later anonymise it — that permanently strips the names, contacts and signatures but keeps the counts, so your statistics survive without holding personal data you no longer need.
On the iPhone app
Everything a coordinator needs on the night is on the phone — the events, the registrations, checking children in, and verifying each guardian's Working With Children check. An administrator can also create and open events here.
Tap Manage in the tab bar, then Turnout.
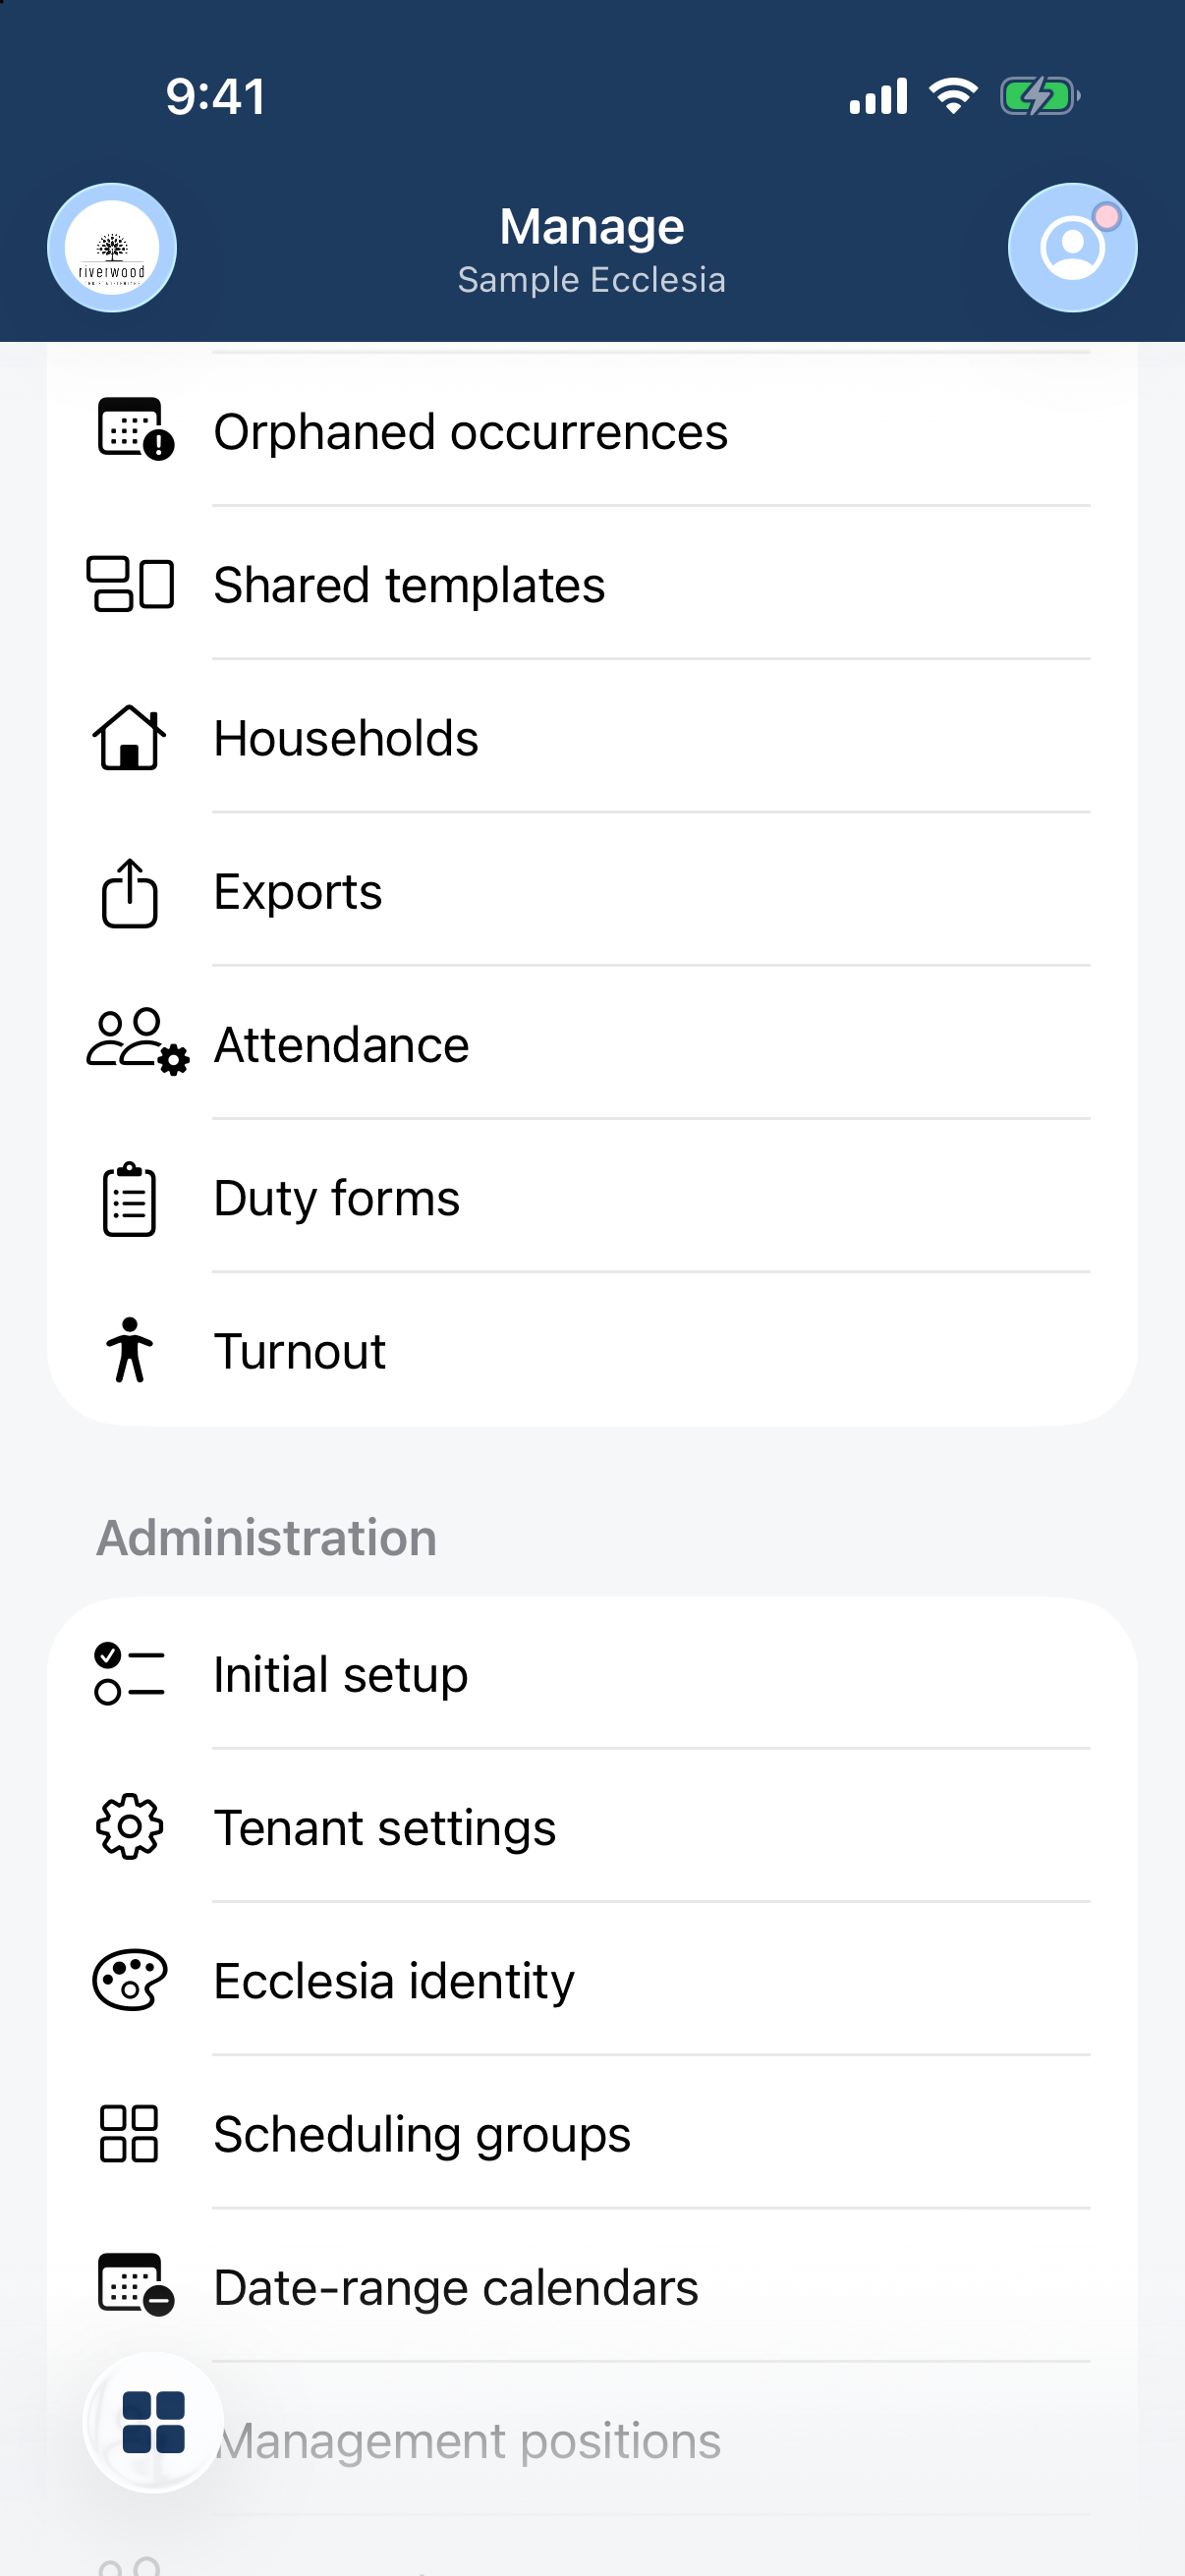
The Manage hub with a Turnout entry (figure.child icon). You’ll see every event — open ones first, then closed — with a count of families and children. The bar-chart button (top-right) is an overview across all your events. Tap an event to open it.
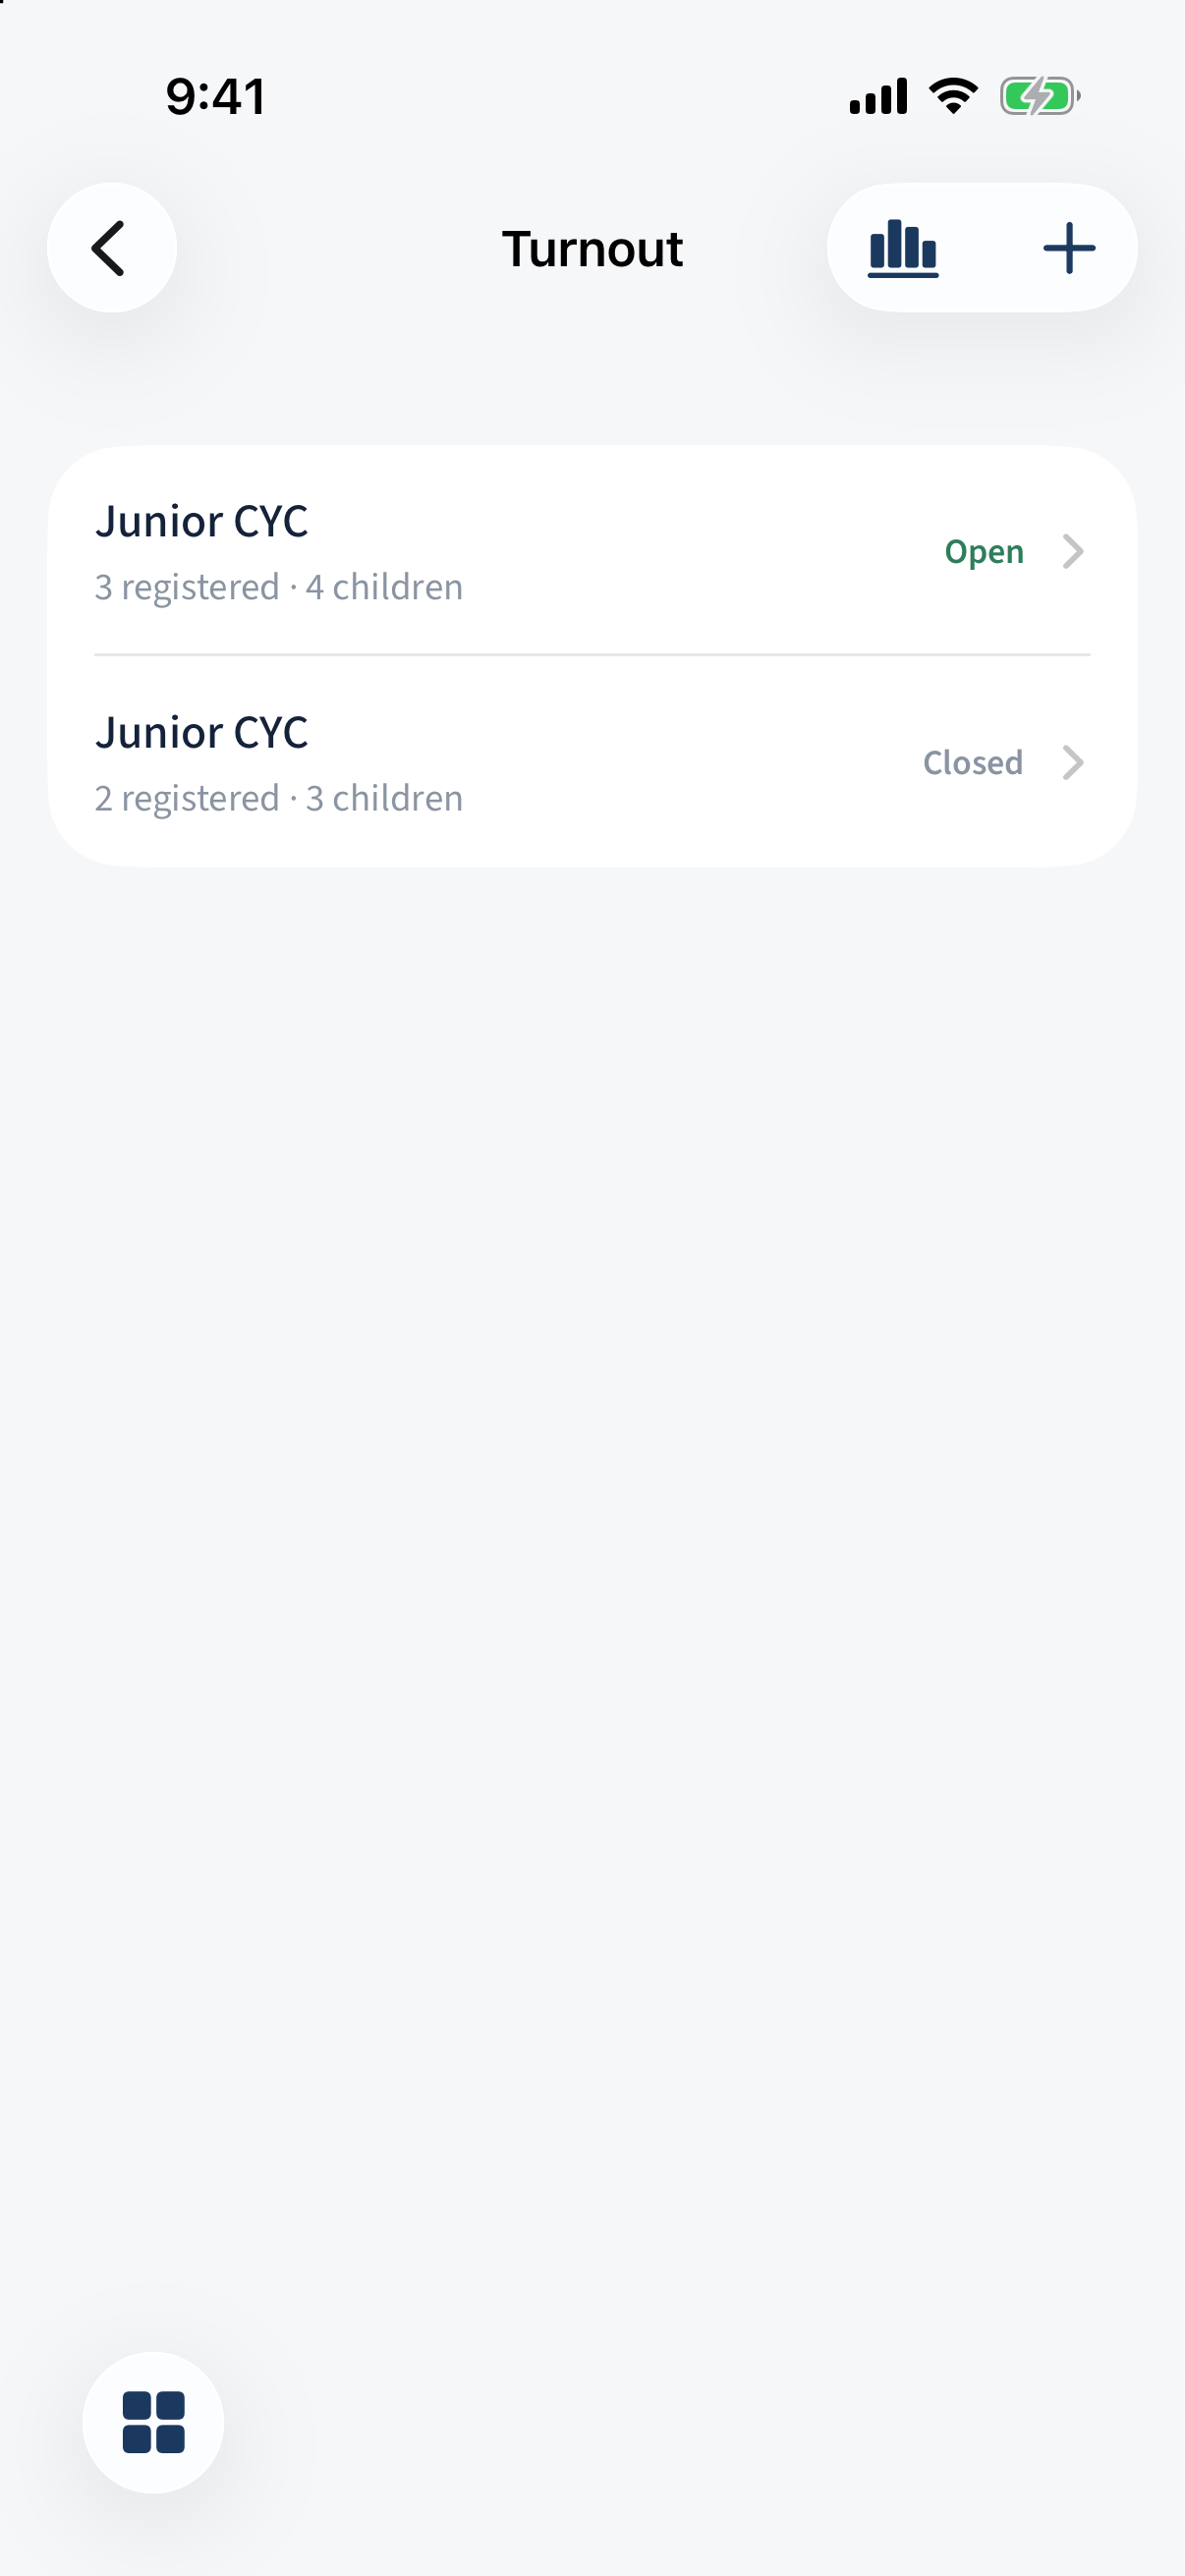
The Turnout events list — open events first, then closed, with registration counts and an overview button. The event opens with its status (Draft, Open or Closed), the age range, the committee email, and how many families (Registered) and Children have signed up.
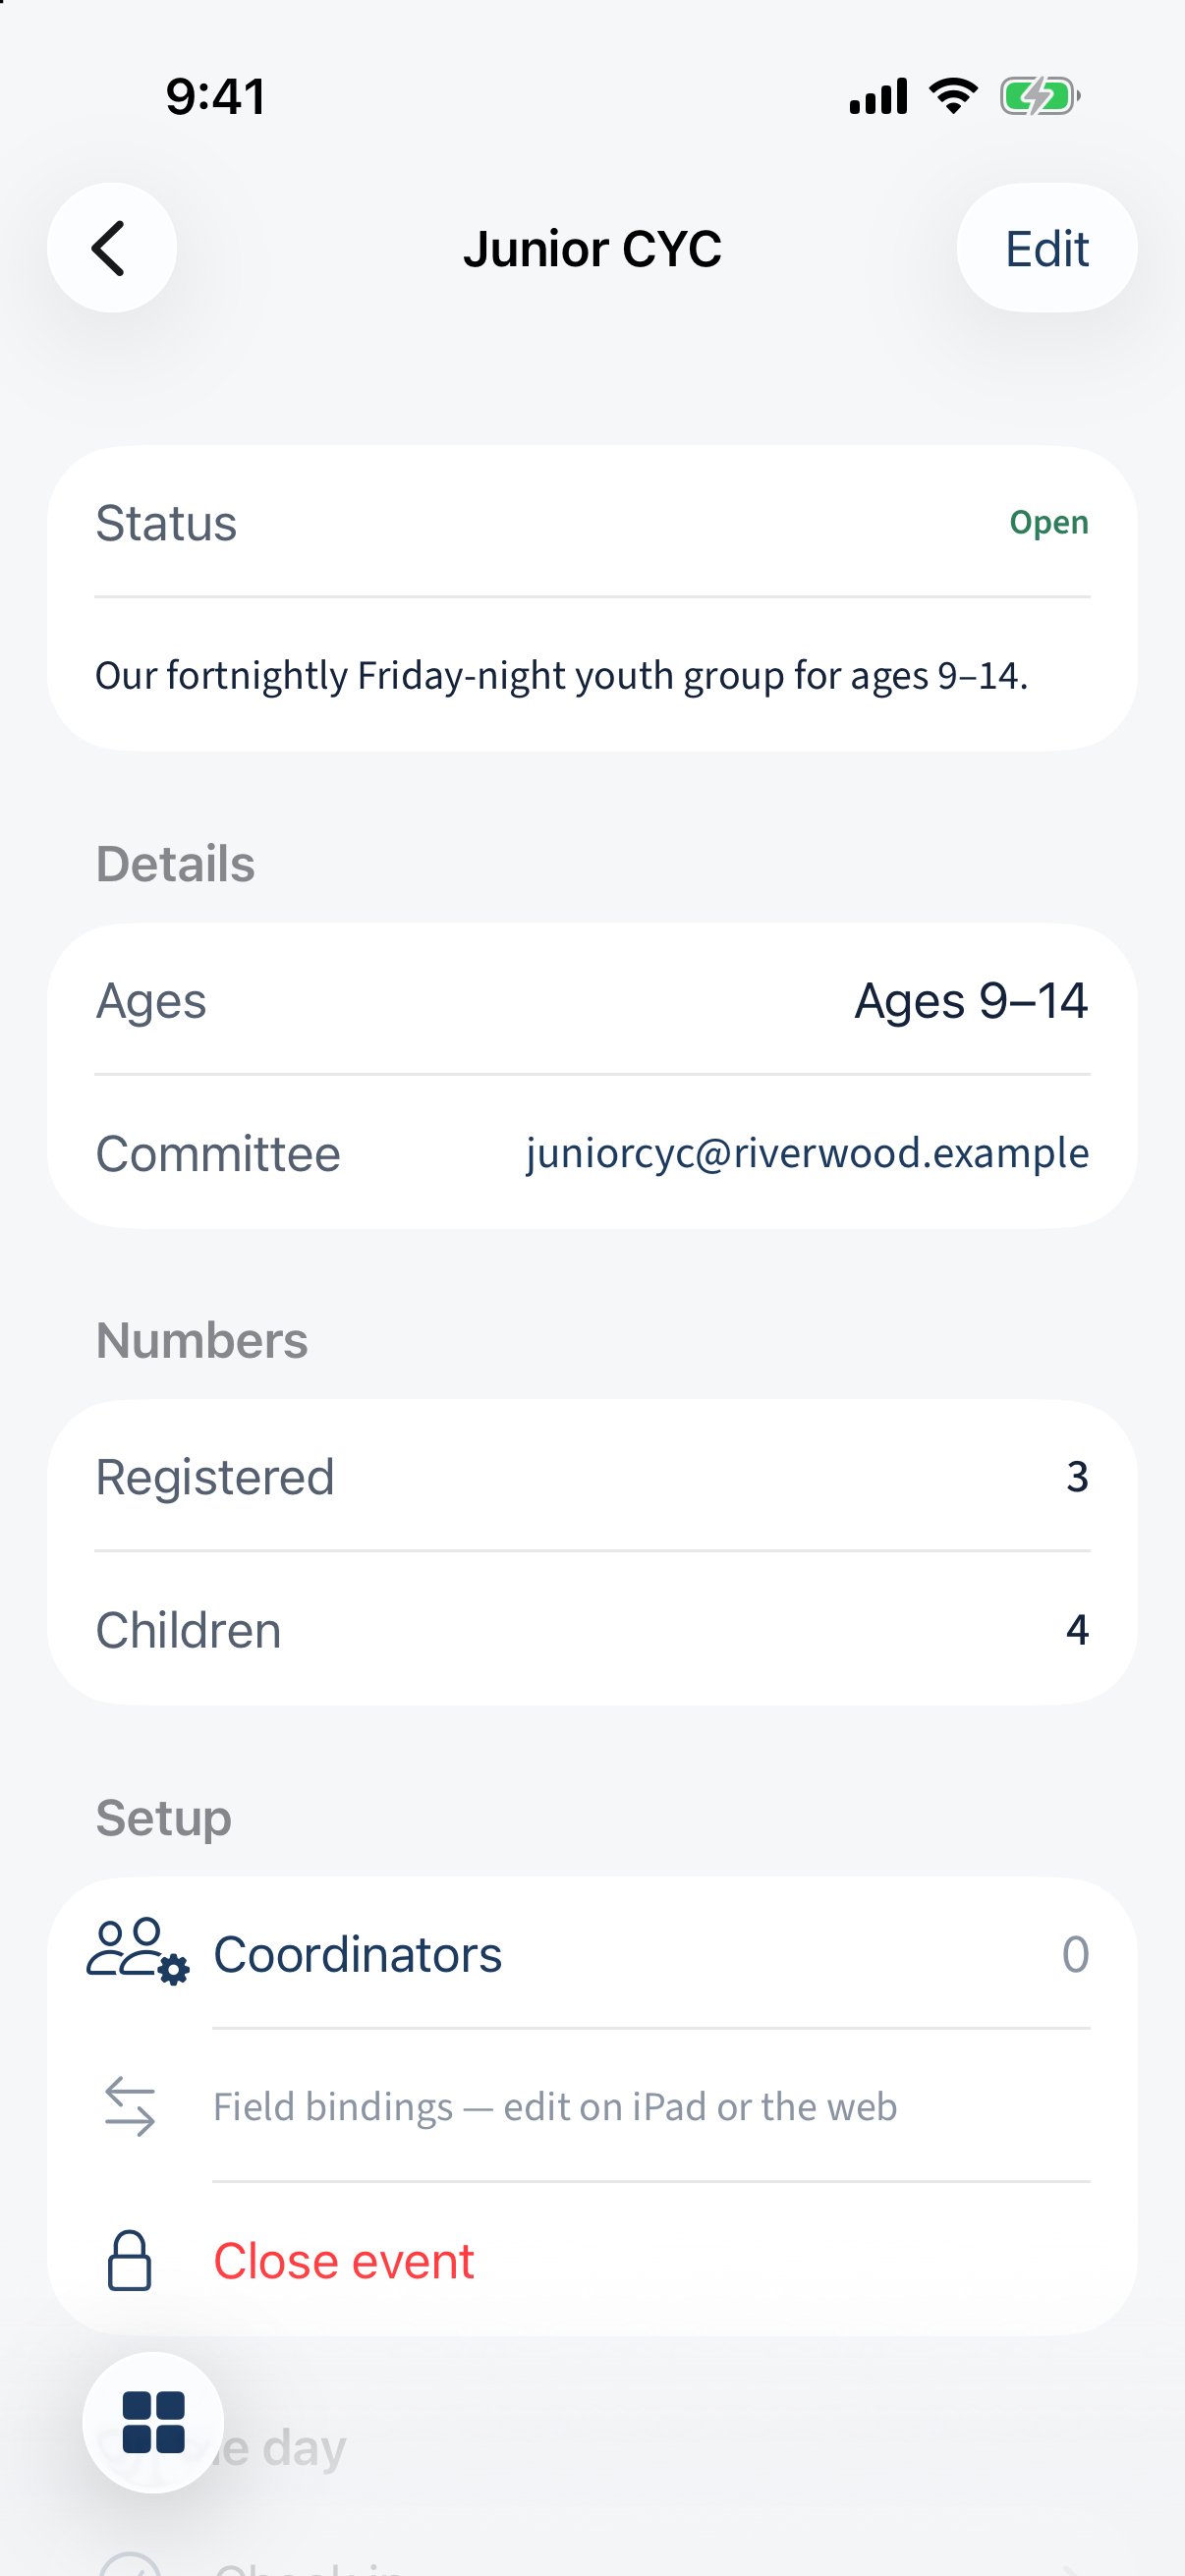
An event: status, age range, committee email, Registered/Children counts, and a Setup section. Under Registrations, each family shows with a badge flagging anything to look at — e.g. Age check when a child is just outside the age range but within the tolerance band. Tap a family for their children, contacts and any safety-check numbers.
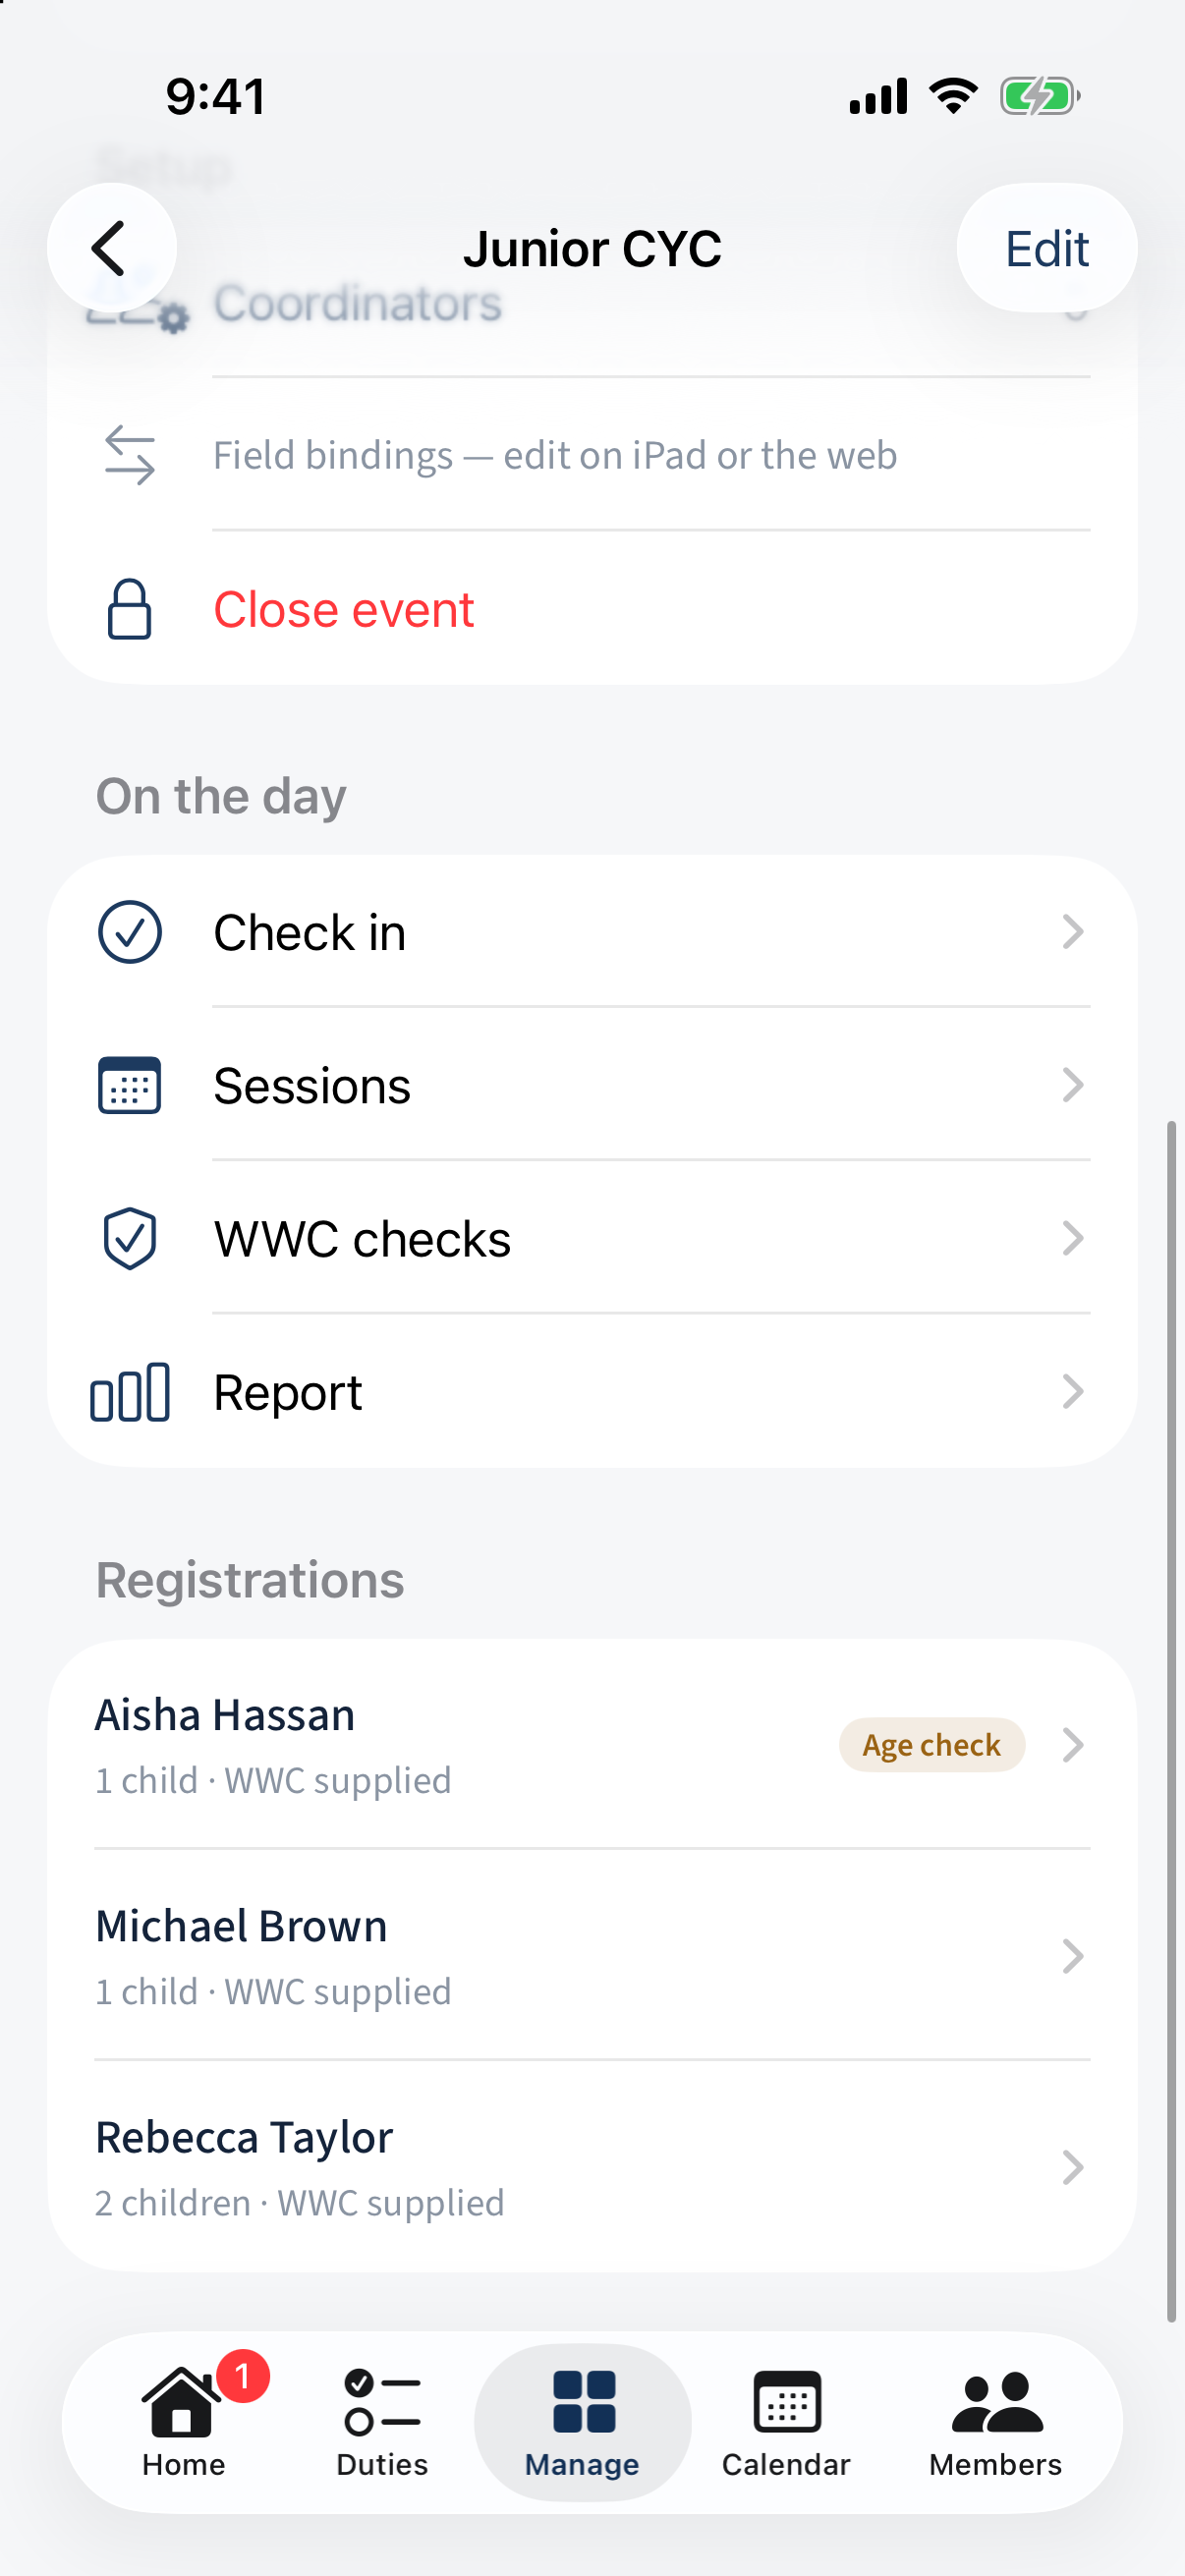
The On the day actions and the registrations list, with an "Age check" badge on one family. When the event is Open, tap Check in, pick the session date, and tap each child to tick them present — the running count shows at the bottom. You can note the adult on site; a child checked in twice is quietly skipped.
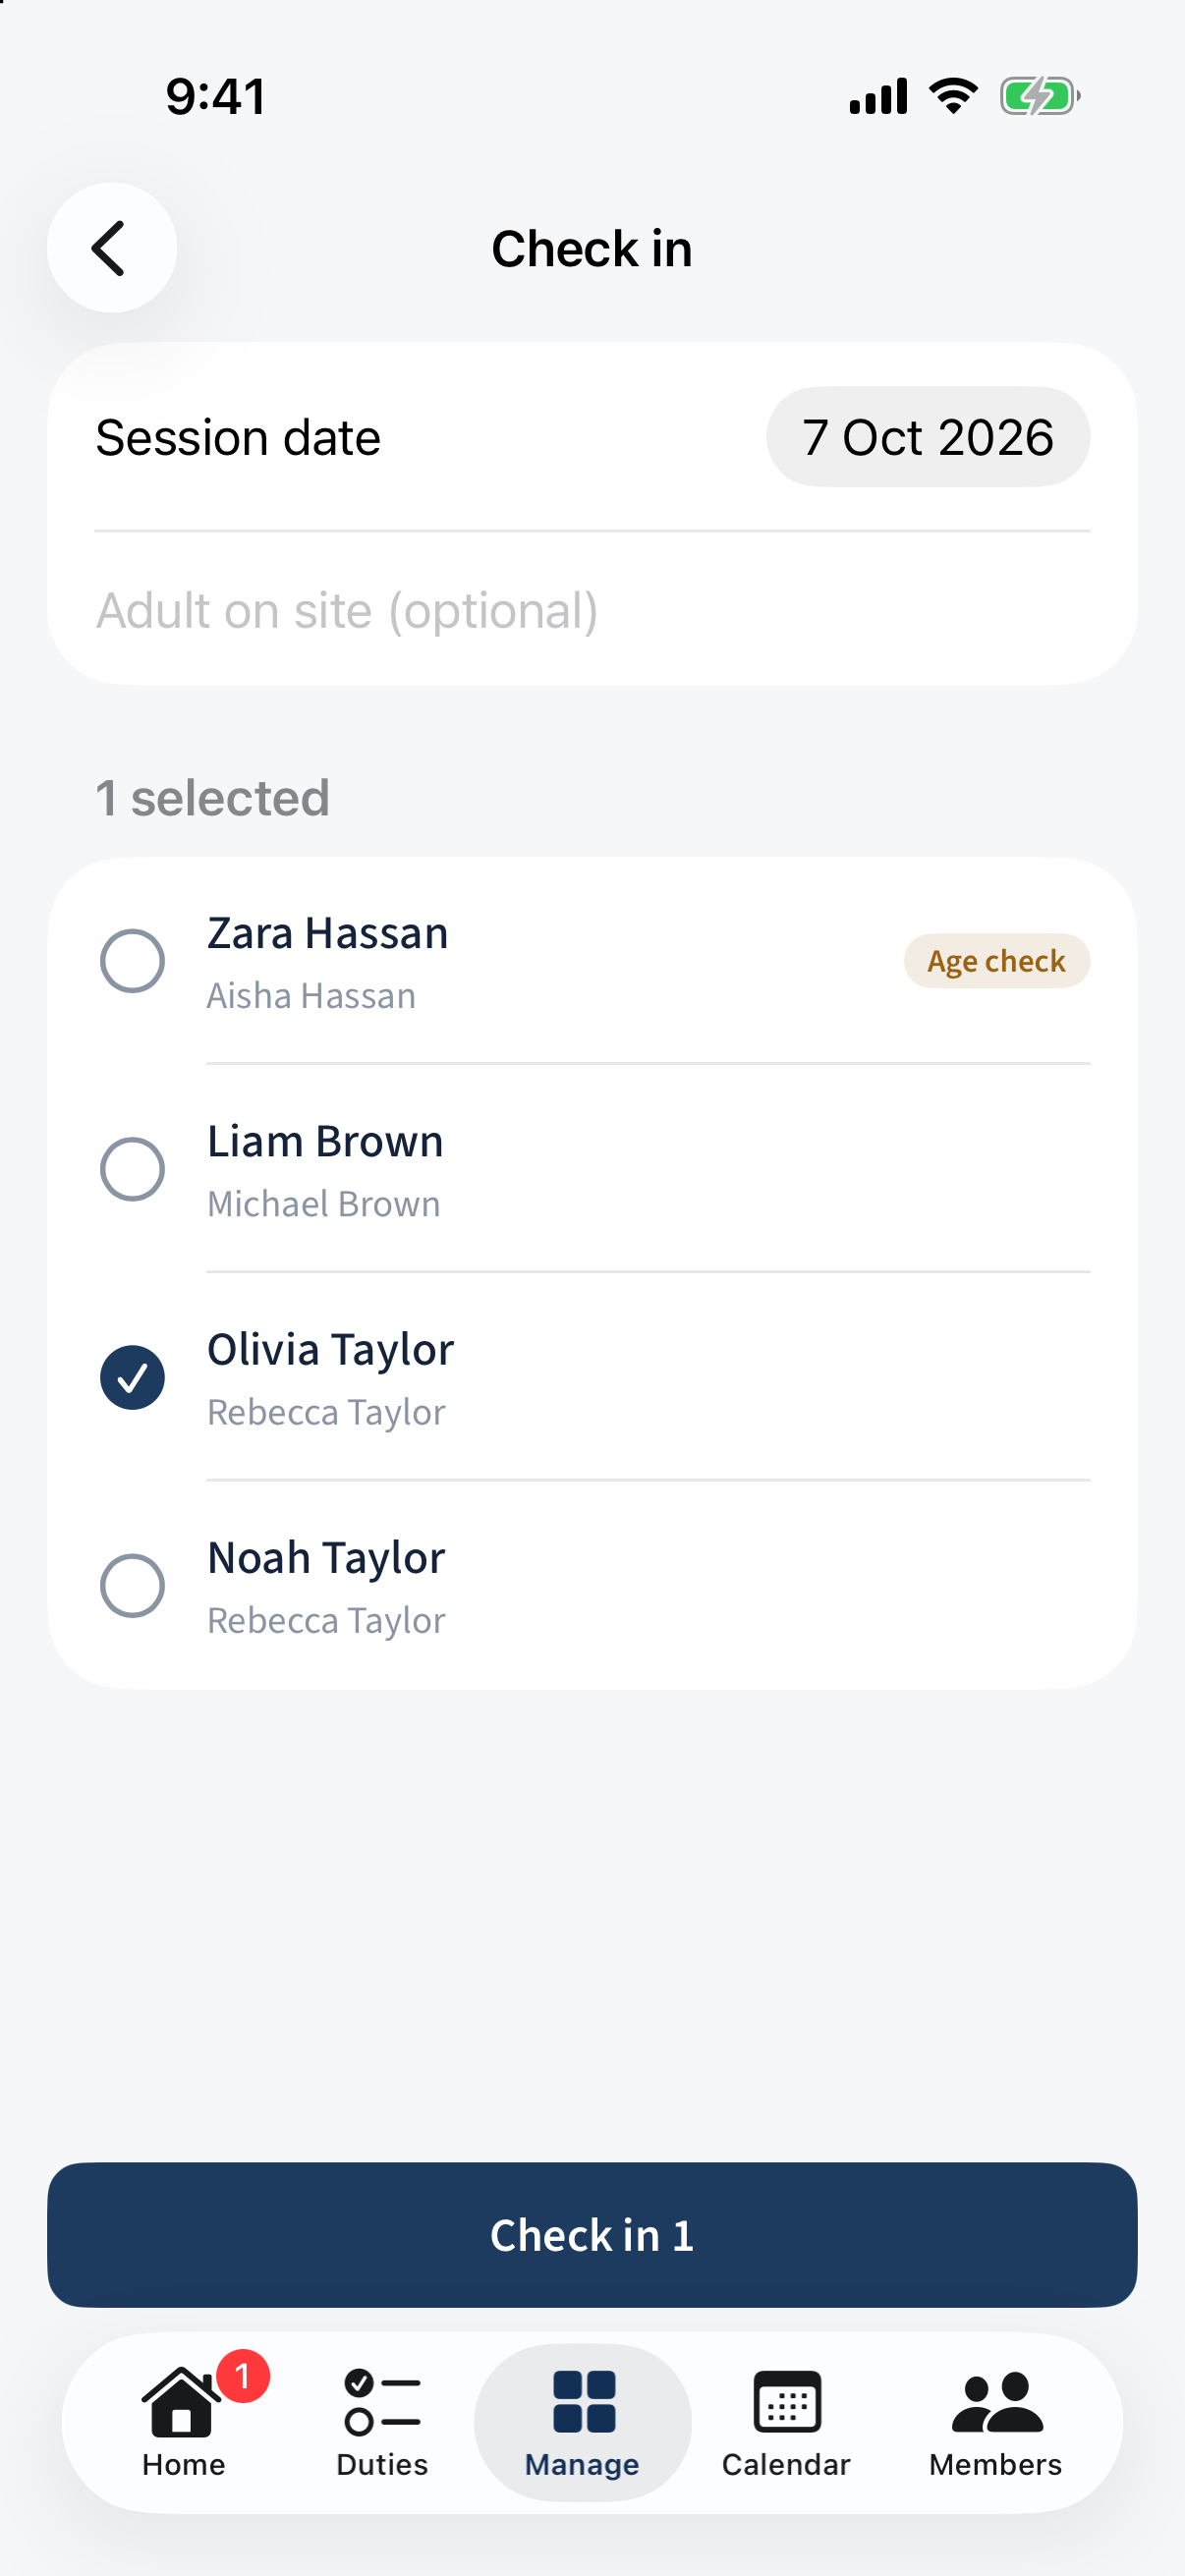
The Check in screen — tap each child to tick them present, with a running "Check in 1" count. Tap WWC checks to verify the guardians’ checks. Each row shows the number, the scheme it was supplied under (e.g. NSW Working With Children Check), the guardian and the expiry. A check whose expiry has passed is badged Expired as entered.
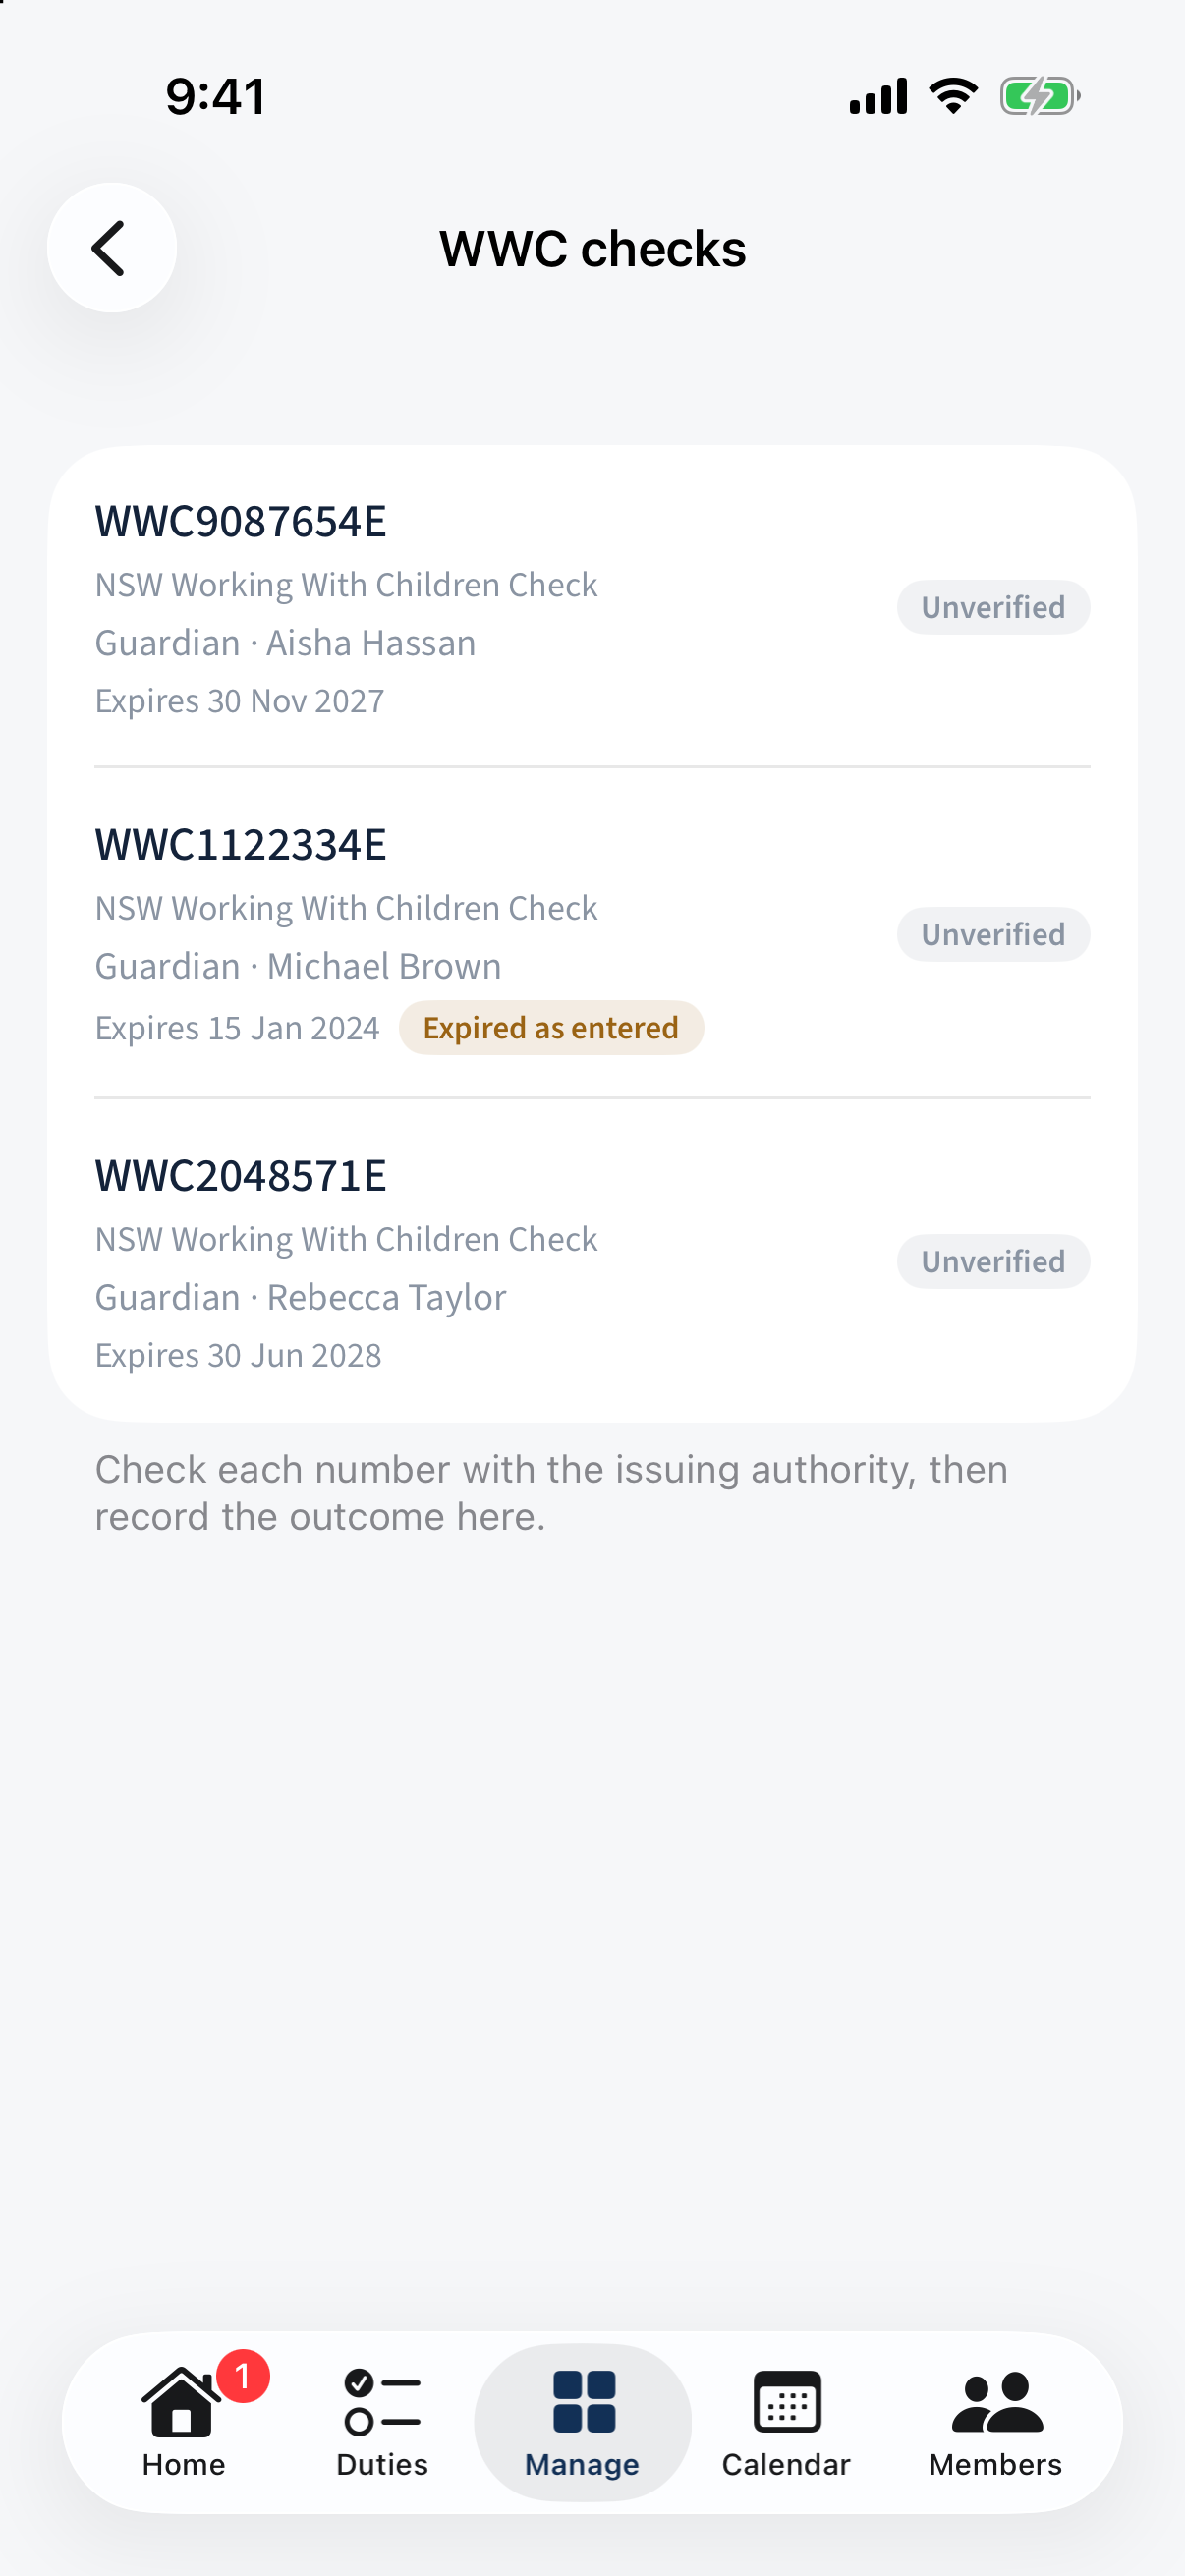
The WWC / safety checks screen — each row with the number, scheme label, guardian and expiry, with an "Expired as entered" badge. Tap a check, confirm it with the issuing authority, and record the outcome — Verified, Not valid or Expired — with an optional note.
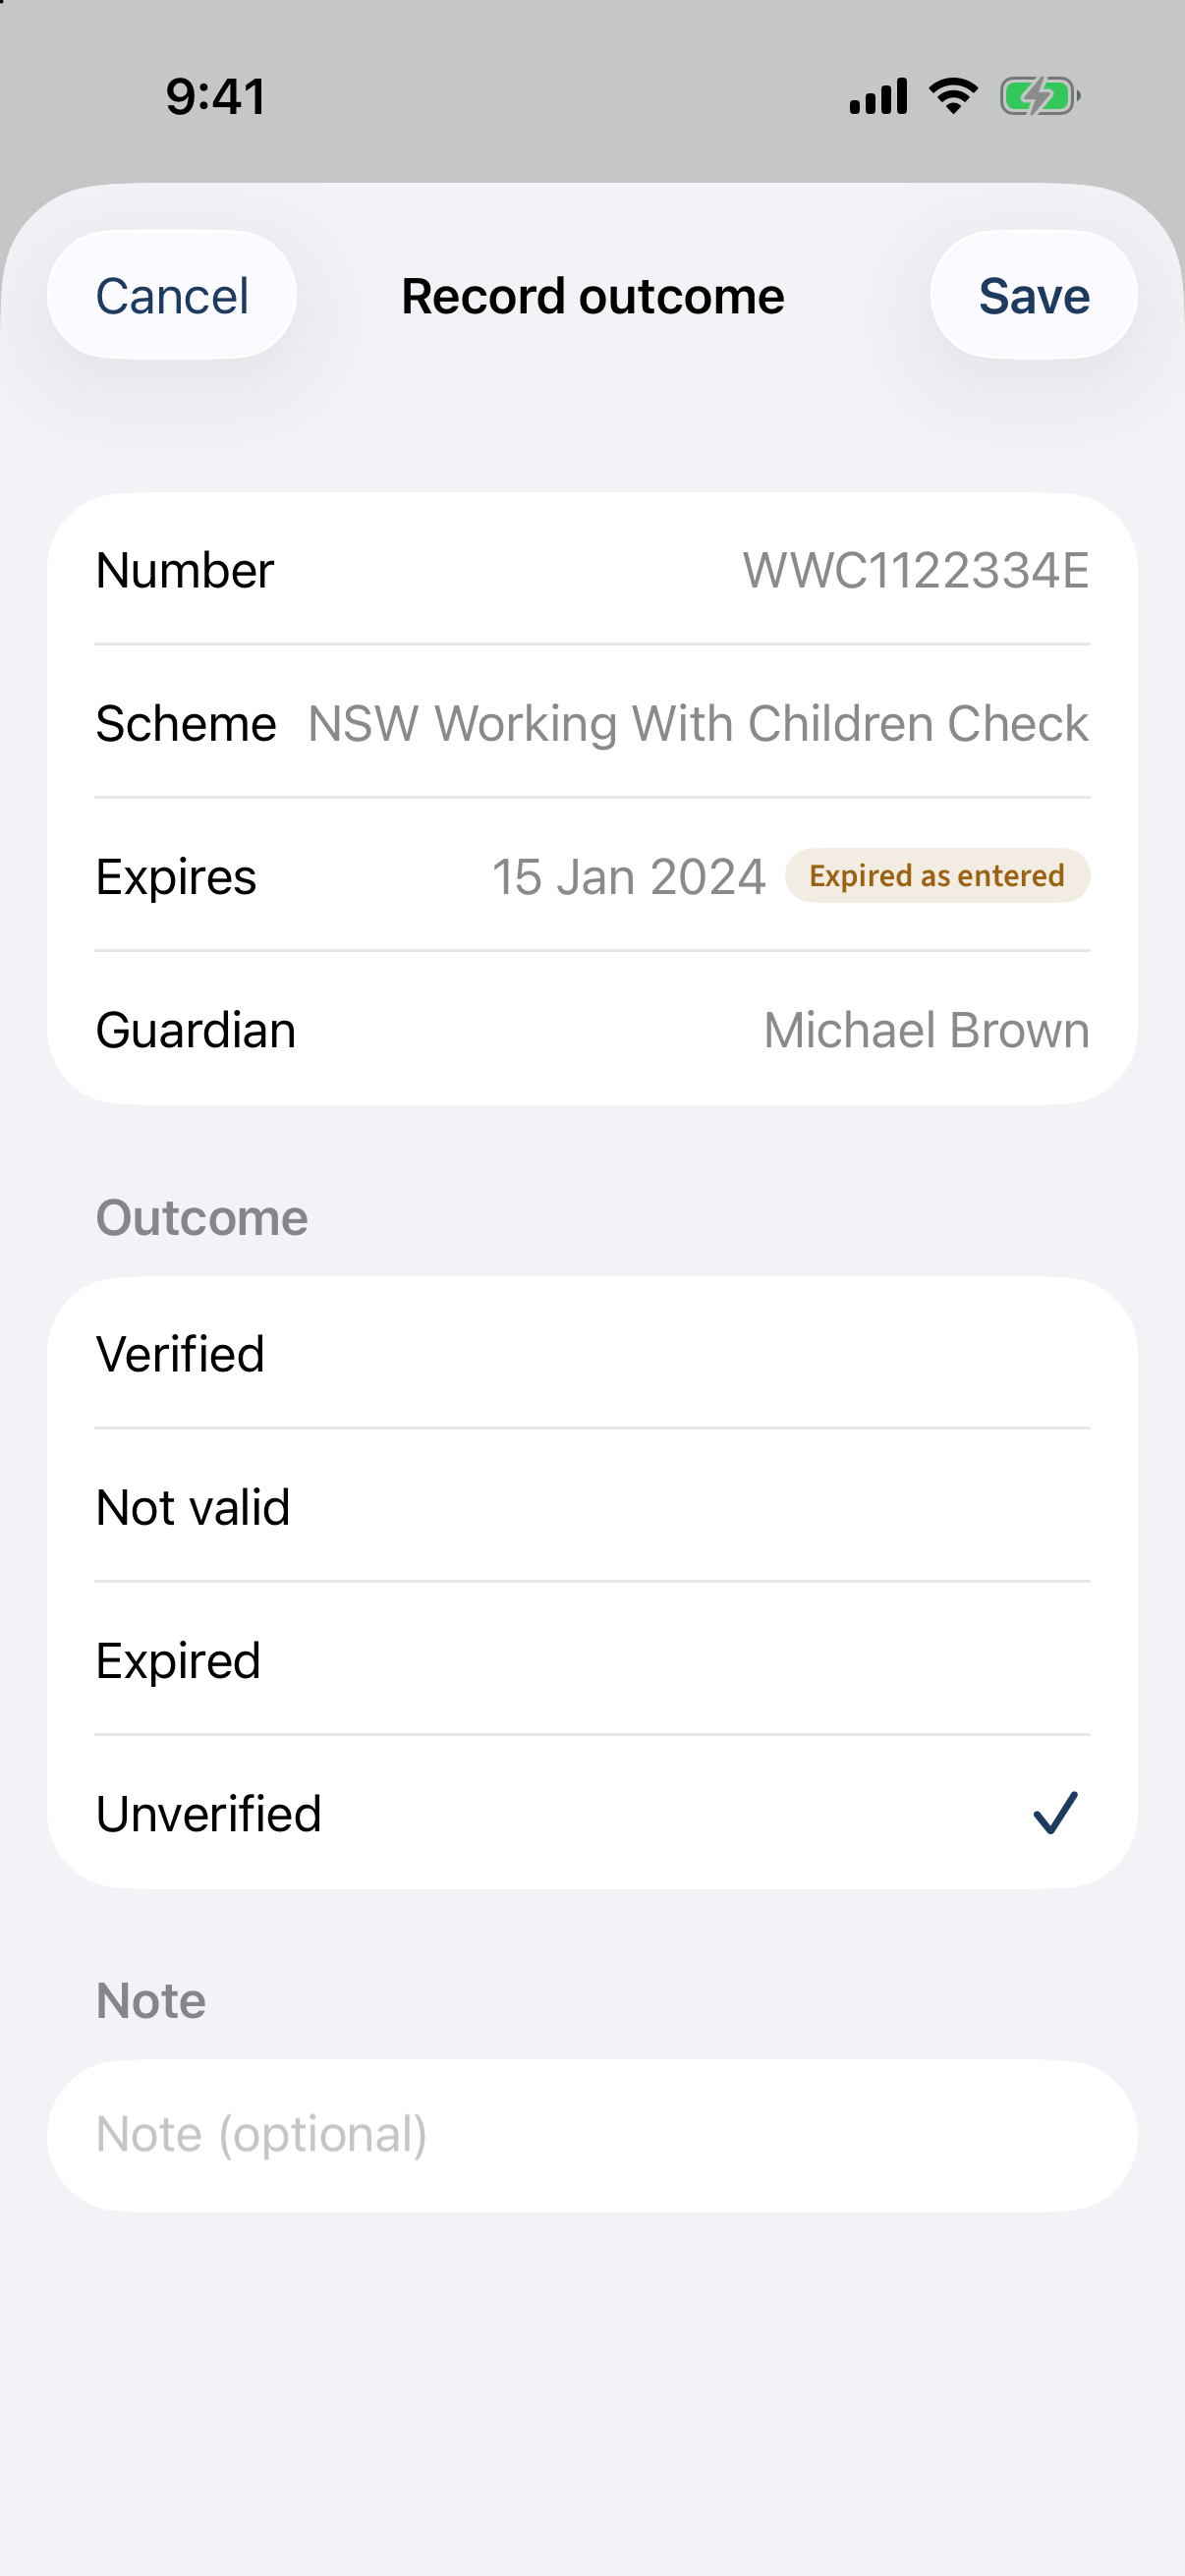
The Record outcome sheet for one check — scheme, expiry, and Verified / Not valid / Expired options. Sessions lists each night the event runs; you can add one by hand, and a schedule can generate them for you.
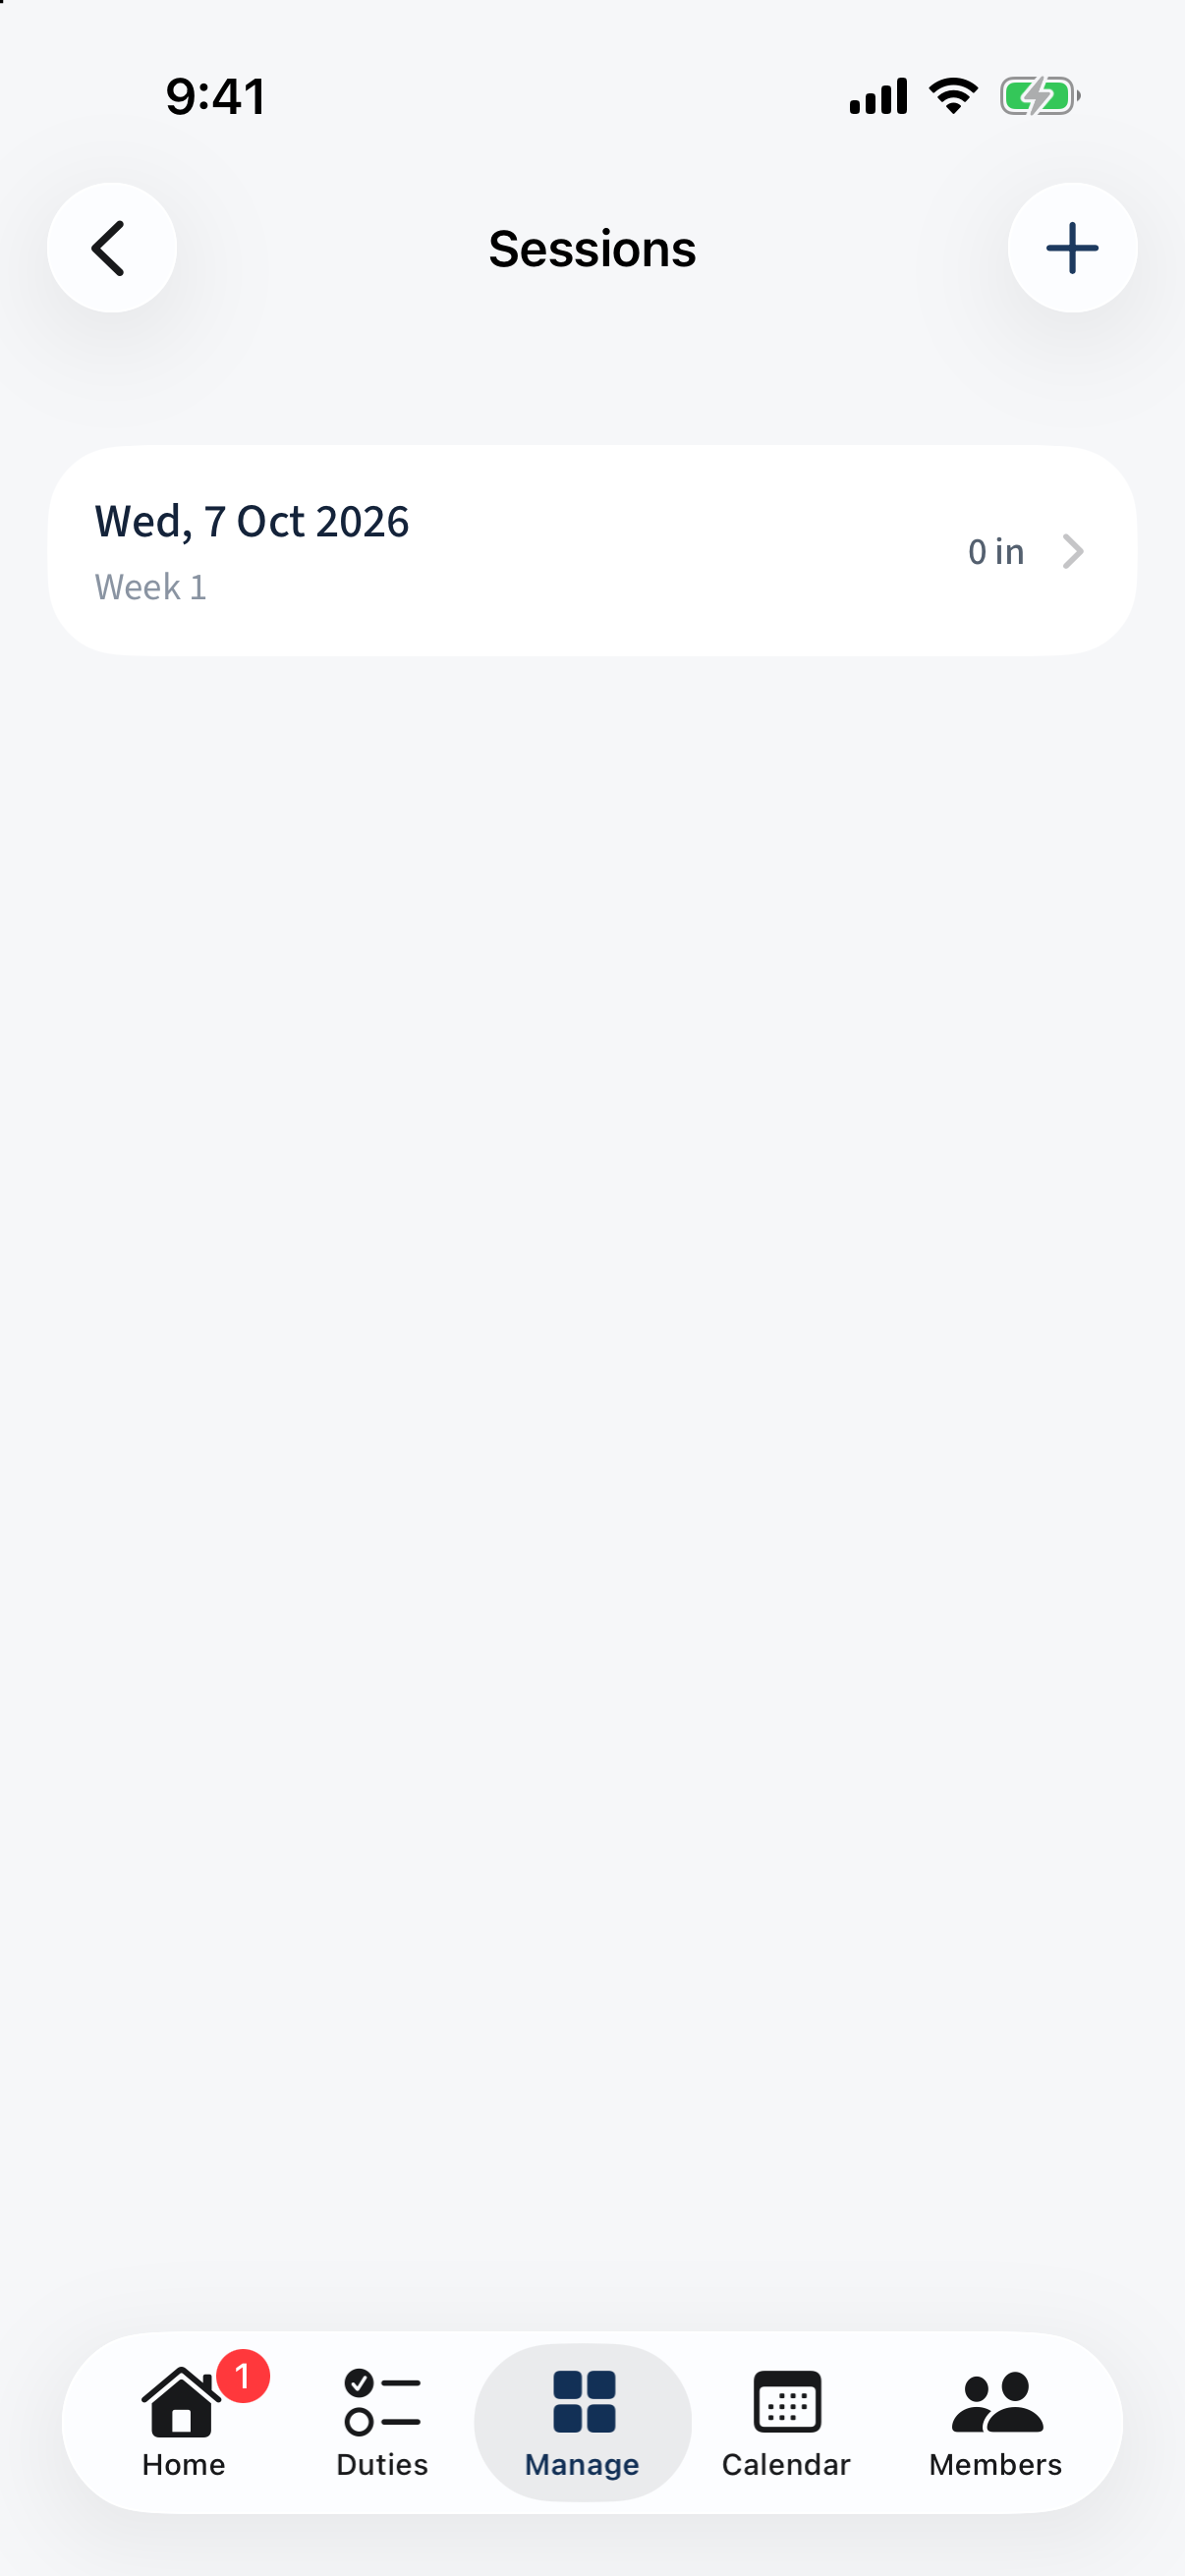
The Sessions list — a dated session with a label. Report rolls up the totals and a per-session breakdown — who’s registered, average turnout, and how many have never attended.
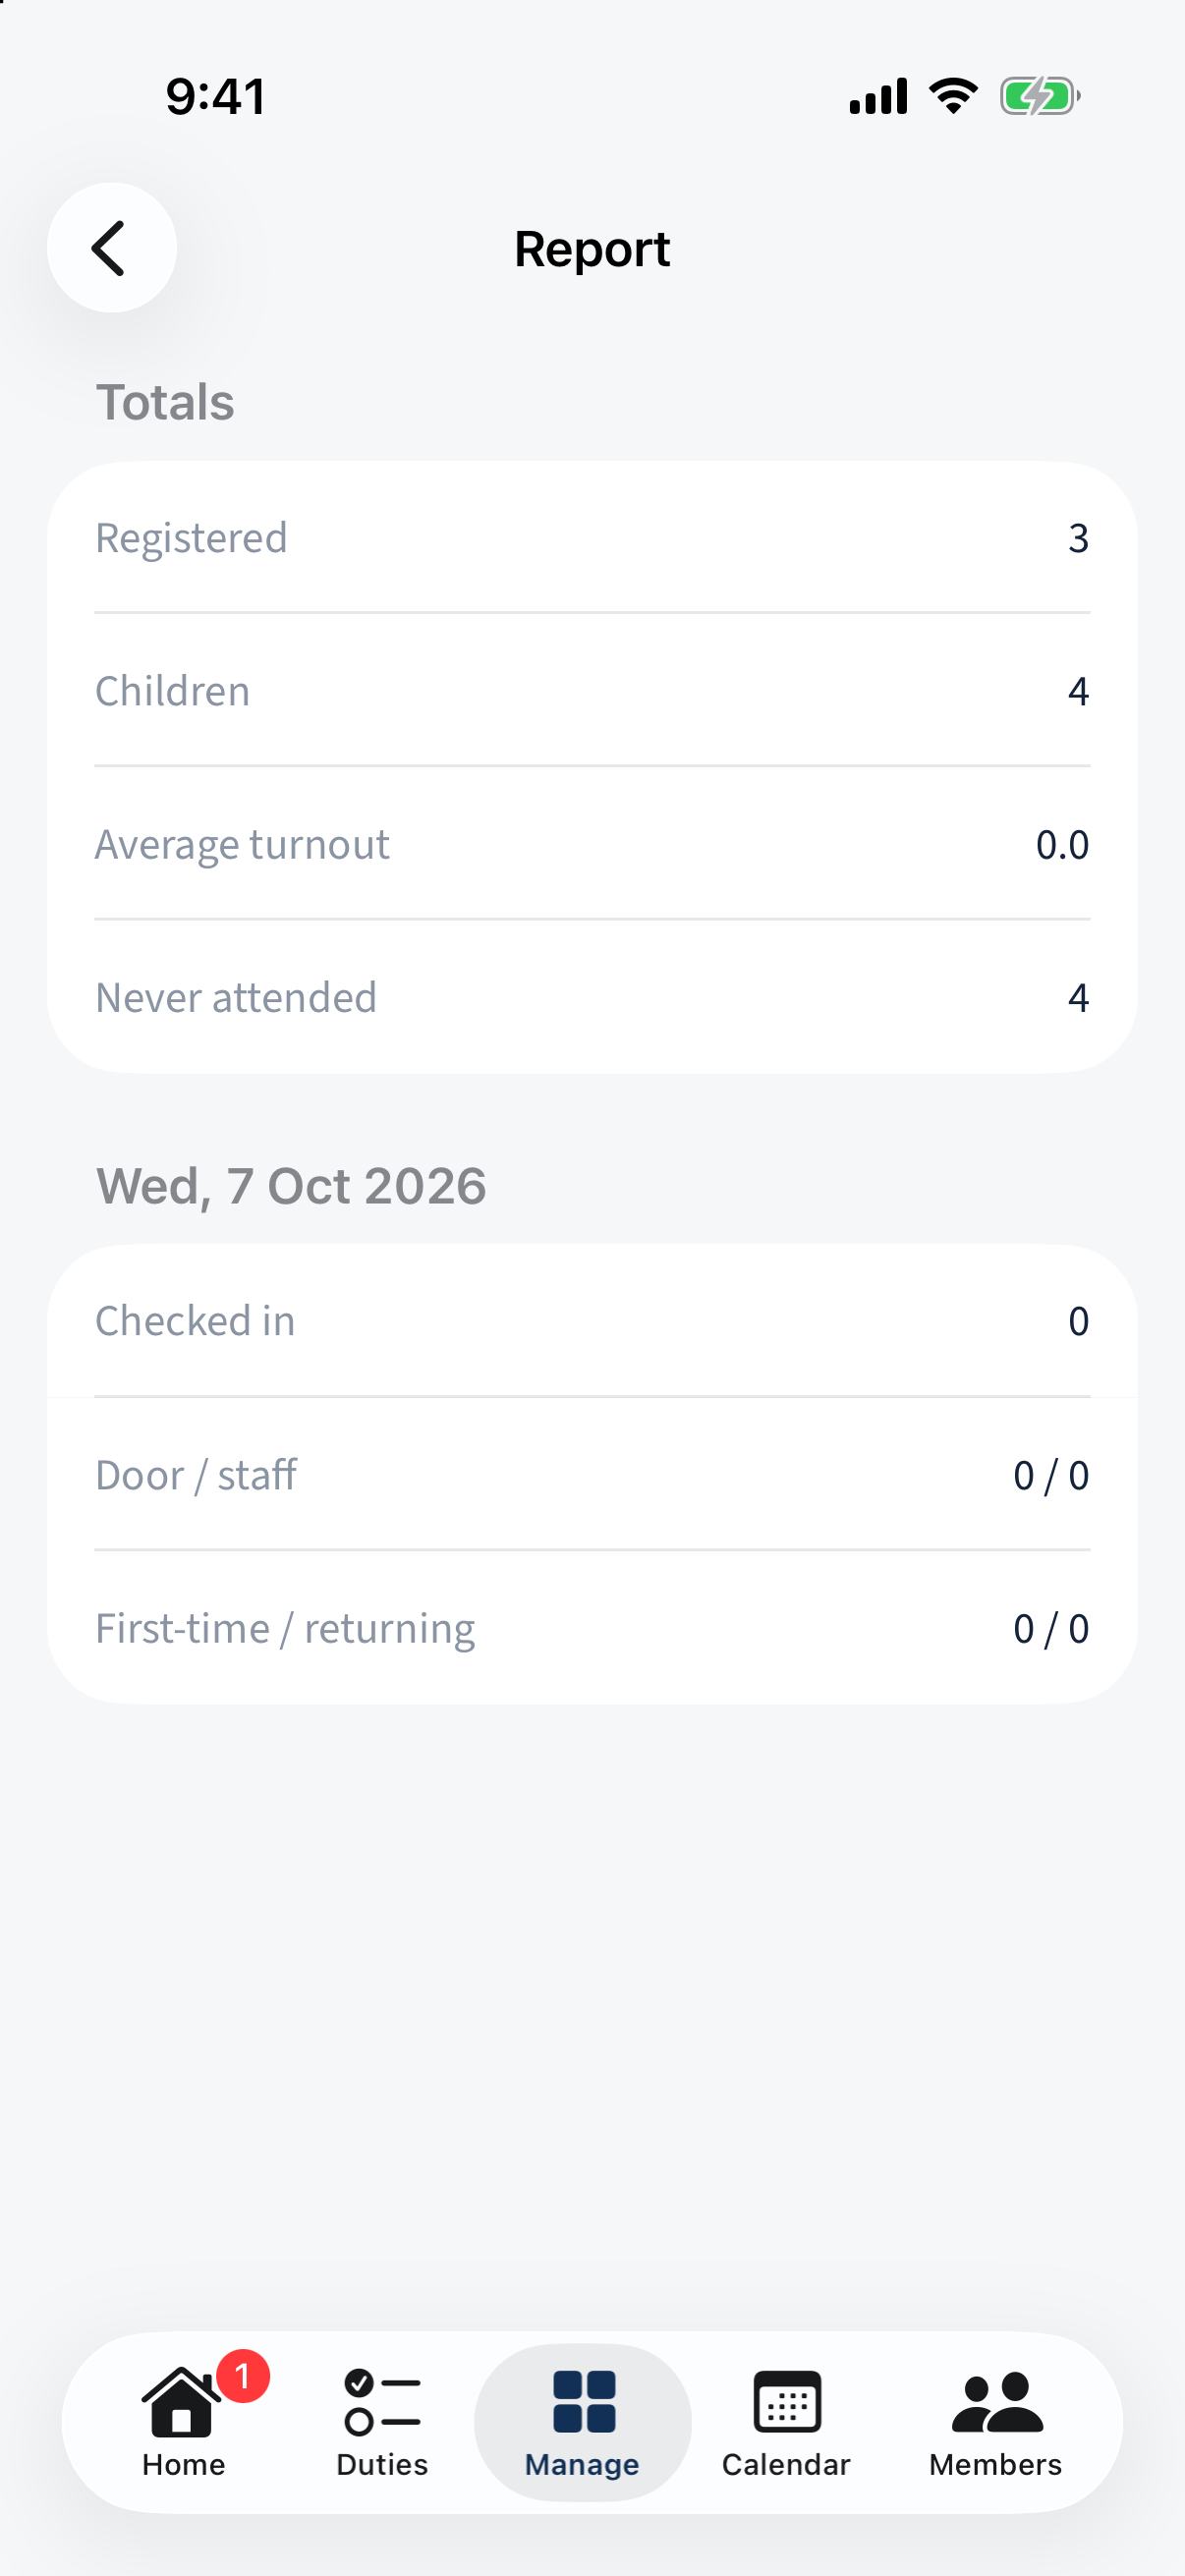
The Report — totals and a per-session breakdown. Administrators tap + on the events list to Start from a template (the quickest — it creates the registration and check-in forms for you) or build a New blank event.
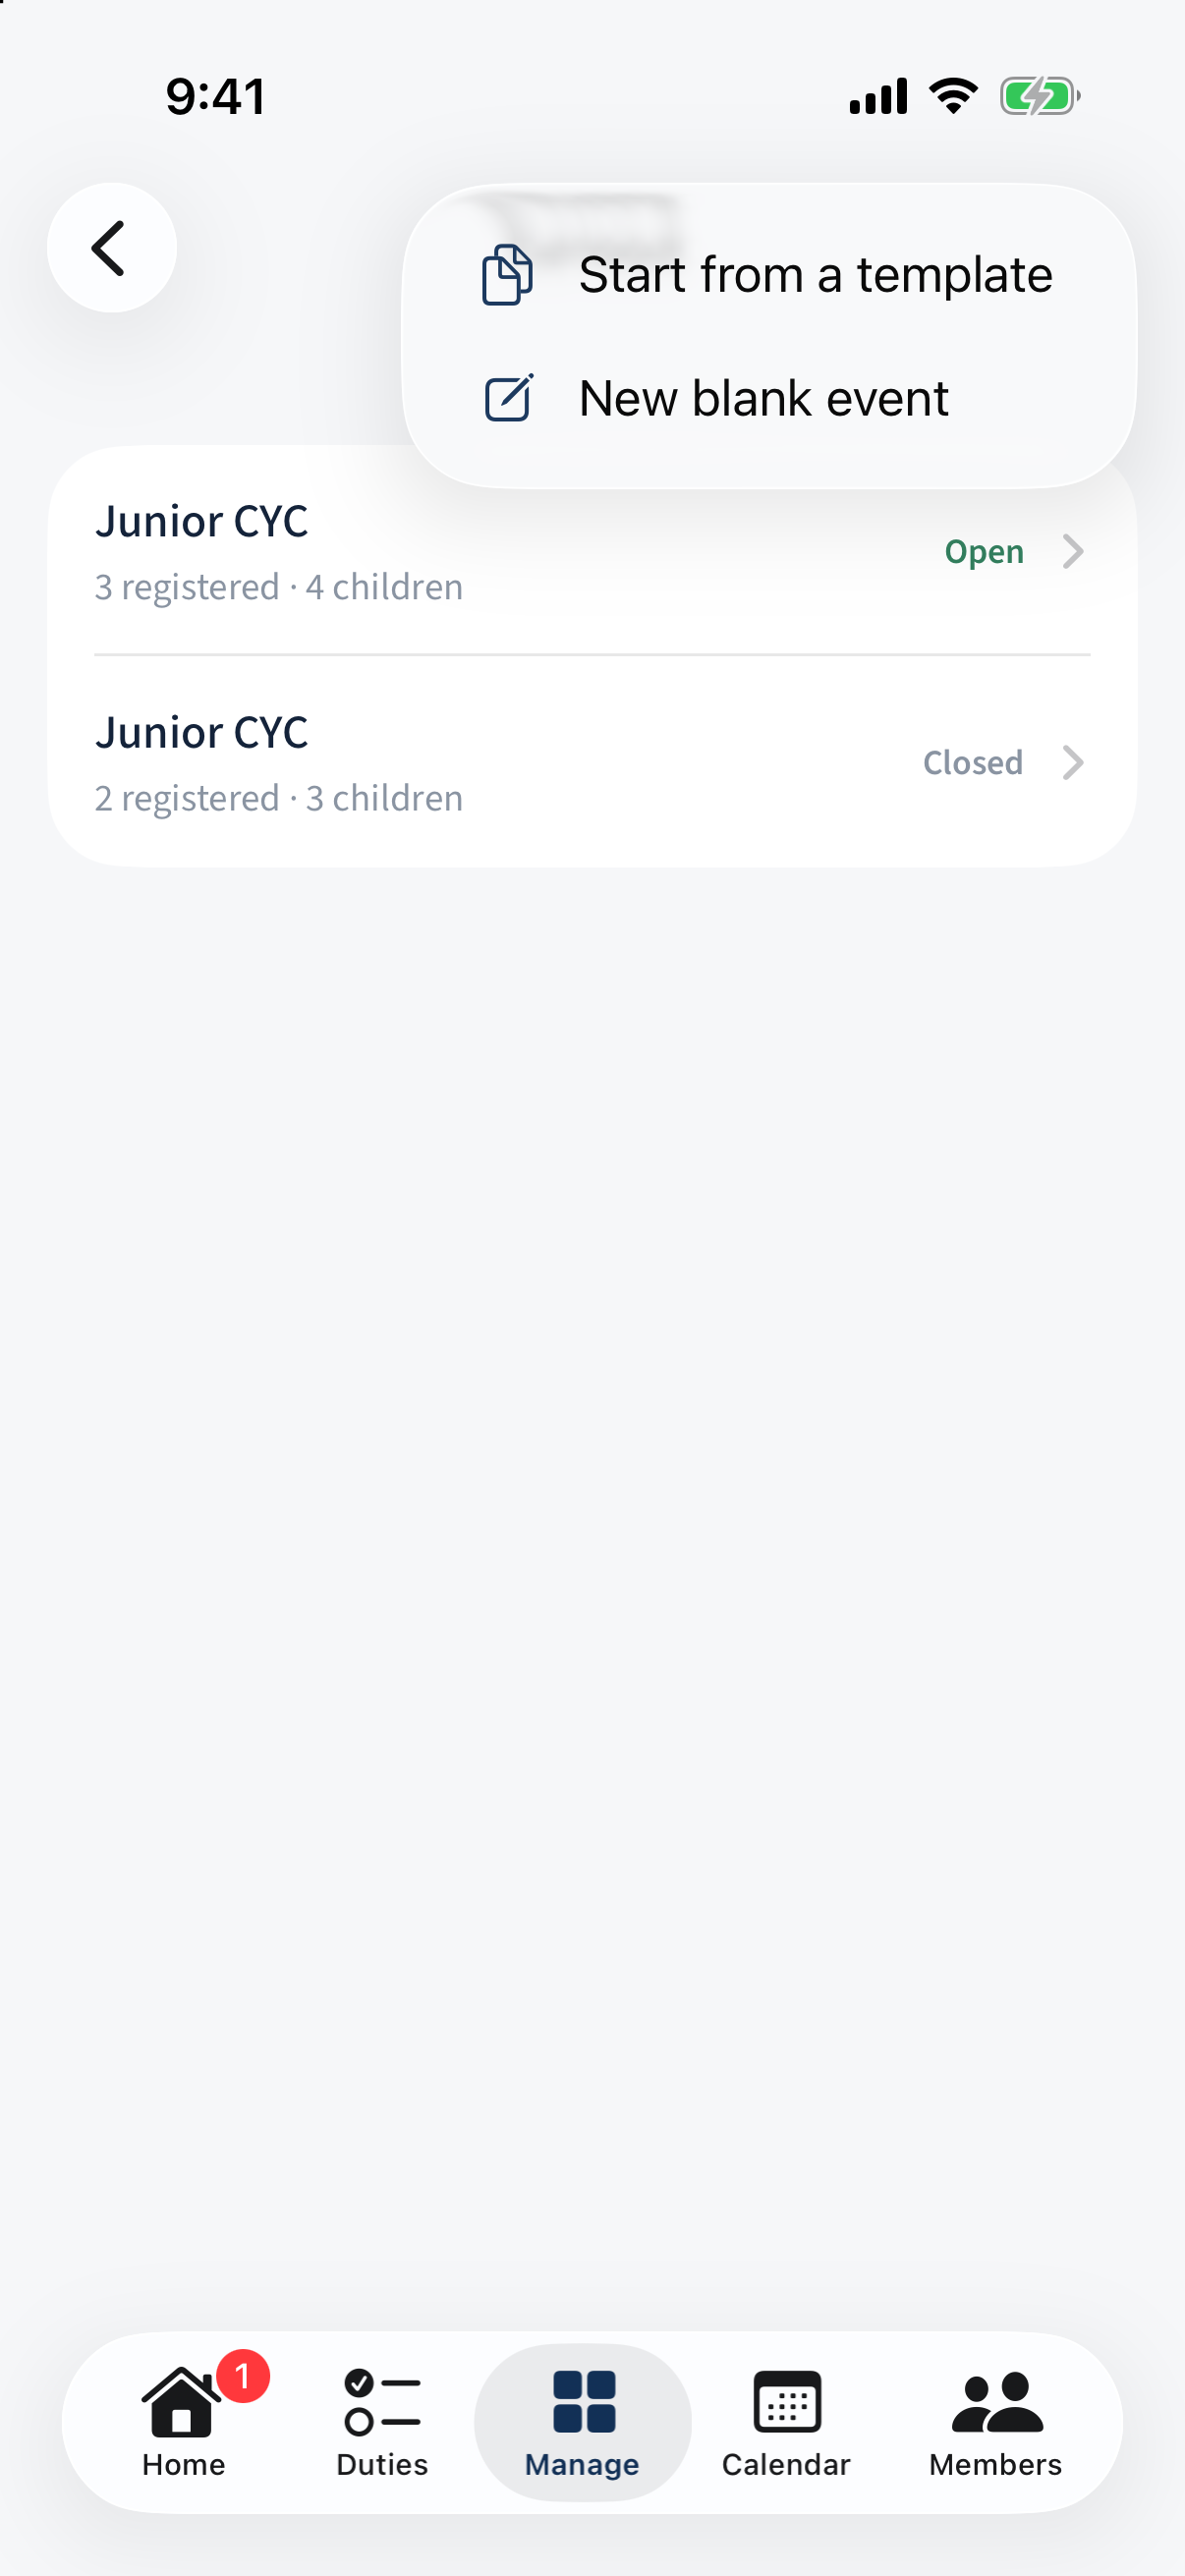
The admin "+" menu — Start from a template / New blank event. On the form, name the event, choose its registration and check-in forms, optionally limit by age, add the committee email, and set a recurring schedule if you want. Back on the event, the Setup section adds coordinators, auto-binds the forms, and Opens the event once it’s ready.
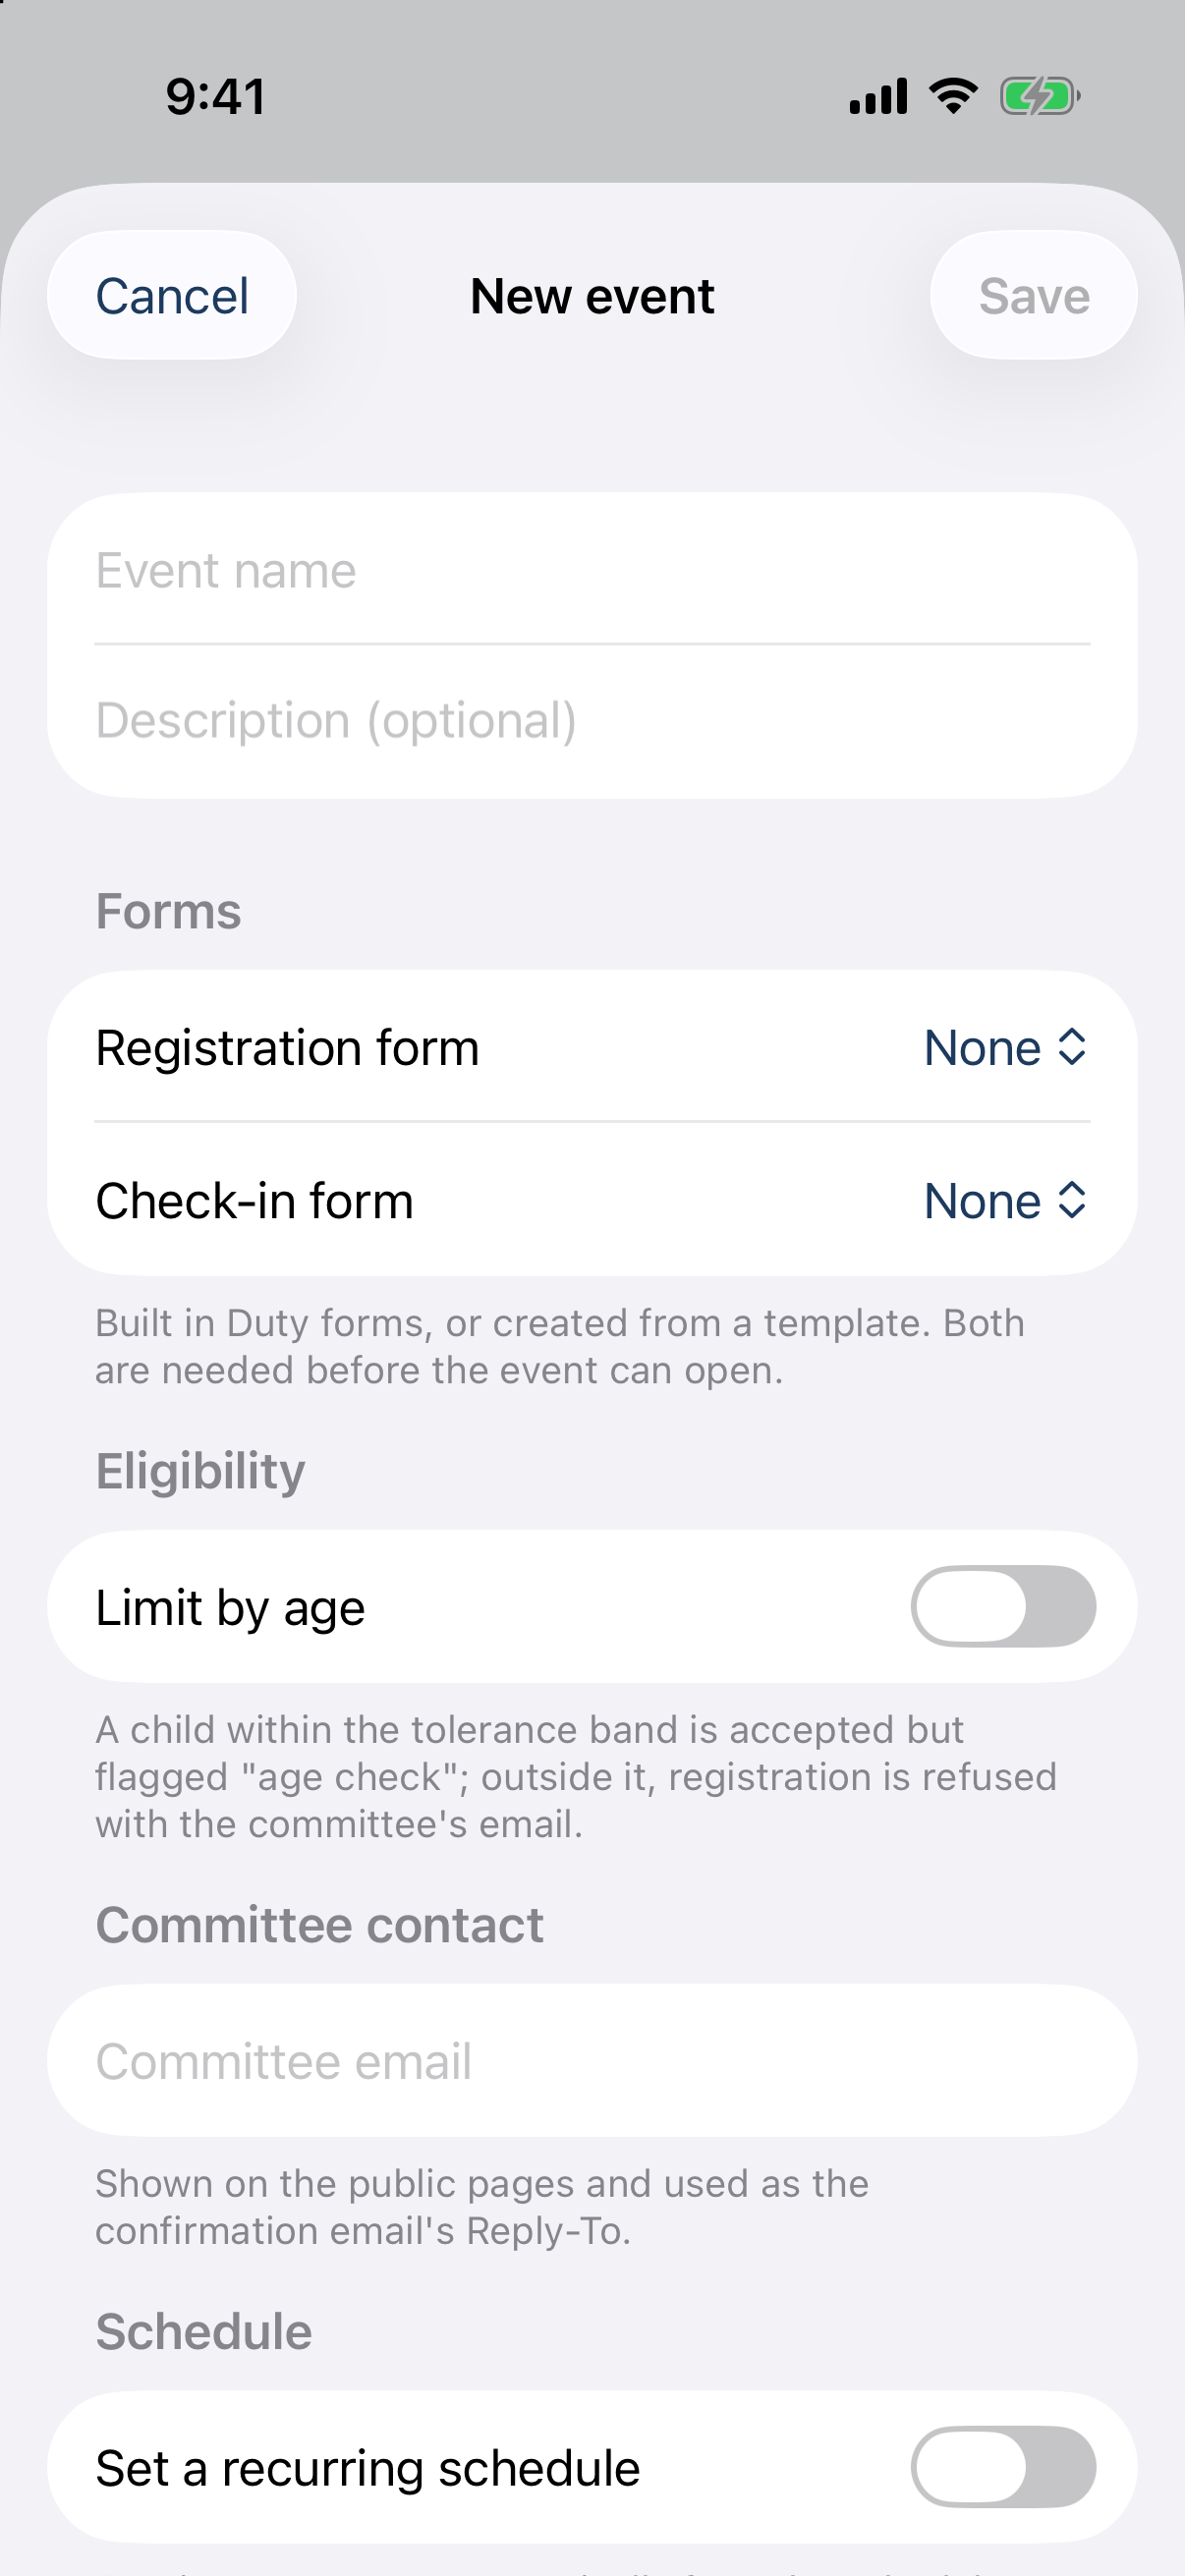
The New event form — registration and check-in form pickers, age limit, committee email, recurring schedule.
Different on the app: Where a check’s scheme isn’t known the app says “Safety check” / “Working With Children check” rather than the NSW-specific “WWCC”; the scheme label comes from your tenant’s credential catalogue, so a Victorian tenant sees “Victorian Working with Children Check”. Viewing, check-in, WWC checks and the report are for an event’s coordinators (or an admin); creating, editing, opening/closing and the schedule are administrator.
On the web only: The detailed field bindings (mapping form questions to Turnout) are edited on iPad or the web — the iPhone shows a note where they’d go. The poster PDF & QR codes, the report’s attendance cross-tab and XLSX export, and anonymising or deleting an event are web-only.