Initial setup: the new-ecclesia checklist
Setting up an ecclesia touches a lot of places — roles, scheduling groups, term dates, recurring events, your member list, invitations, roster cycles. Initial setup gathers all of it into one checklist that keeps its own score: each step opens the real page, and ticks itself off once the work is done.
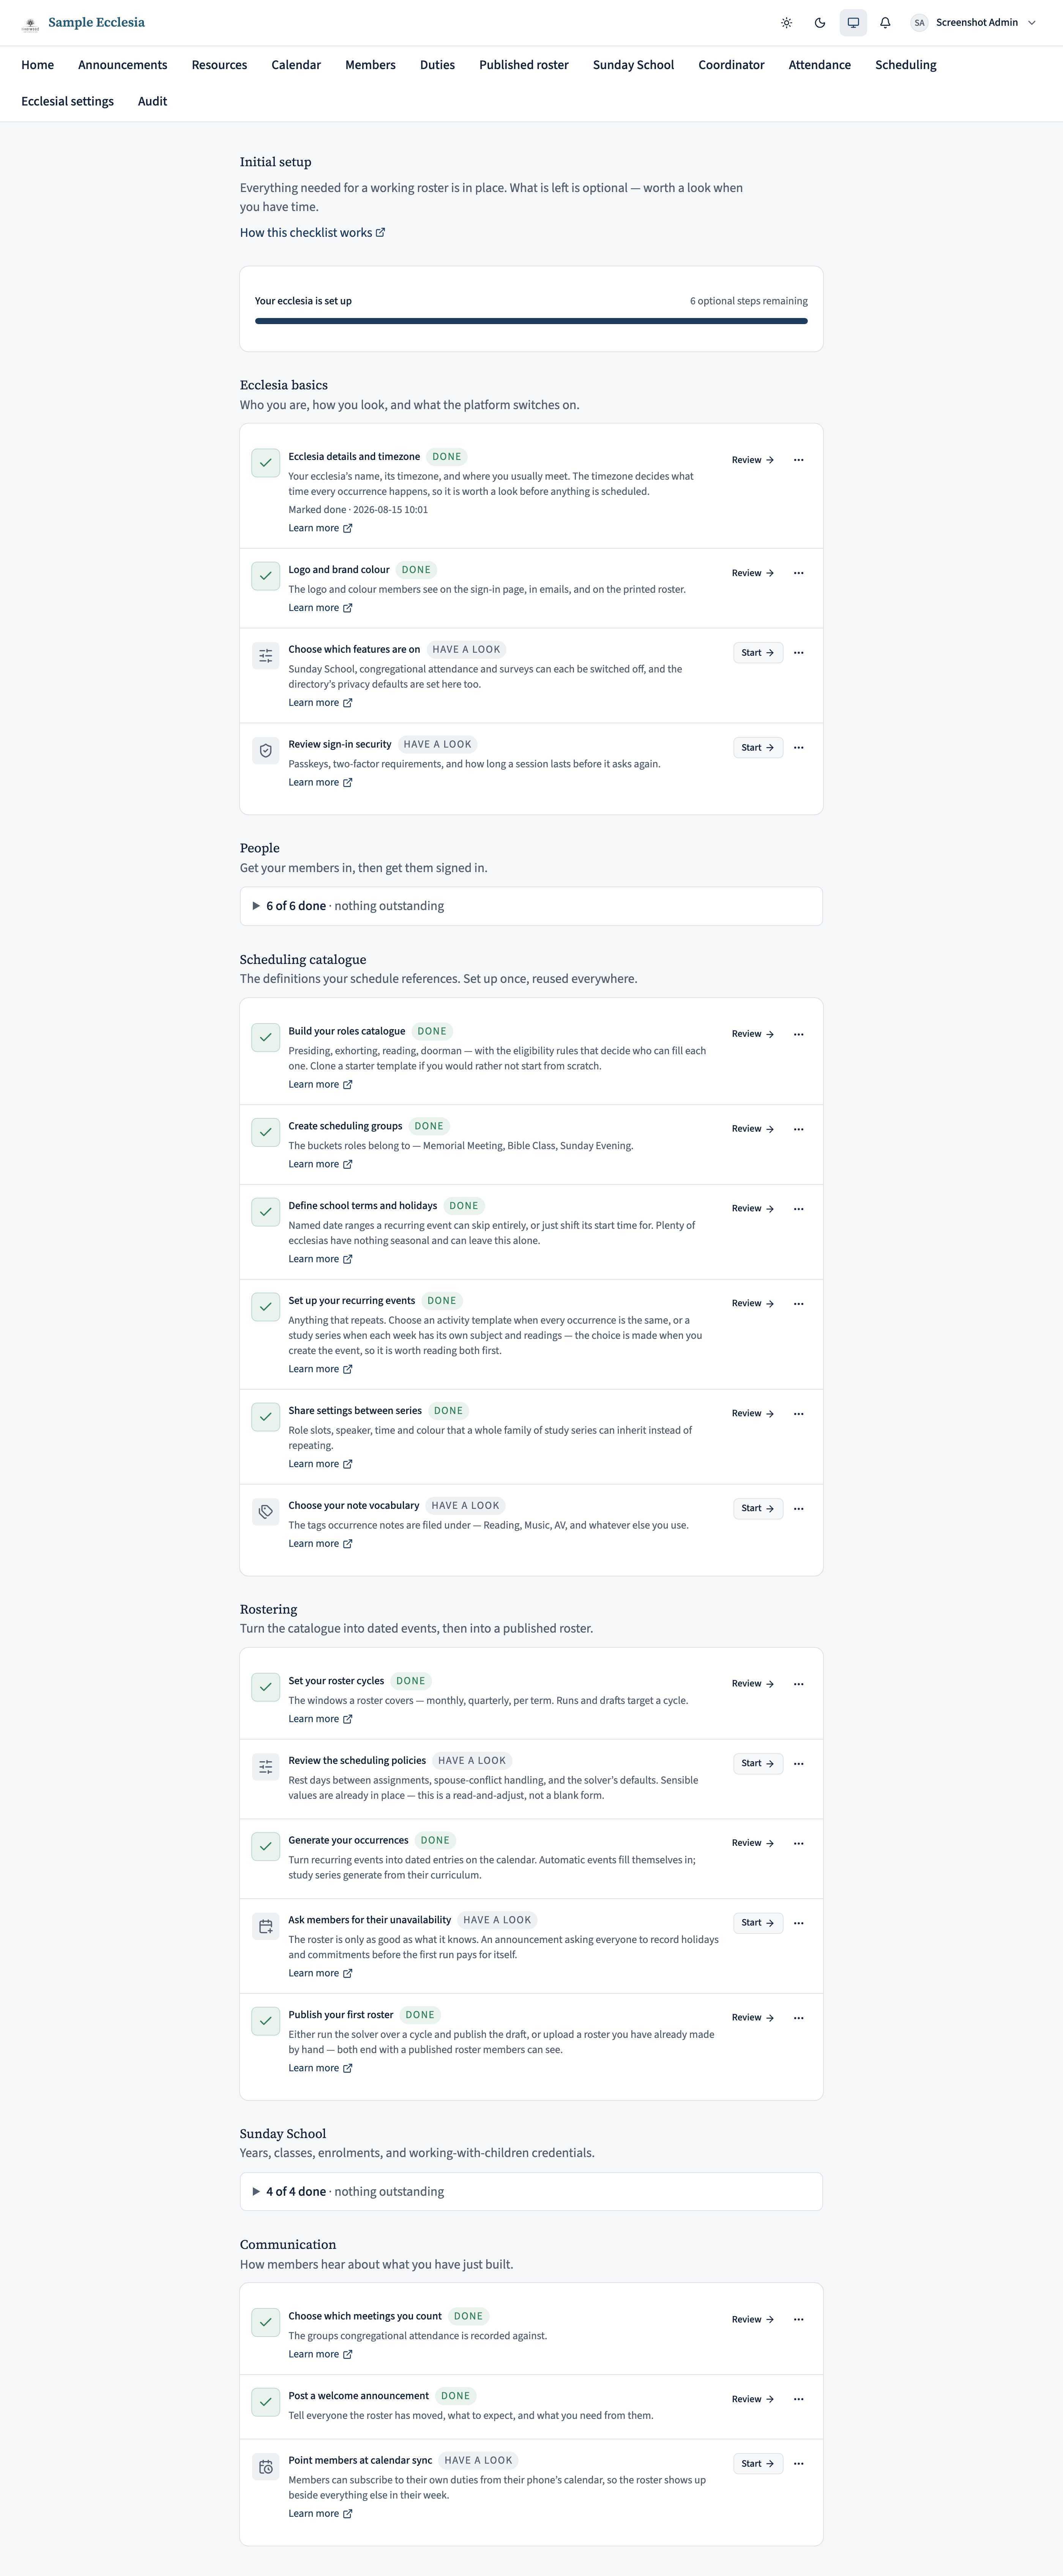
You will find it at Manage → Initial setup, and — while there is still required work outstanding — from a card on your home page. Once your ecclesia is set up the home card retires itself; the checklist lives on under Manage → Initial setup.
Only administrators see it. Nothing on the checklist gates anything — you can use every part of CDRoster without finishing it, and you can work through the steps in any order you like.
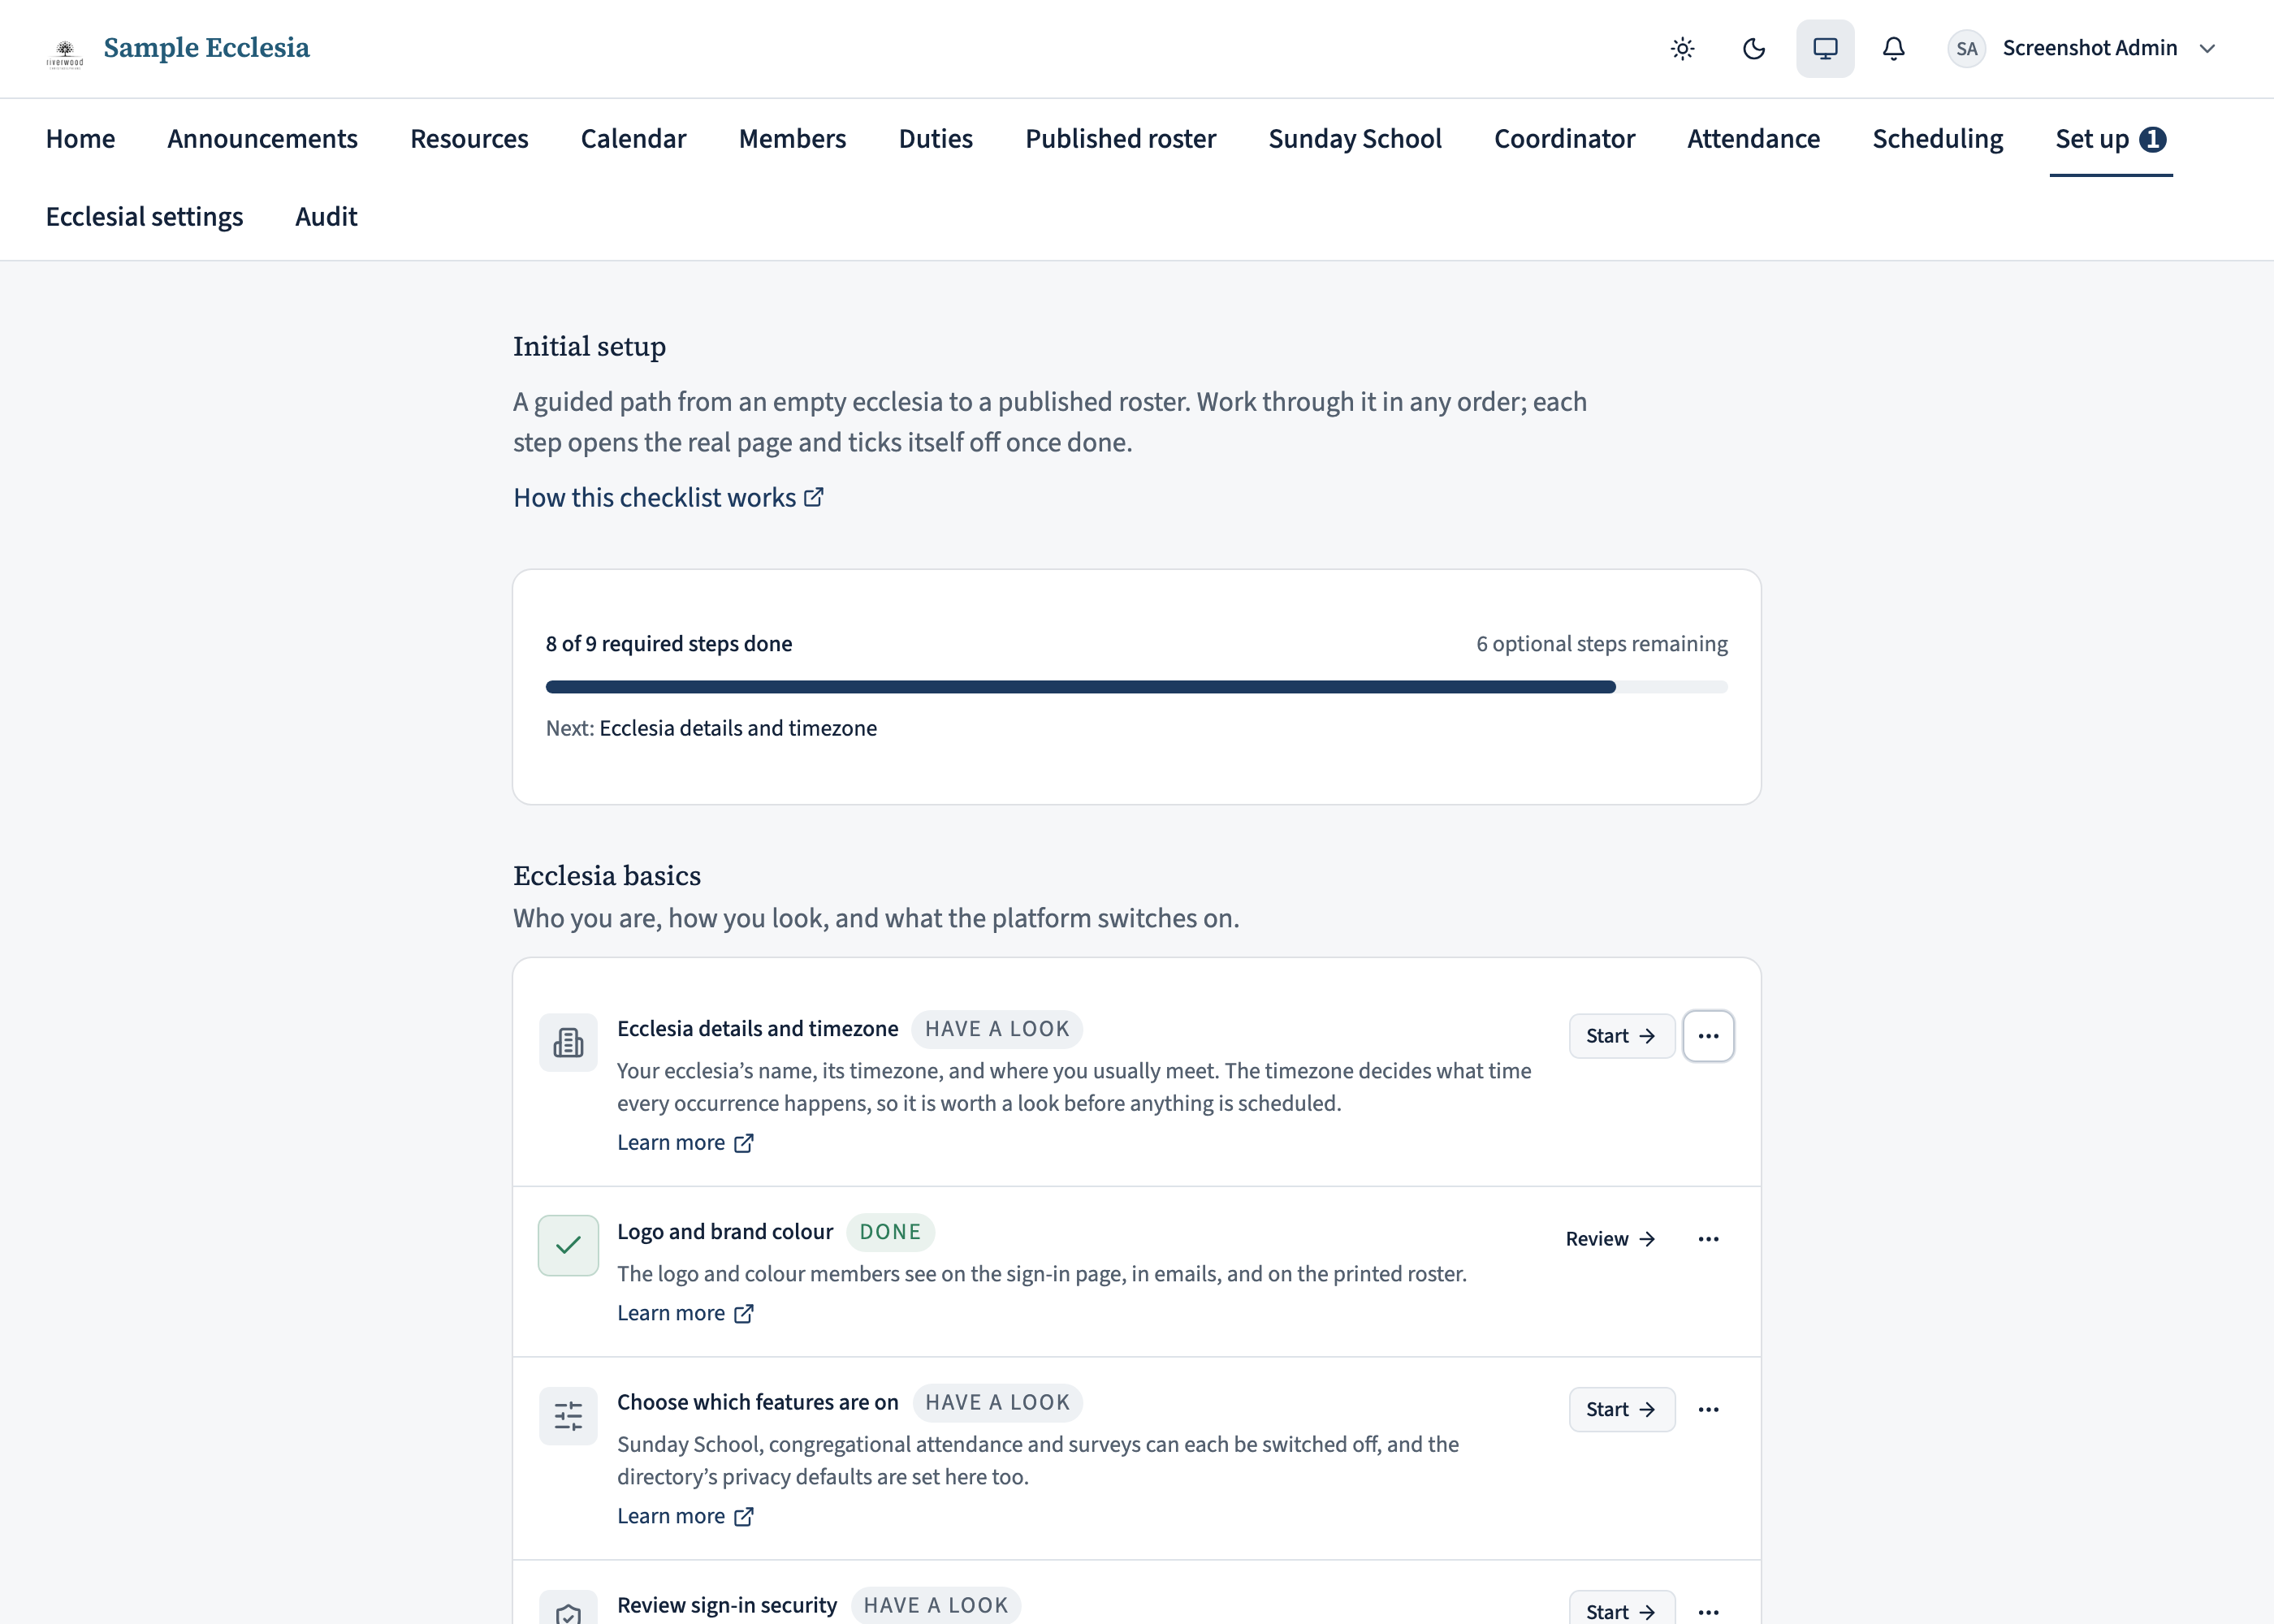
Read the progress bar
Nine steps are marked Required. They are the minimum reliable path from an empty ecclesia to a published roster: your details and timezone, roles, scheduling groups, recurring events, generated occurrences, your members, invitations, roster cycles, and the first published roster.
Everything else is Optional. Optional steps never move the progress bar — they are there so you know they exist, not to nag you. Whether school-term calendars or guest speakers suit your ecclesia is your call, not the checklist’s.
Work a step without losing your place
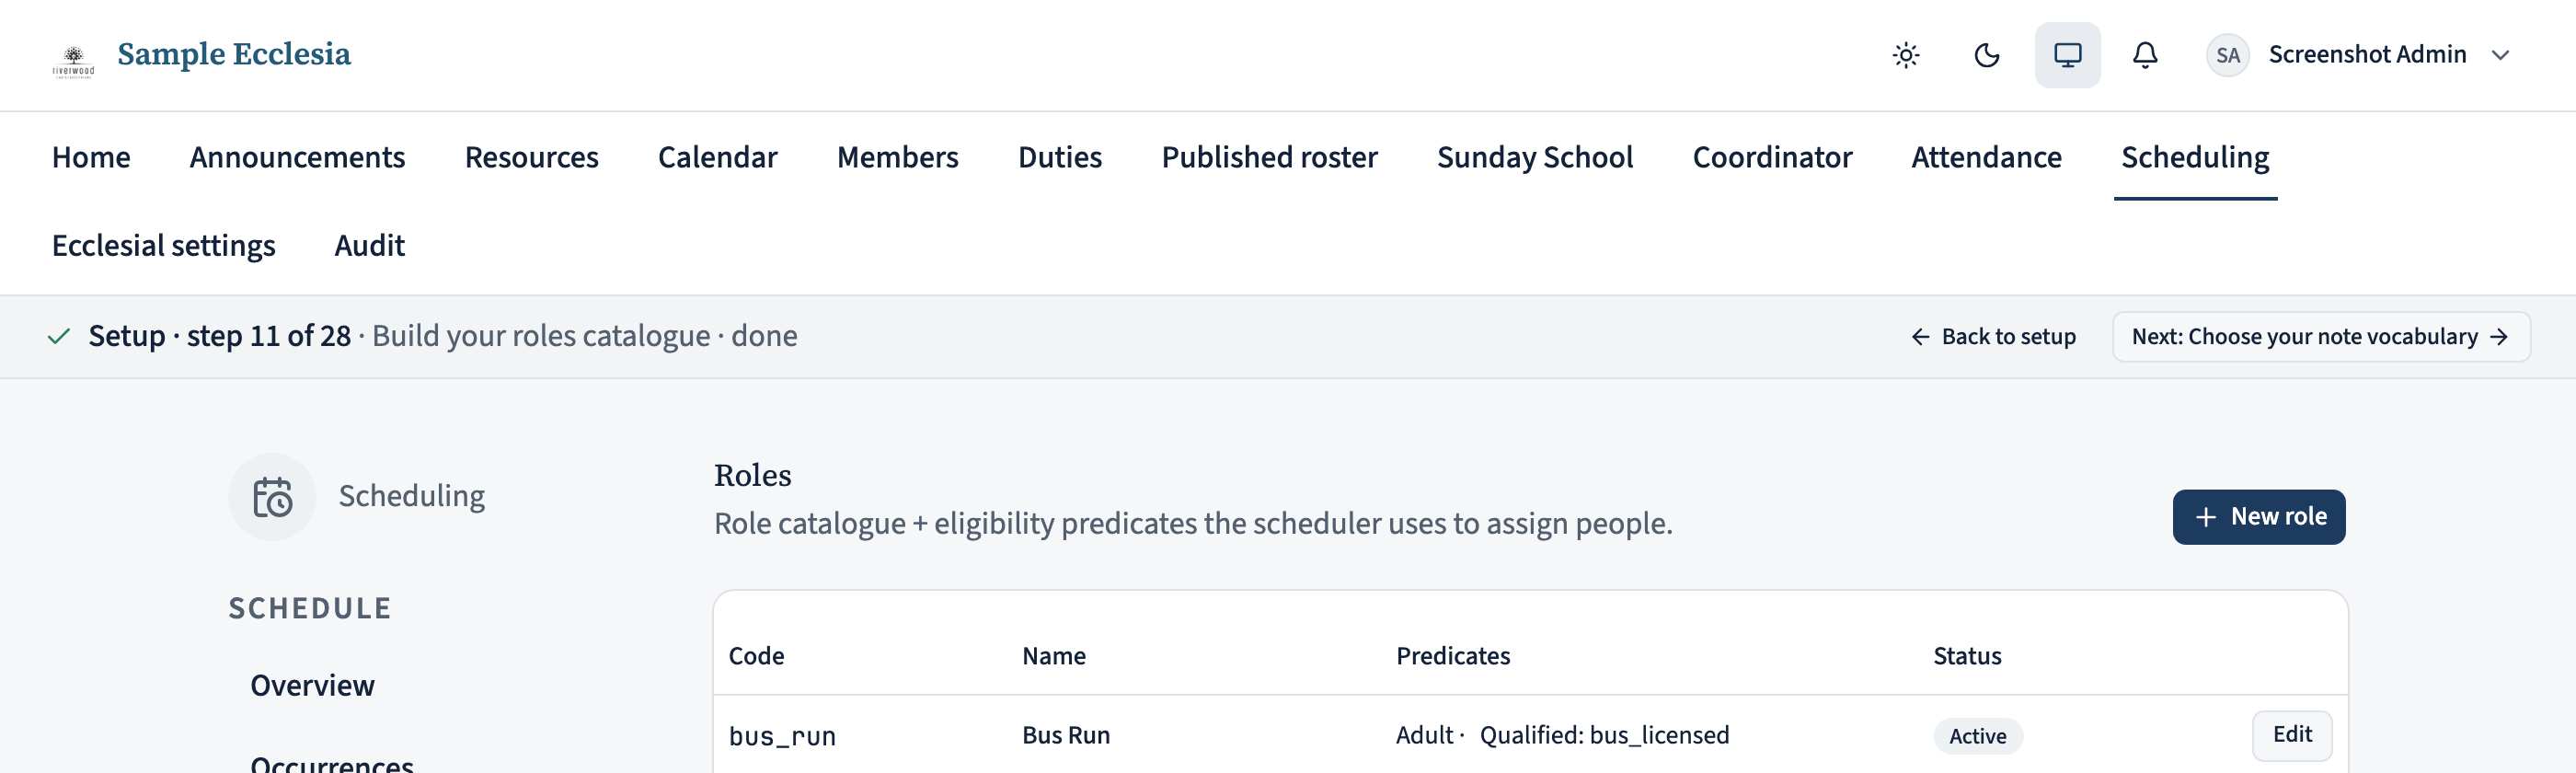
Press Start on any step and you land on the real page for that job — the same Roles page or Member import you would reach from the menu, with nothing simplified or held back.
A slim bar appears above the page telling you which step you are on, with Back to setup and a Next button that skips whatever is already done. The bar sticks around as you move between pages, so you can follow the whole path without keeping the checklist open in another tab.
Understand the four states
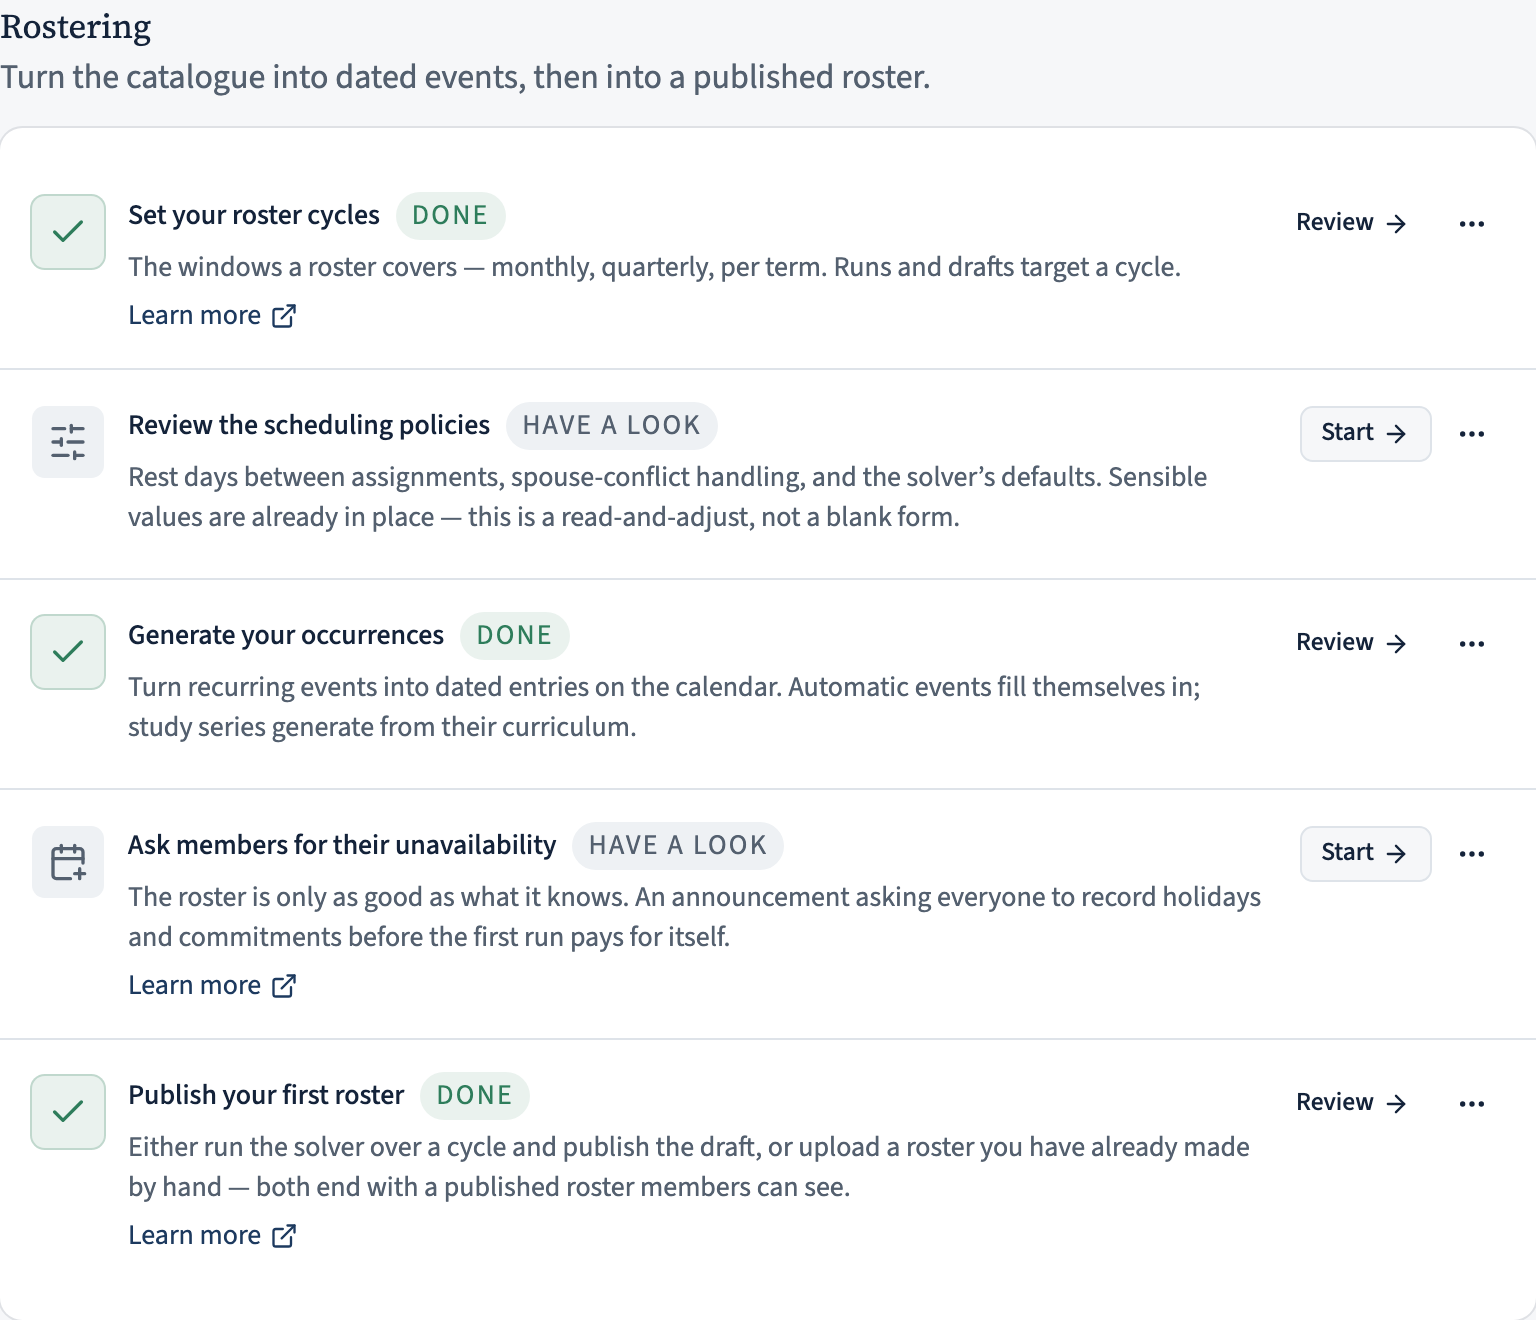
Done means the checklist can see the work in your data — roles exist, a roster has been published. You never have to tell it.
Have a look means there is nothing in the data that can answer the question by itself. Reviewing your scheduling policies is the clearest example: sensible defaults are already there, so their existence proves nothing about whether anyone has read them. Same for confirming your timezone — every ecclesia has one set, but only you know whether it is the right one.
Tell it what it cannot work out
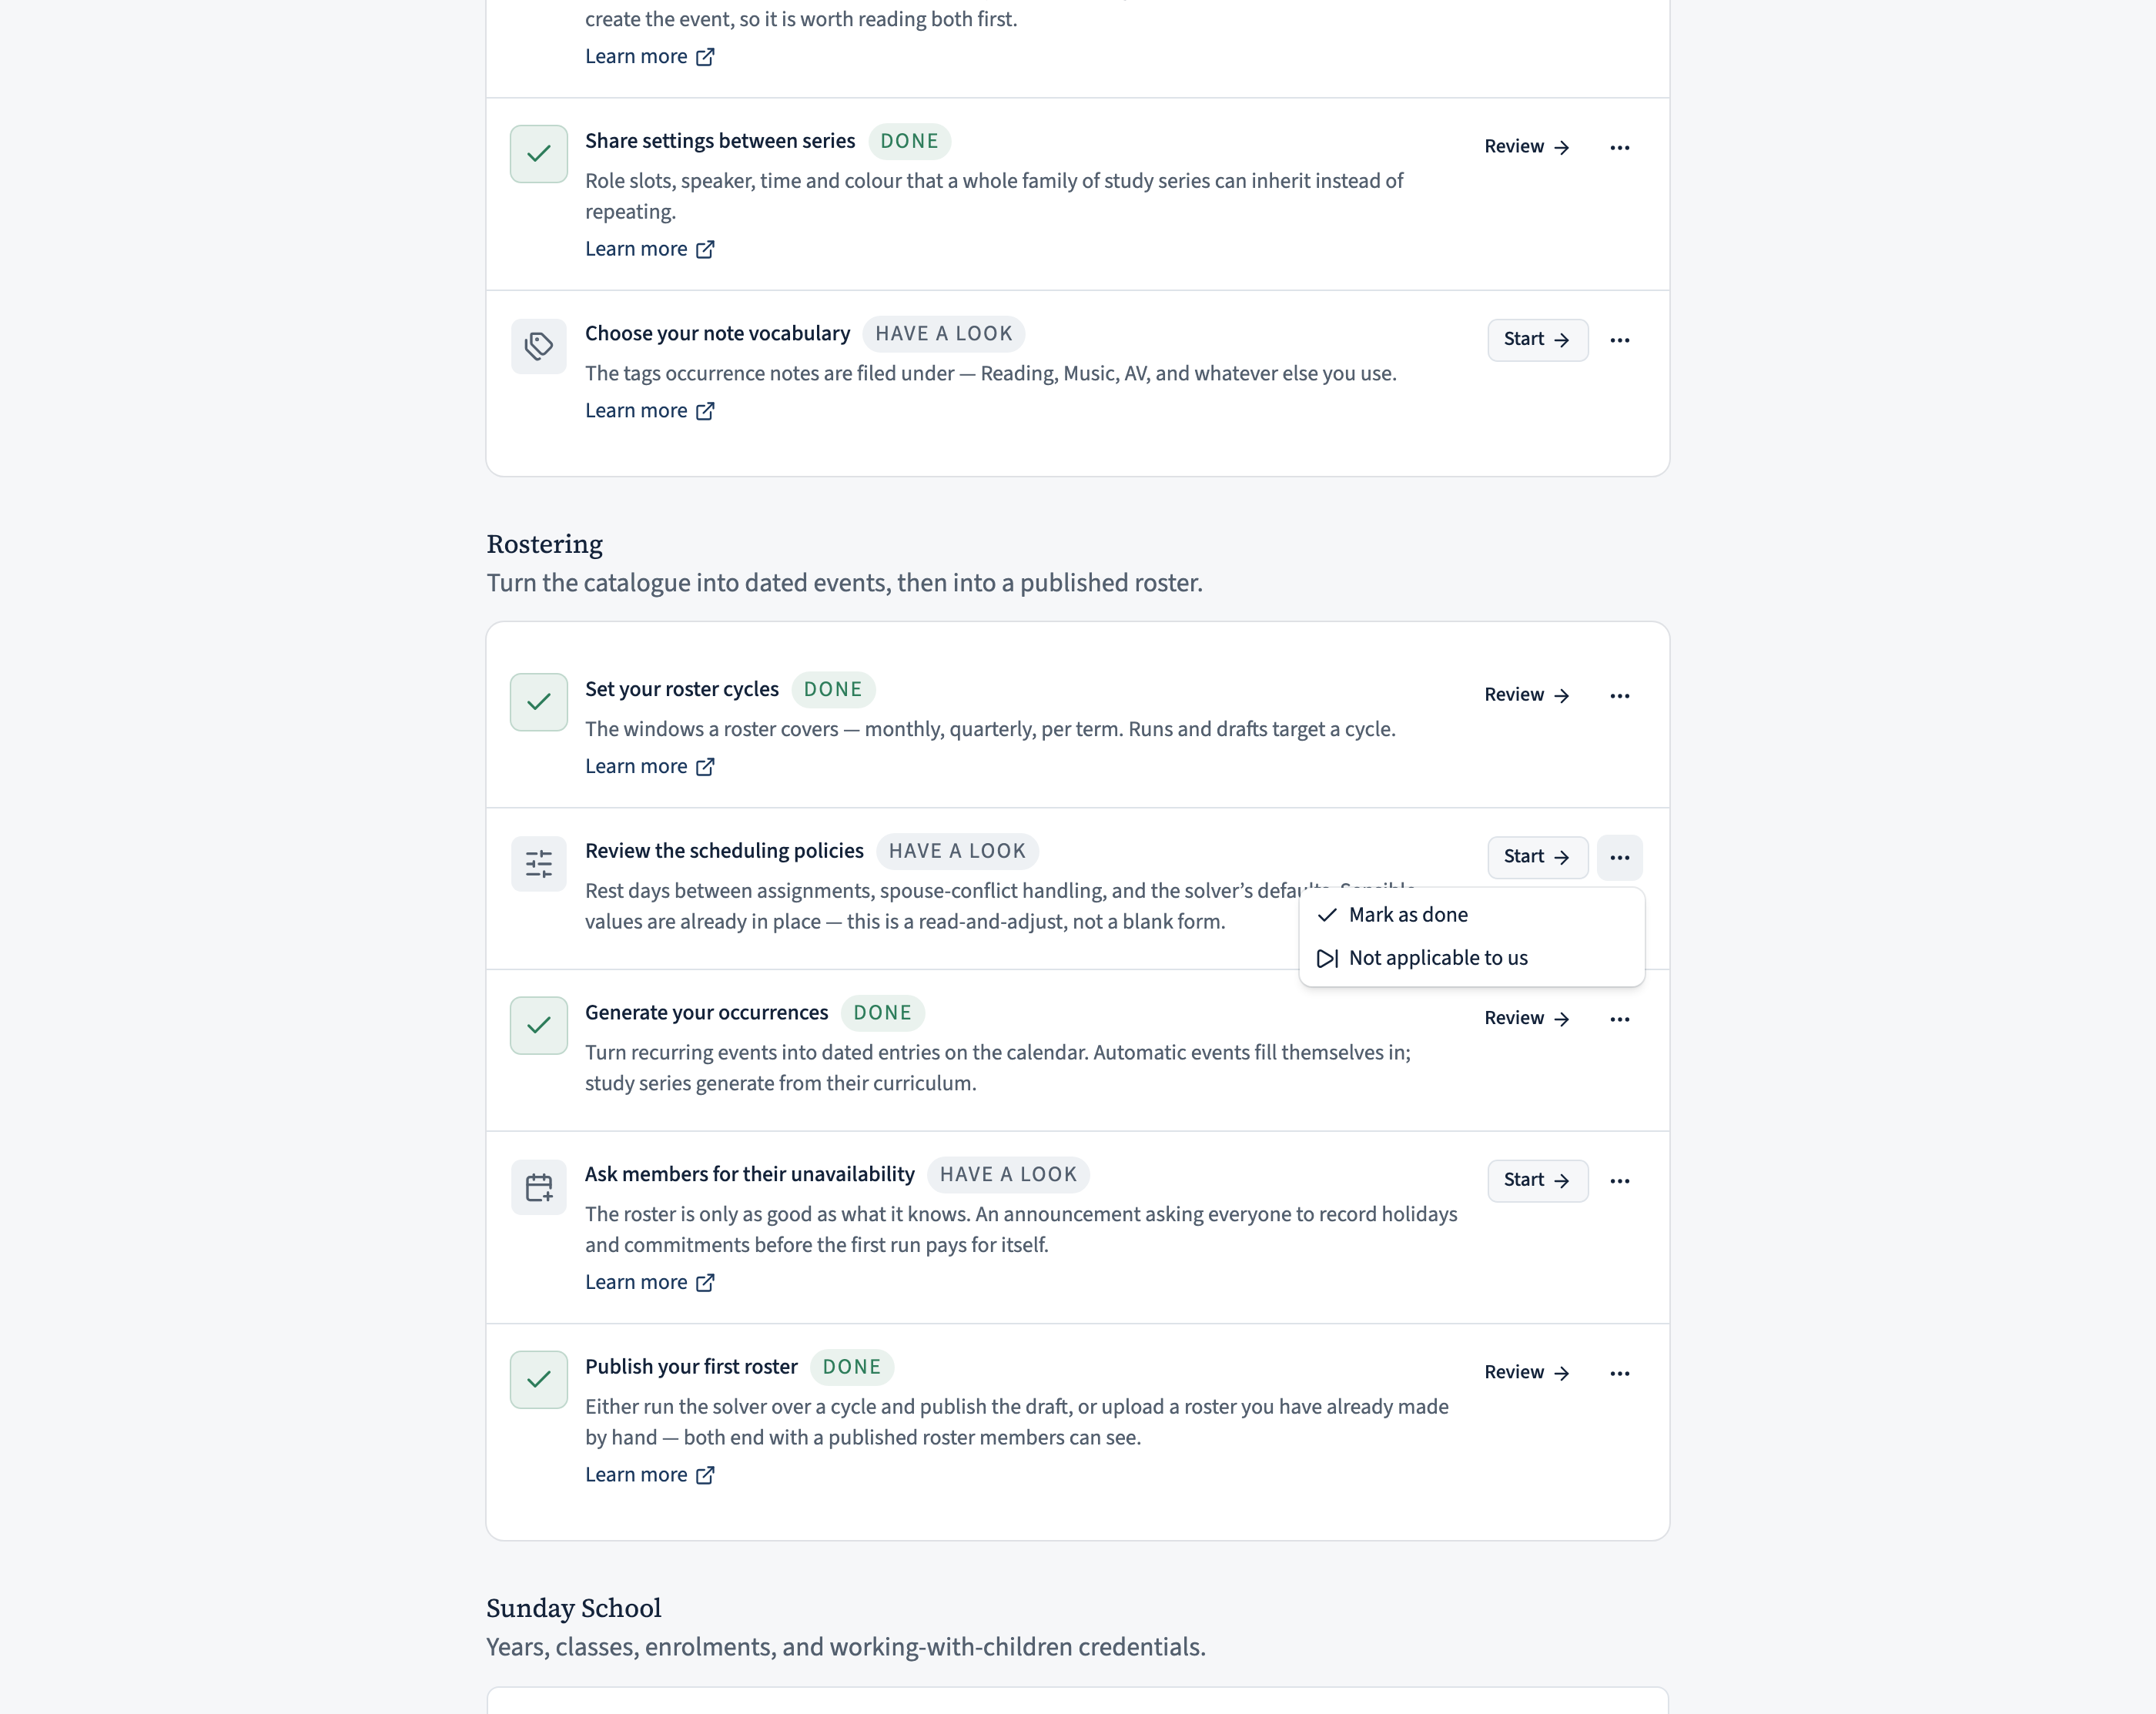
Every step has a … menu with two options. Mark as done is for the steps above — you checked the timezone, you read the policies. Not applicable to us is for a step your ecclesia will never use: nothing seasonal, so no term calendars; no guest speakers to record.
A step you mark not applicable stops counting as outstanding, so a decision you have already made does not hold your progress bar open forever. Both are reversible — the same menu offers Undo.
These are recorded for the whole ecclesia, not just your browser, so a fellow administrator sees the same checklist you do and is not nagged about something you have already settled.
Finish, and see what is left
Once all nine required steps are settled the page changes character. The finished phases fold up into one-line summaries, and what remains on screen is the optional work you have not done yet — Sunday School, calendar sync, guest speakers, note tags.
That is the form the page keeps. It stays linked under Ecclesial settings as a standing list of what else CDRoster can do for you, rather than something you finish once and never see again.
On the iPhone app
The setup checklist lives in the app's admin Manage hub too.
Manage → Initial setup is the progress checklist (“9 of 9 required steps done”), grouped into stages. Each step shows a Done/Required badge and Start / Learn more / Mark as done / Not applicable; a web-only step shows Open on the web. The top stage is Ecclesia basics.
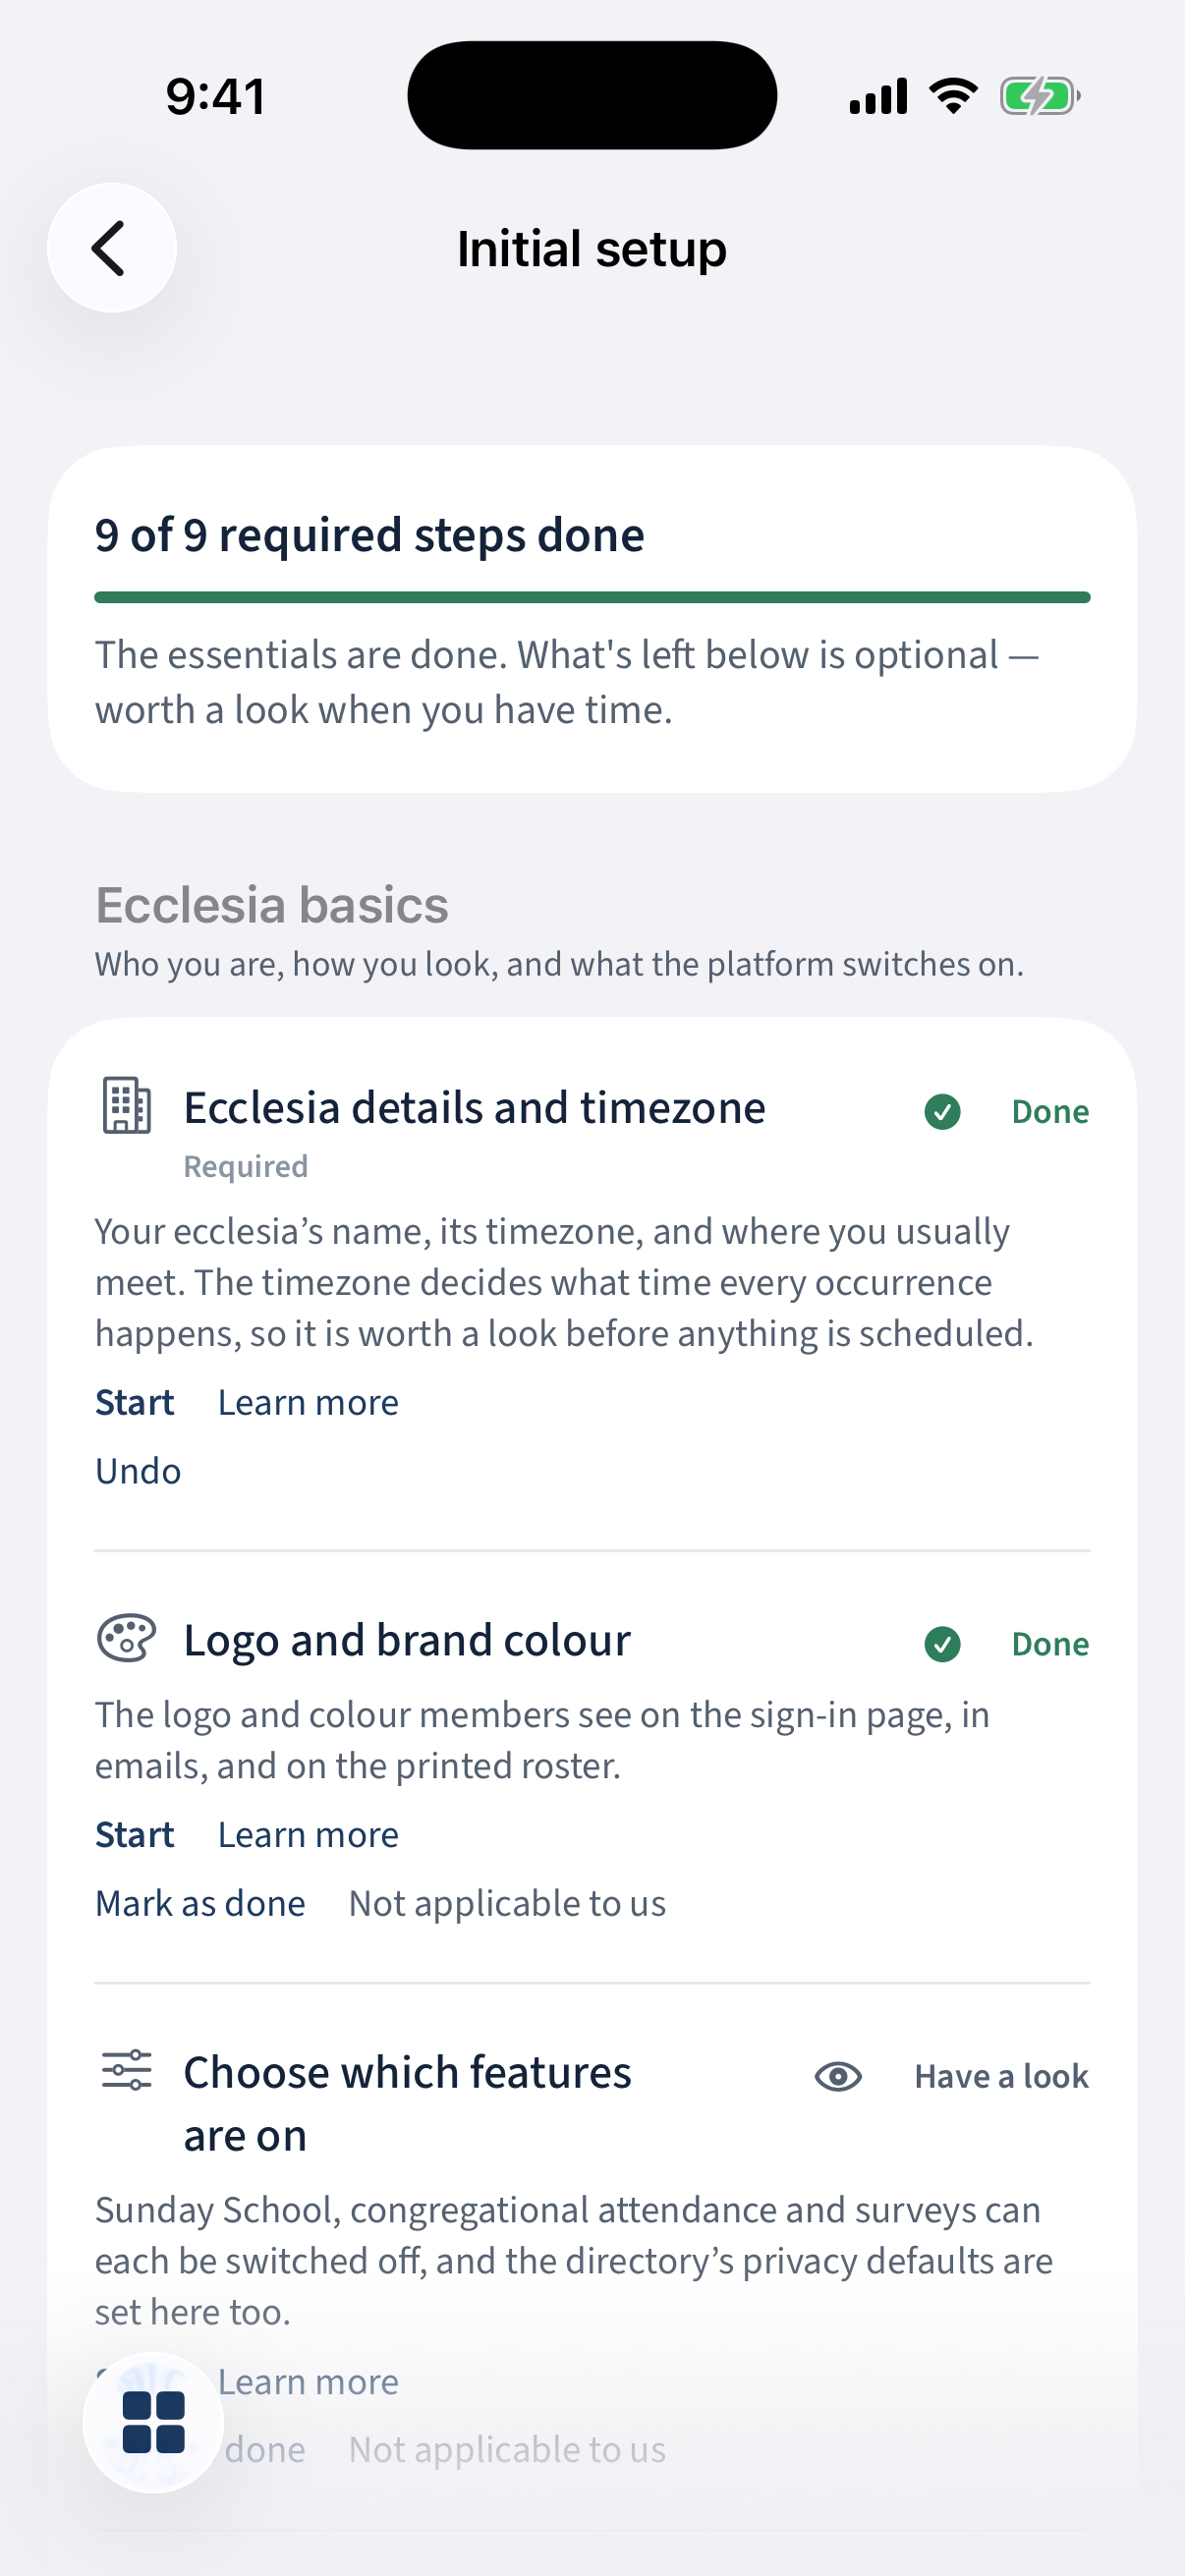
Manage → Initial setup: a “9 of 9 required steps done” checklist grouped into stages, with the Ecclesia basics stage. The People and Scheduling catalogue stages: build your roles, create scheduling groups, define school terms, set up recurring events, share settings, and choose your note vocabulary.
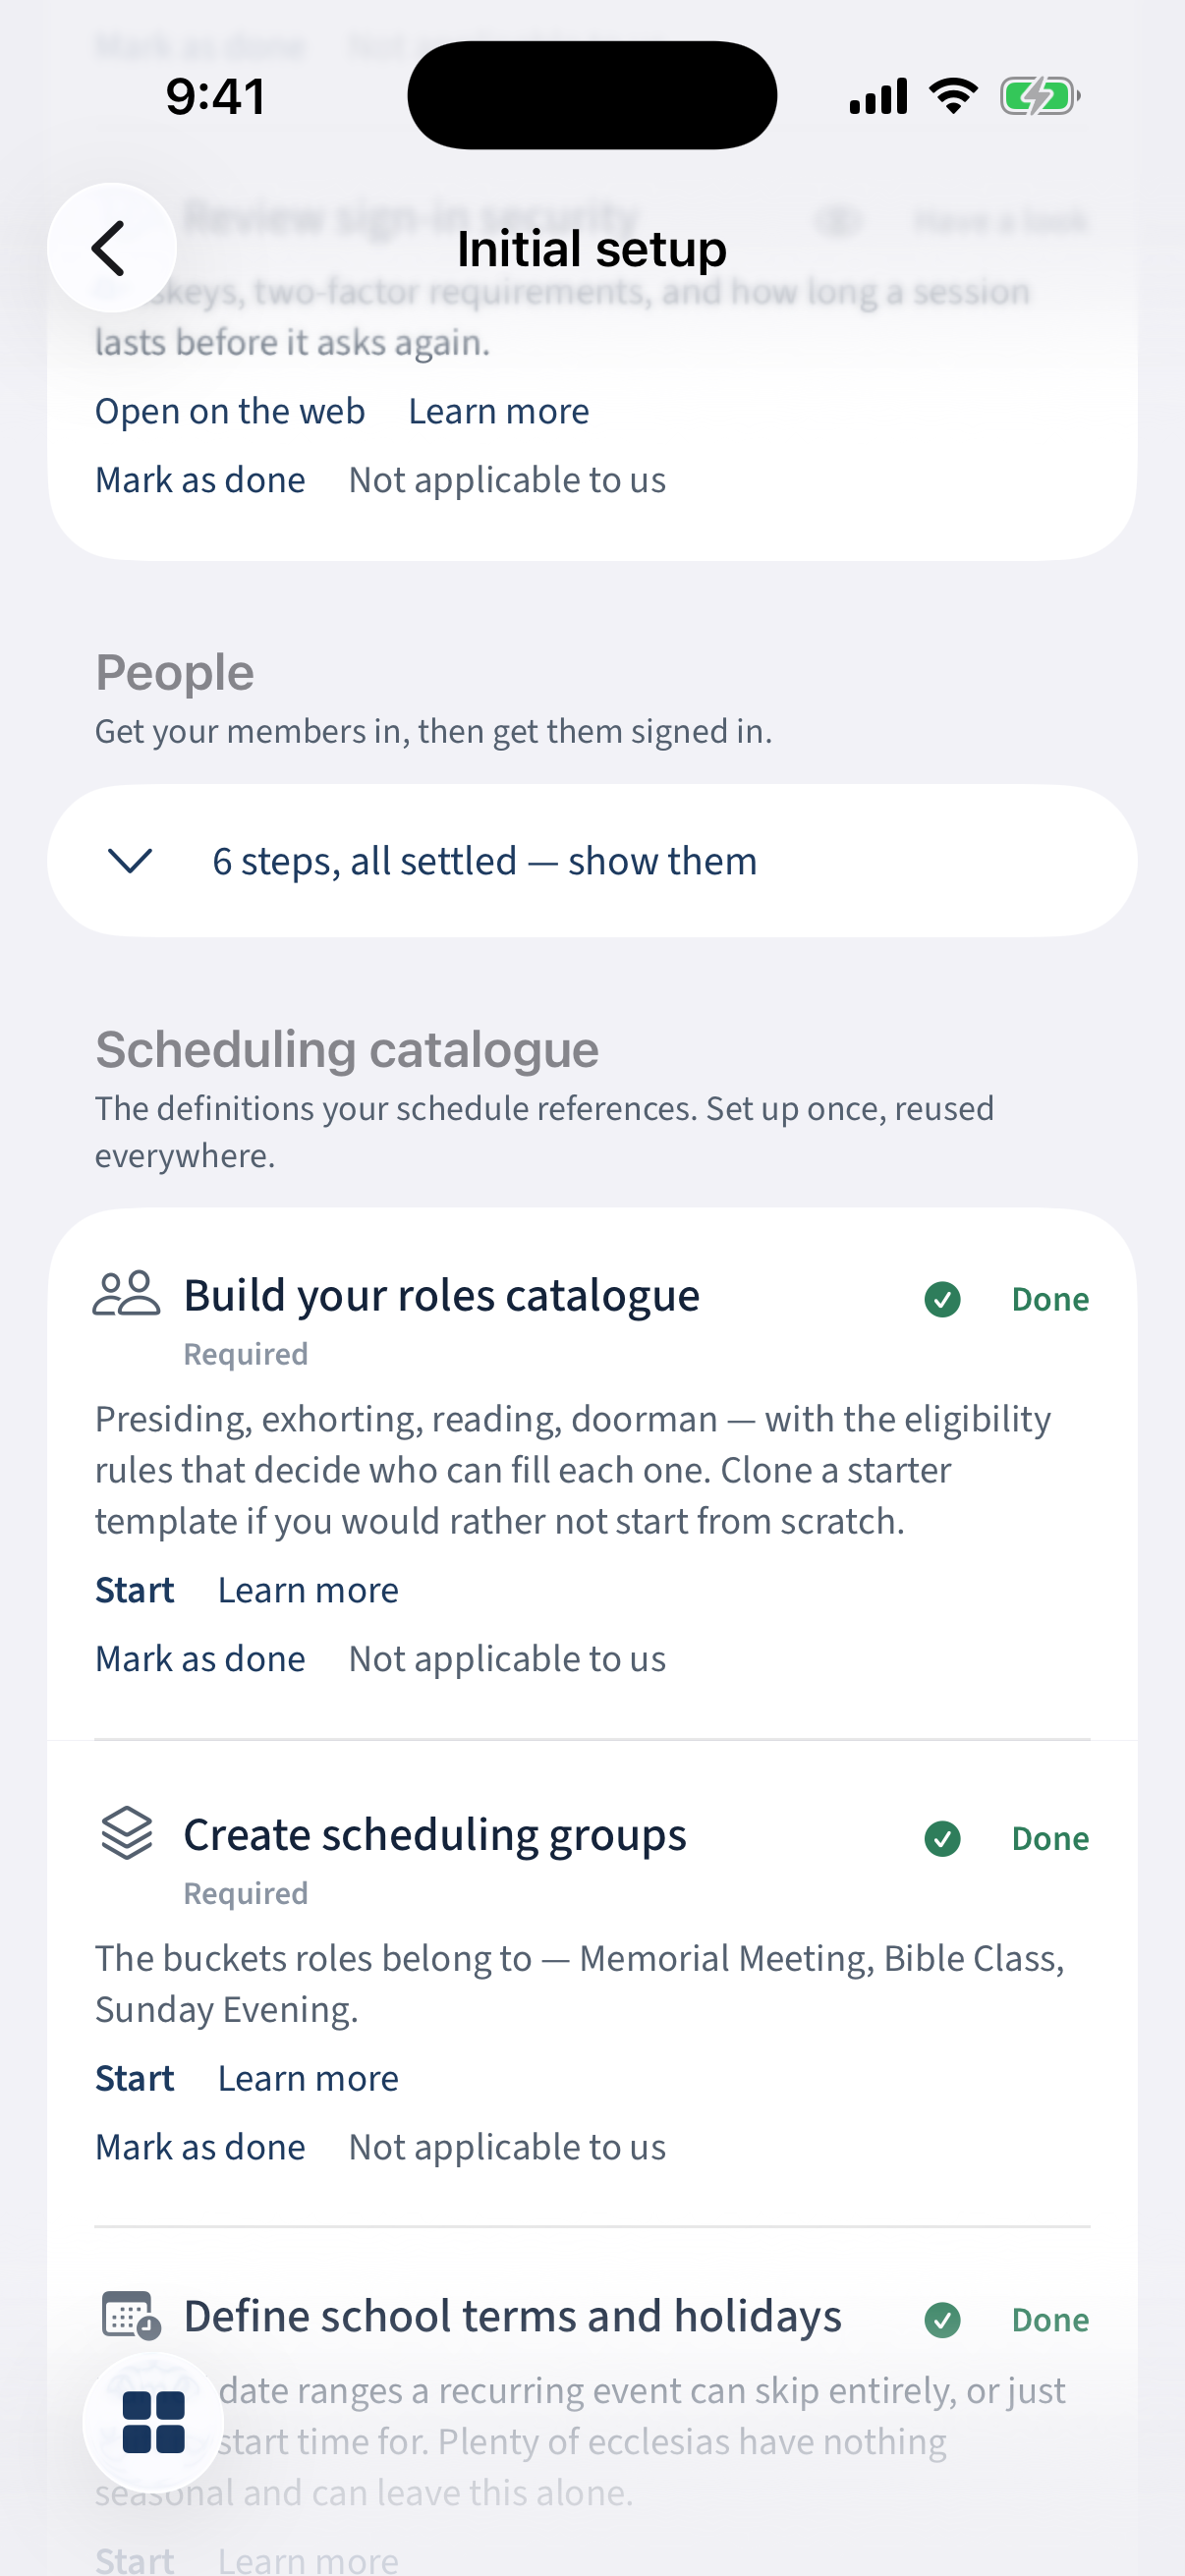
The People and Scheduling catalogue stages of the checklist. The Rostering stage: roster cycles, scheduling policies, ask for unavailability, publish your first roster — then a collapsed Sunday School stage.
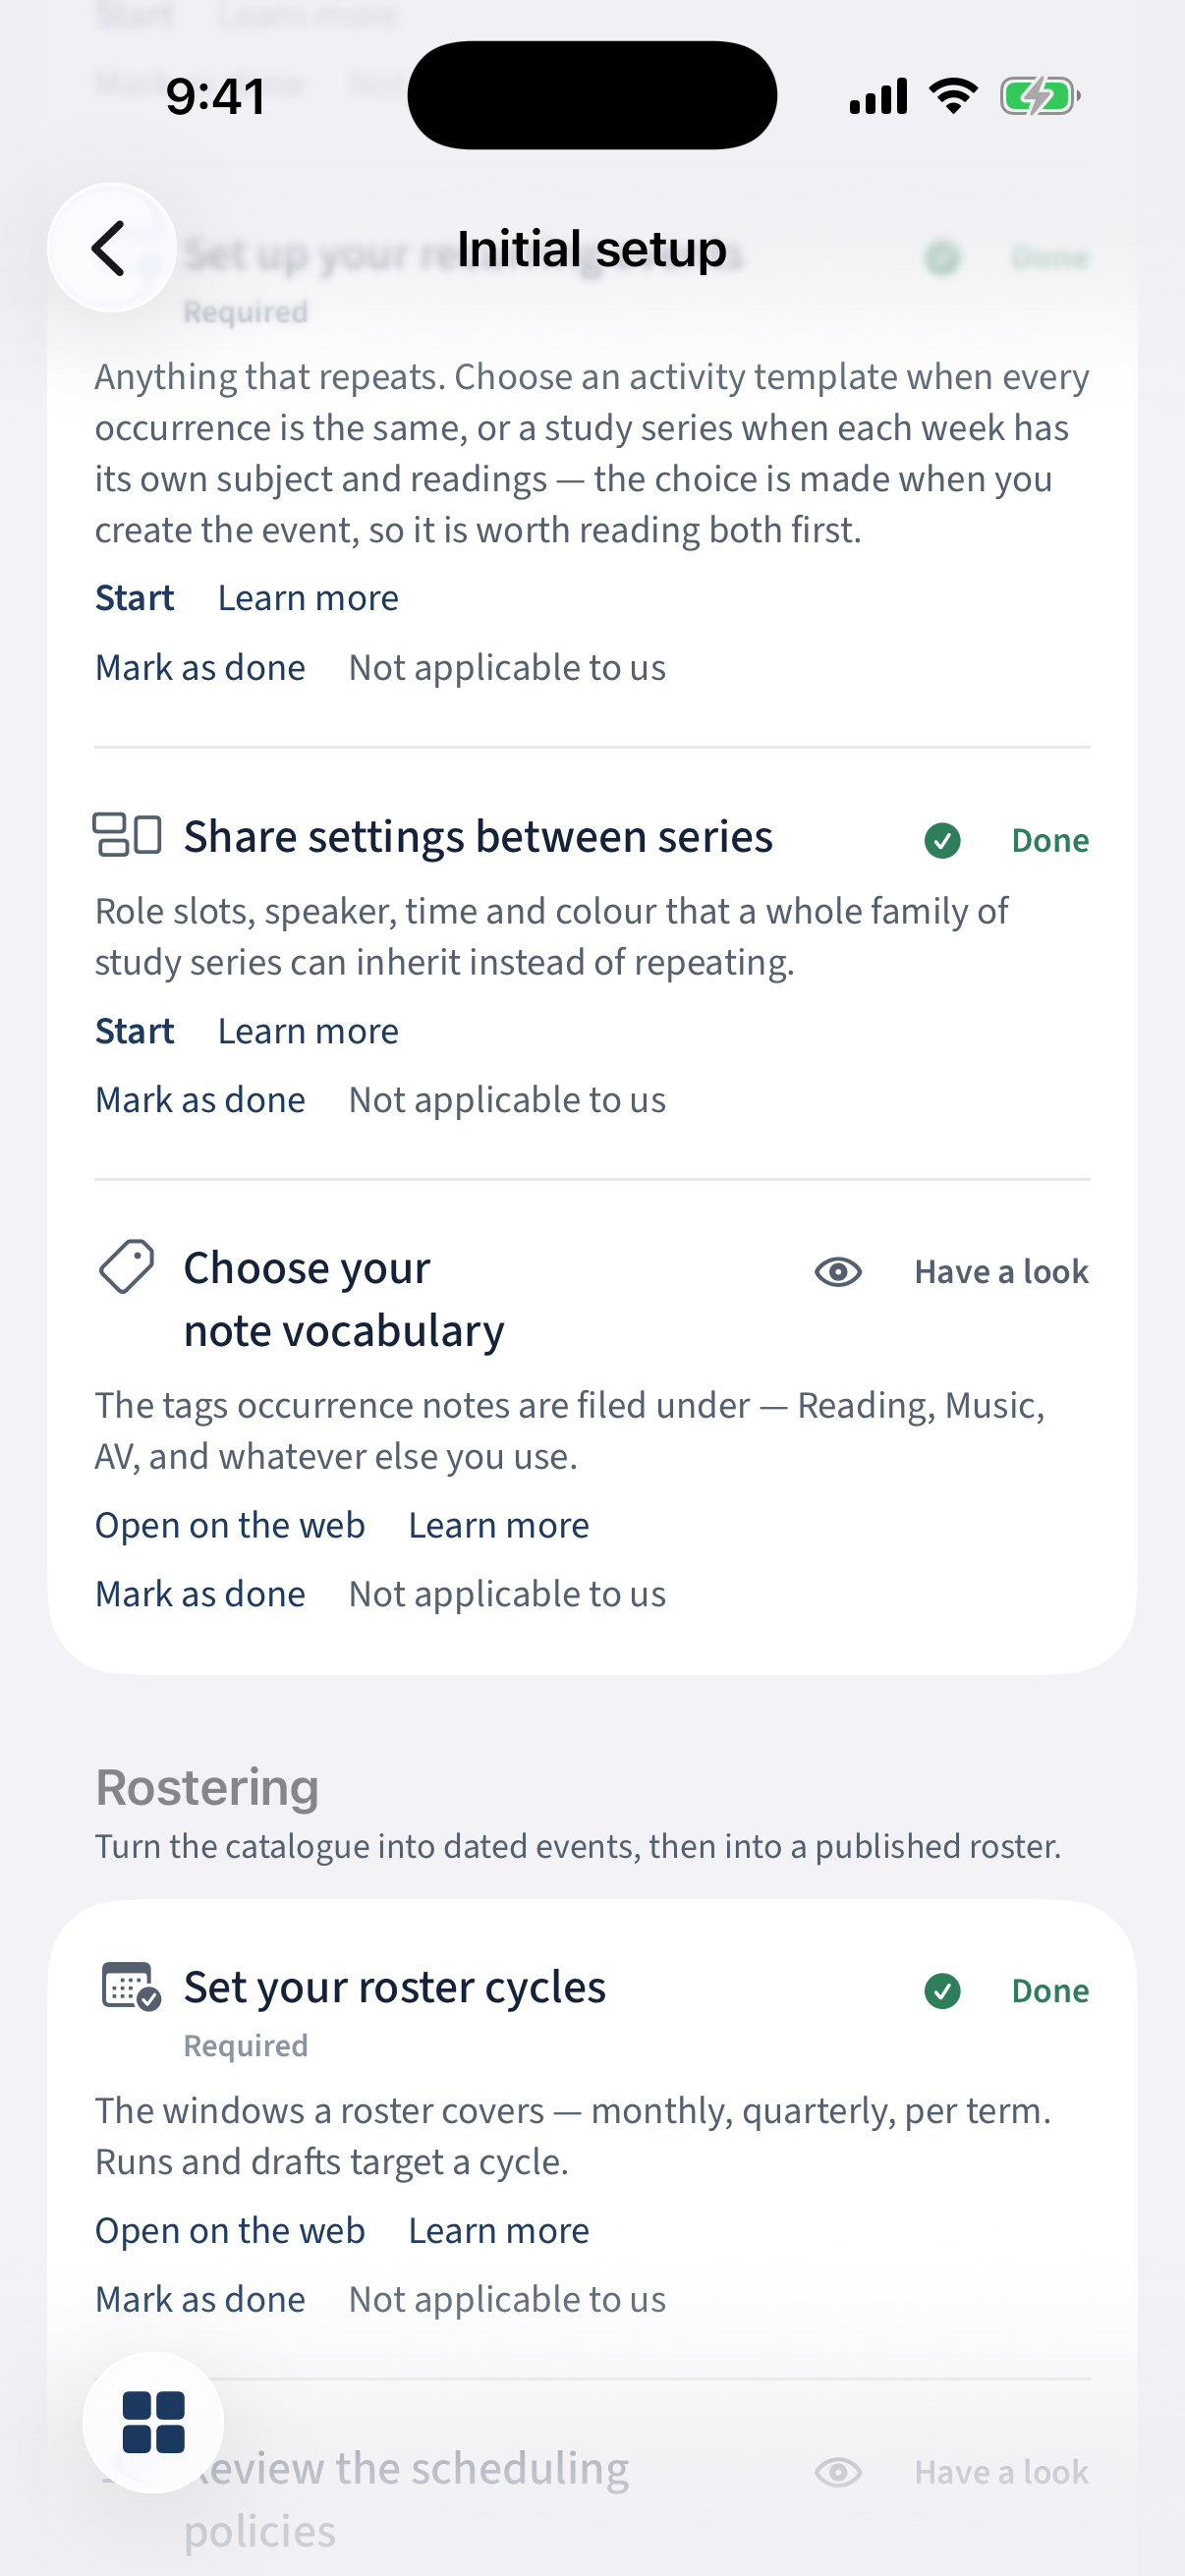
The Rostering stage and a collapsed Sunday School stage.
Different on the app: Some steps deep-link into app screens; a few open on the web.
If you would rather not see it
The home-page card has a × that hides the checklist for everyone in your ecclesia — useful if you are rolling out over months and do not want a standing reminder. The checklist itself stays where it is under Manage → Initial setup, with a Show it again button whenever you want it back.