Importing members from a spreadsheet
Starting a fresh ecclesia usually means bringing in a spreadsheet of existing members before anyone signs in. CDRoster’s member-import flow takes a CSV or Excel file, lets you tell the server which column maps to which field, previews what will change, and commits the whole batch in one go.
Nothing is written to the directory until you click Commit on the preview page — you can back out at any earlier step and no member records are created. The flow is administrator-only.
Prepare the spreadsheet
The upload accepts .csv, .xlsx, .xls, and .ods. A few rules that’ll save you a round trip:
- One header row. The importer reads the top row as column names. Extra blank rows above the header confuse the auto-mapper.
- One member per row. Split households later from the Members page — the importer doesn’t group rows by family.
- Display name is the only required field. Everything else — age status, baptism status, contact points, address — is optional. Rows with a blank display name are rejected.
- Age status, sex, and baptism status read as fixed enums: “adult / minor”, “male / female / unspecified”, and “baptised / unbaptised / unknown” respectively. Case doesn’t matter. Anything outside those values validates as a warning; the row is still committable but the field is dropped.

Upload the file
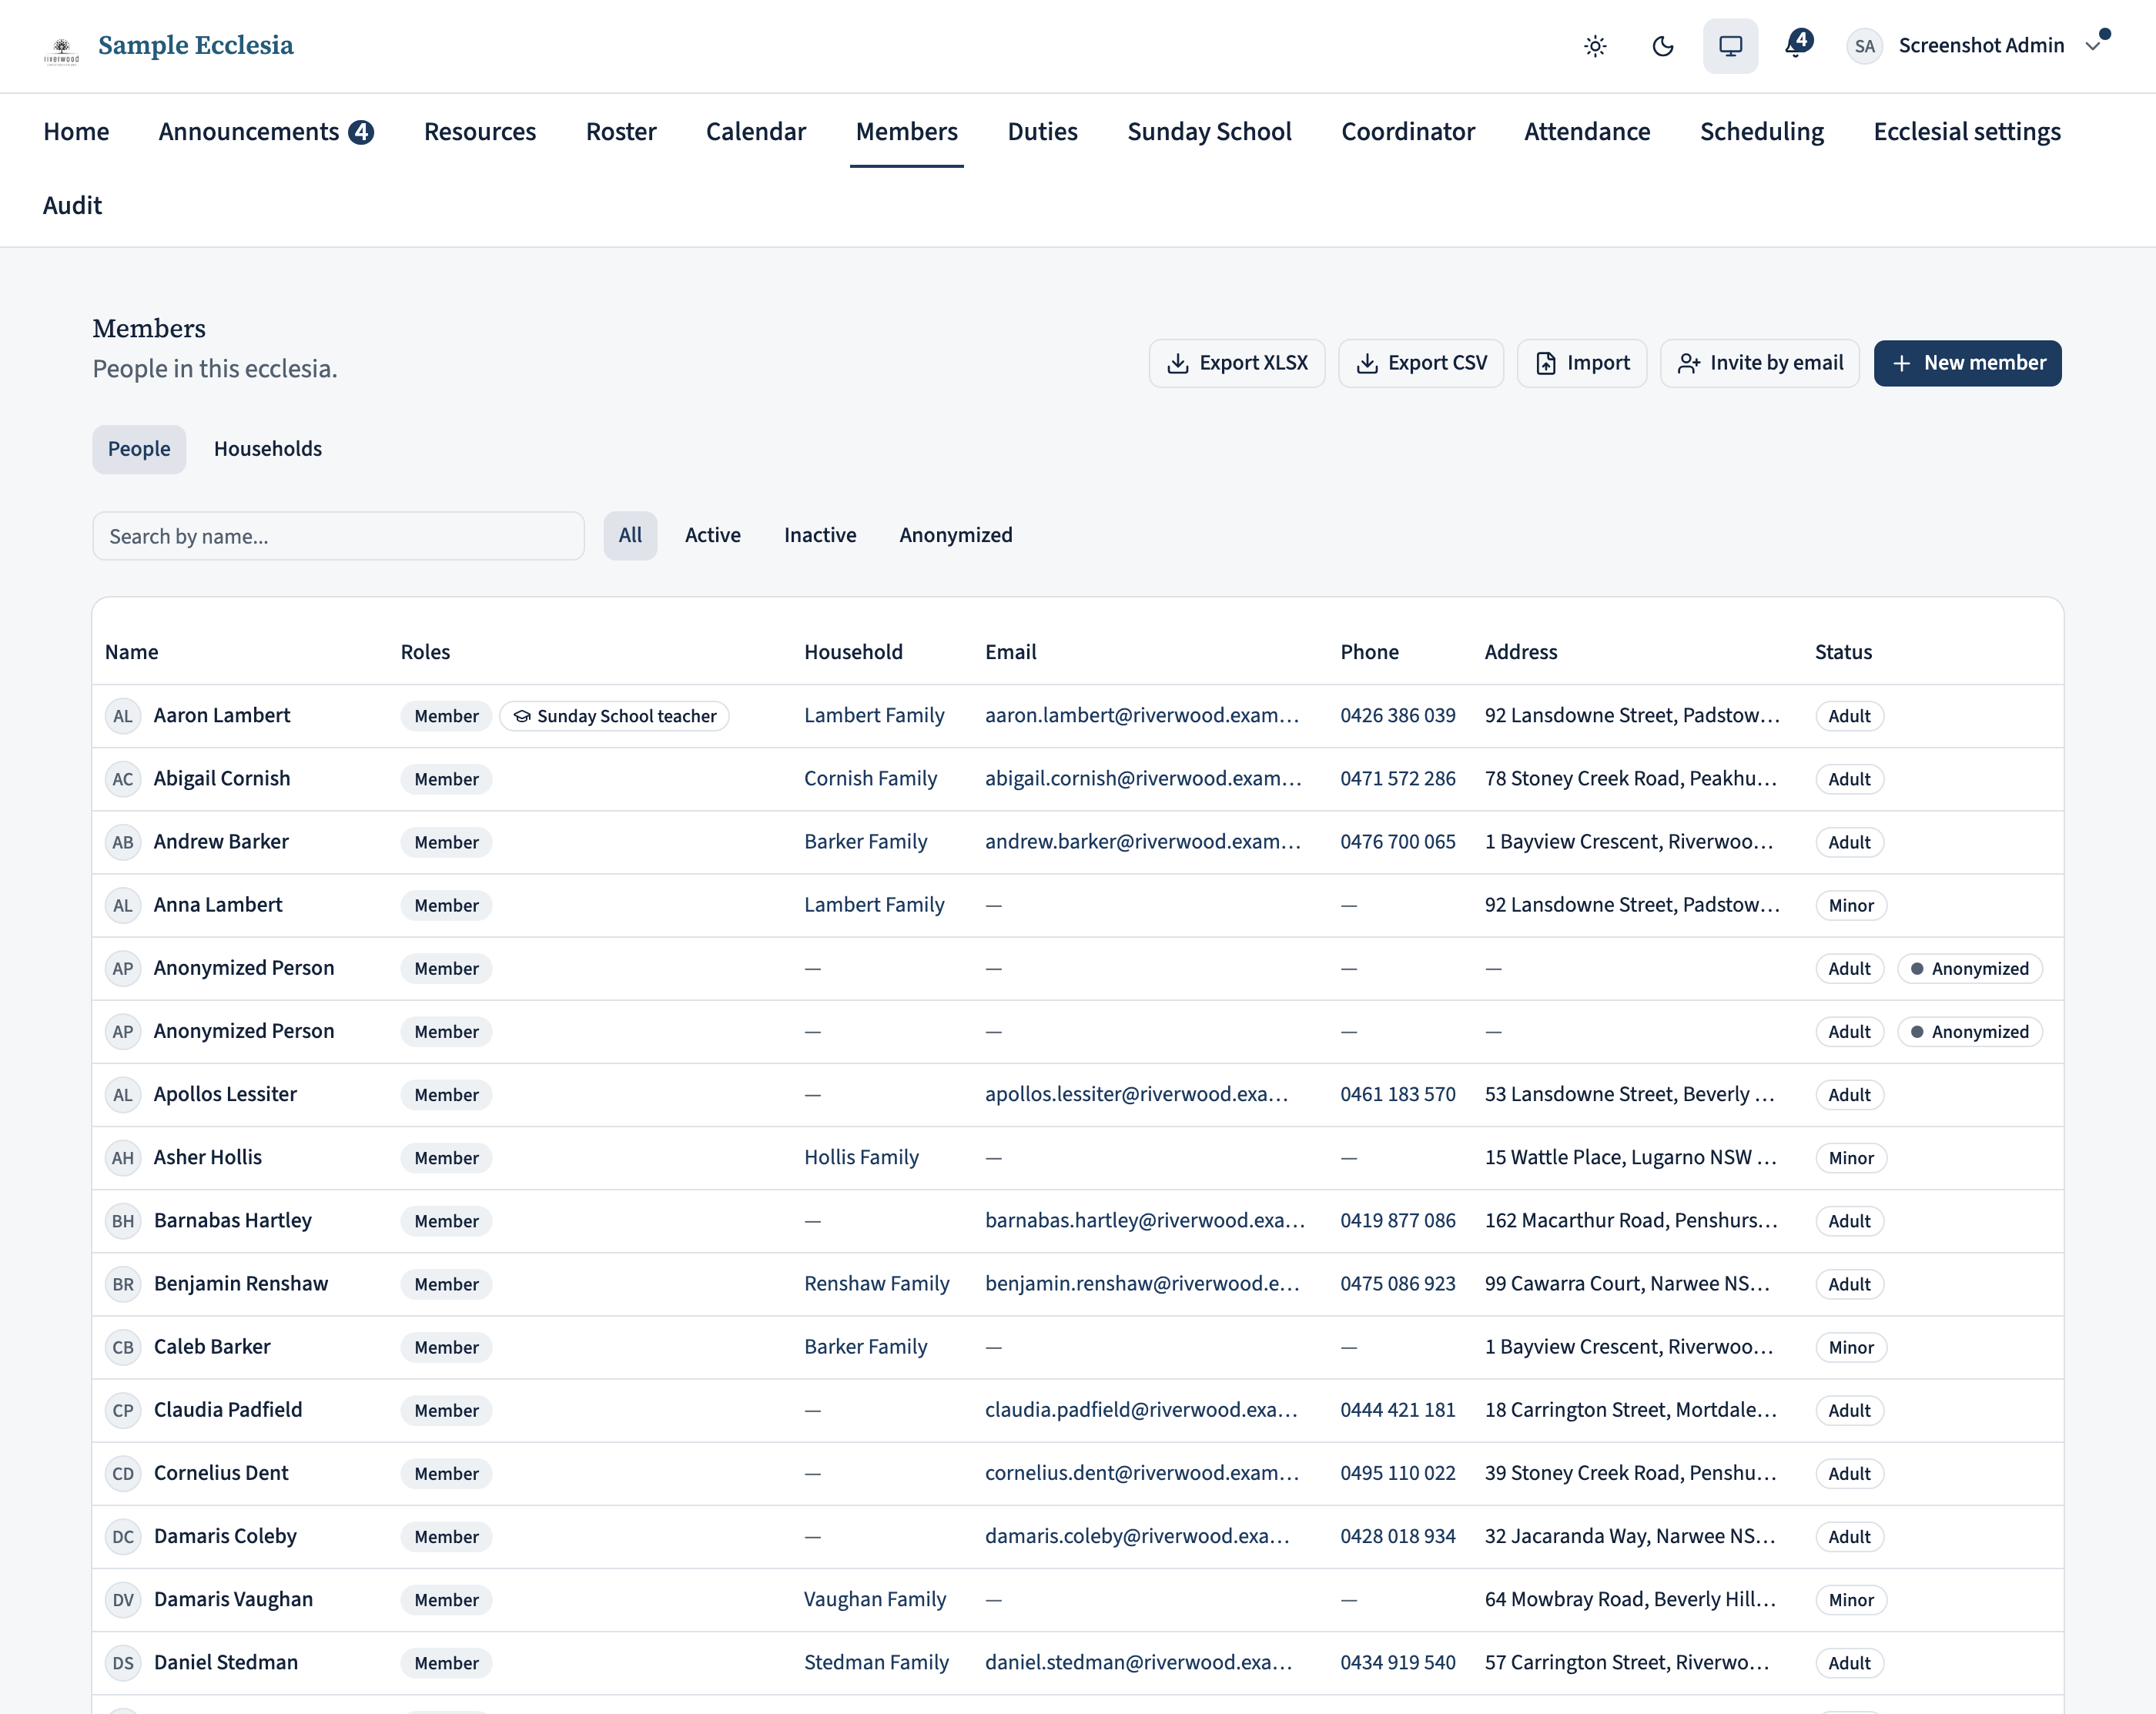
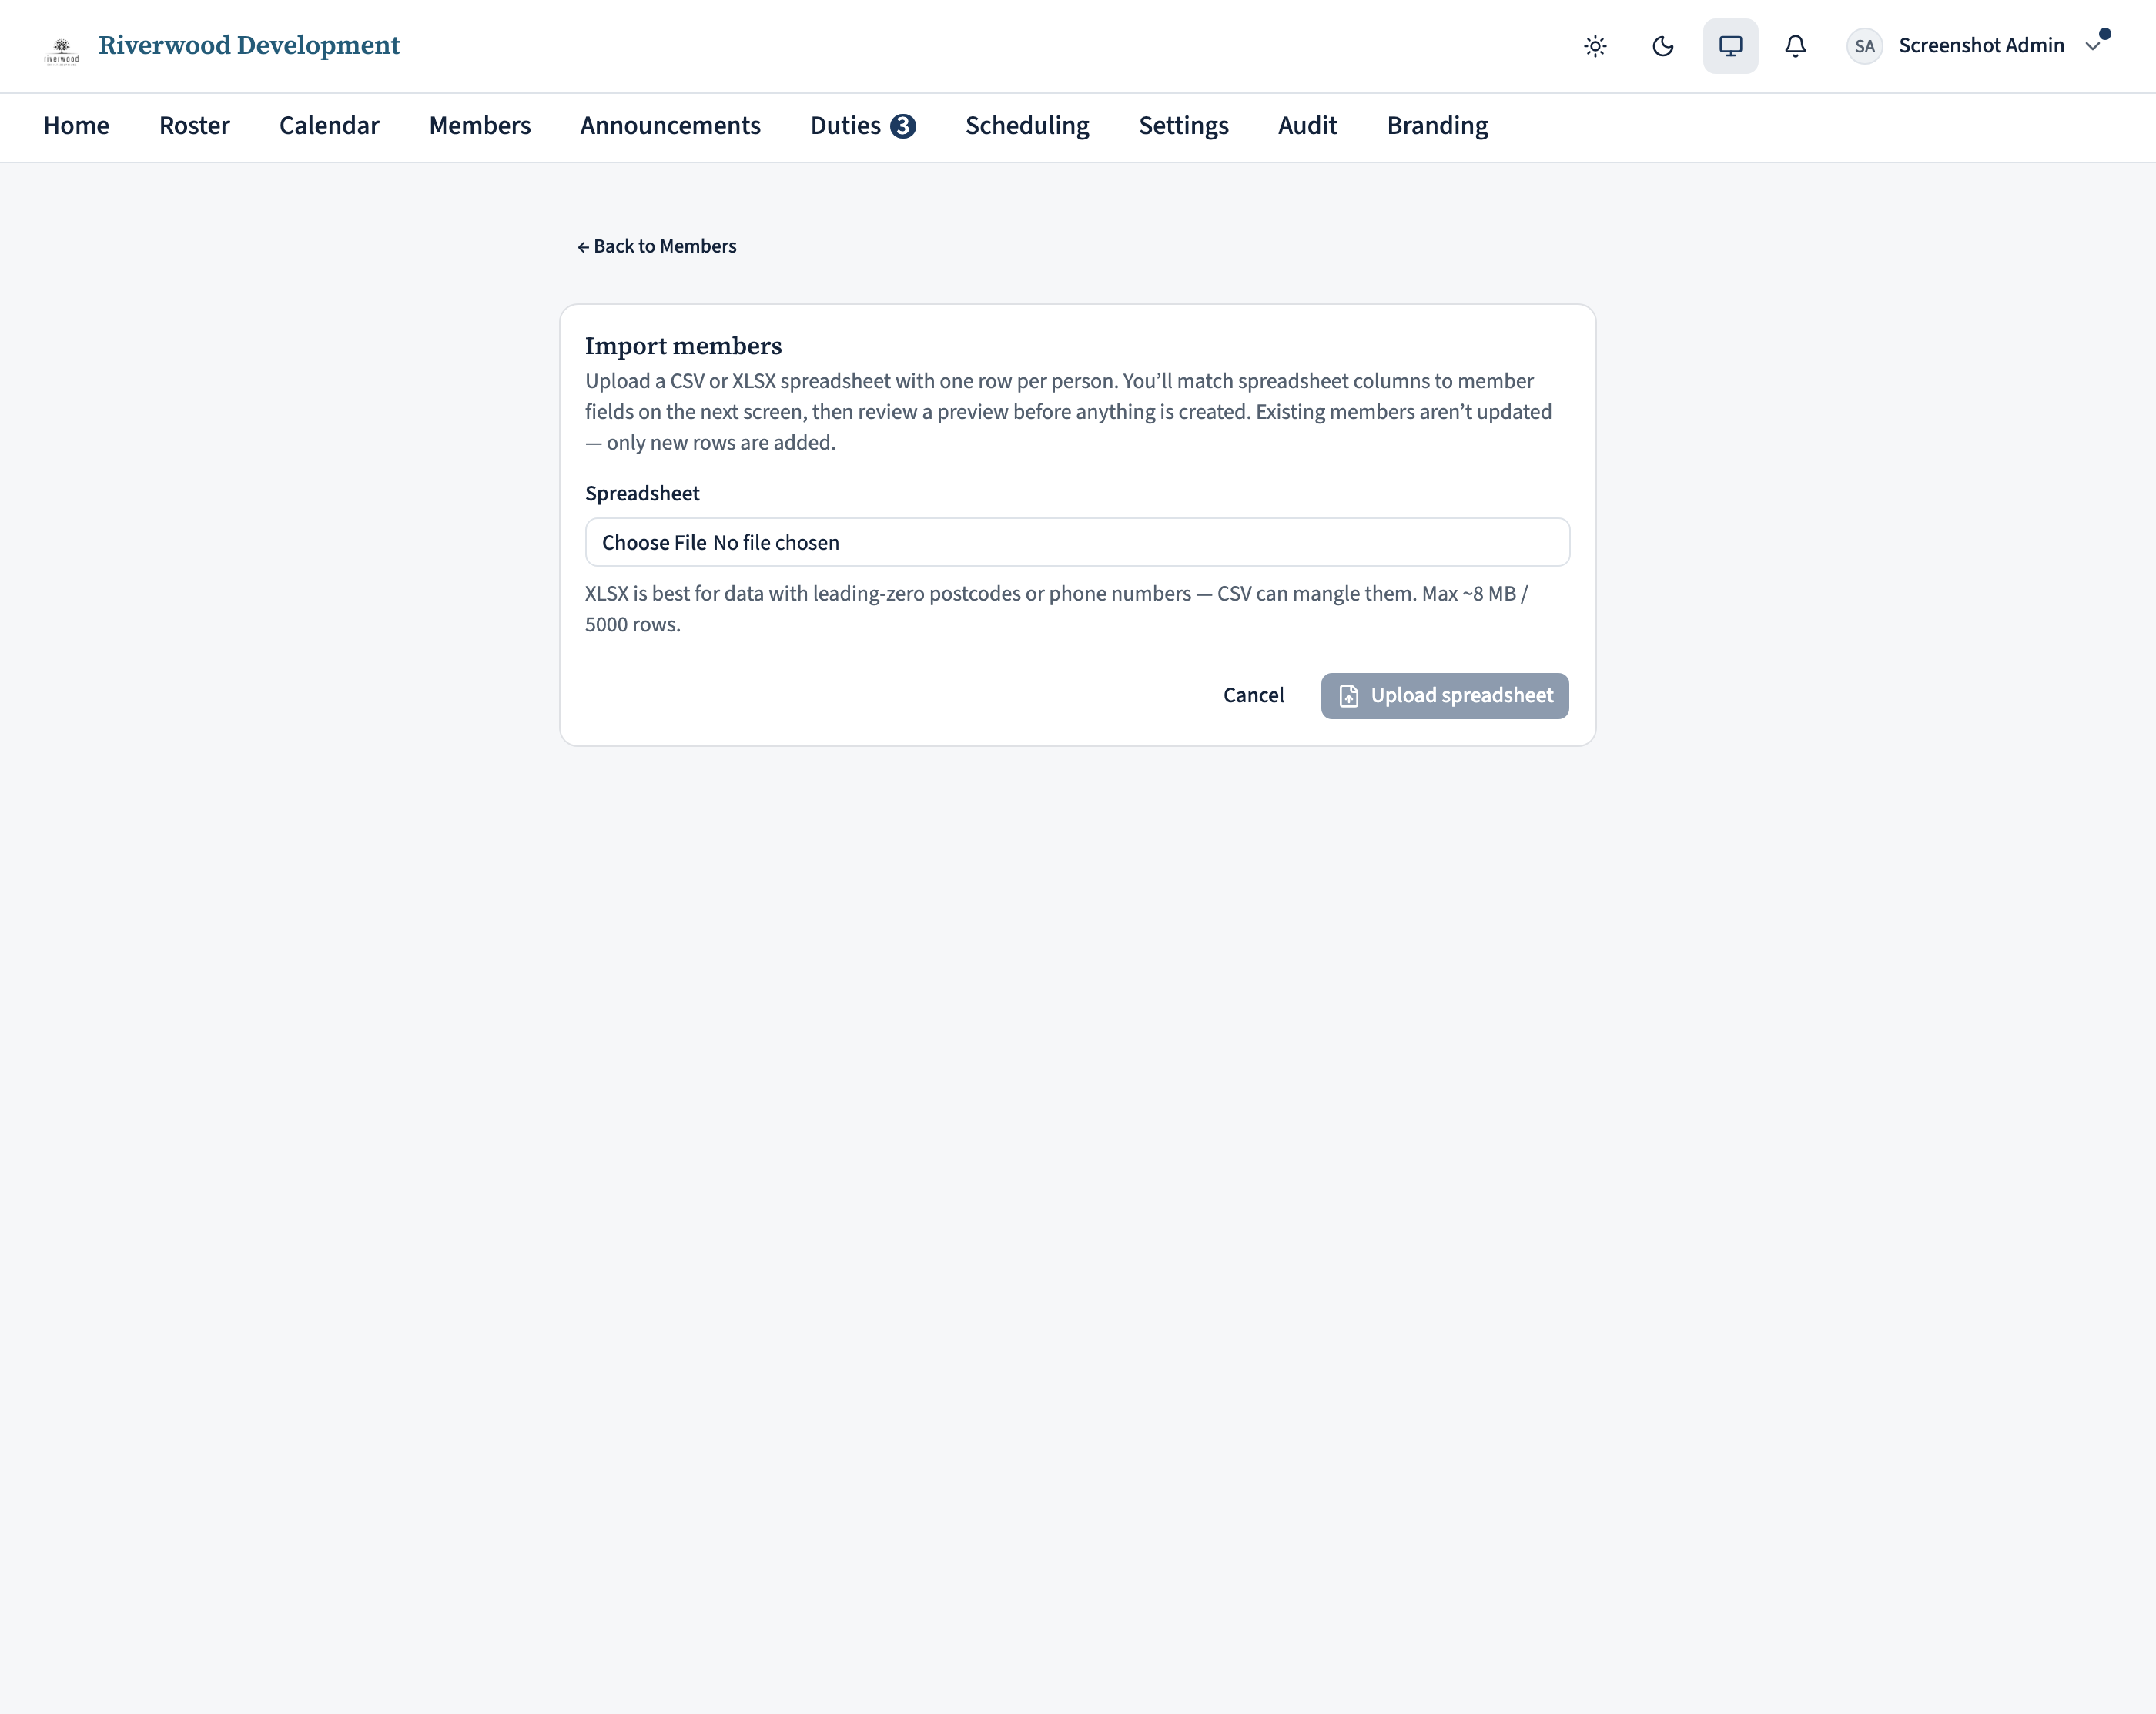
Head to Members, then click Import in the top-right of the header (only admins see this button). Pick the file with the browse dialog or drag it onto the drop-zone, then click Upload.
The server does two things immediately: it reads the header row to detect columns, and it takes a best guess at which column maps to which CDRoster field. You’re then bounced to the mapping page.
Confirm the column mapping
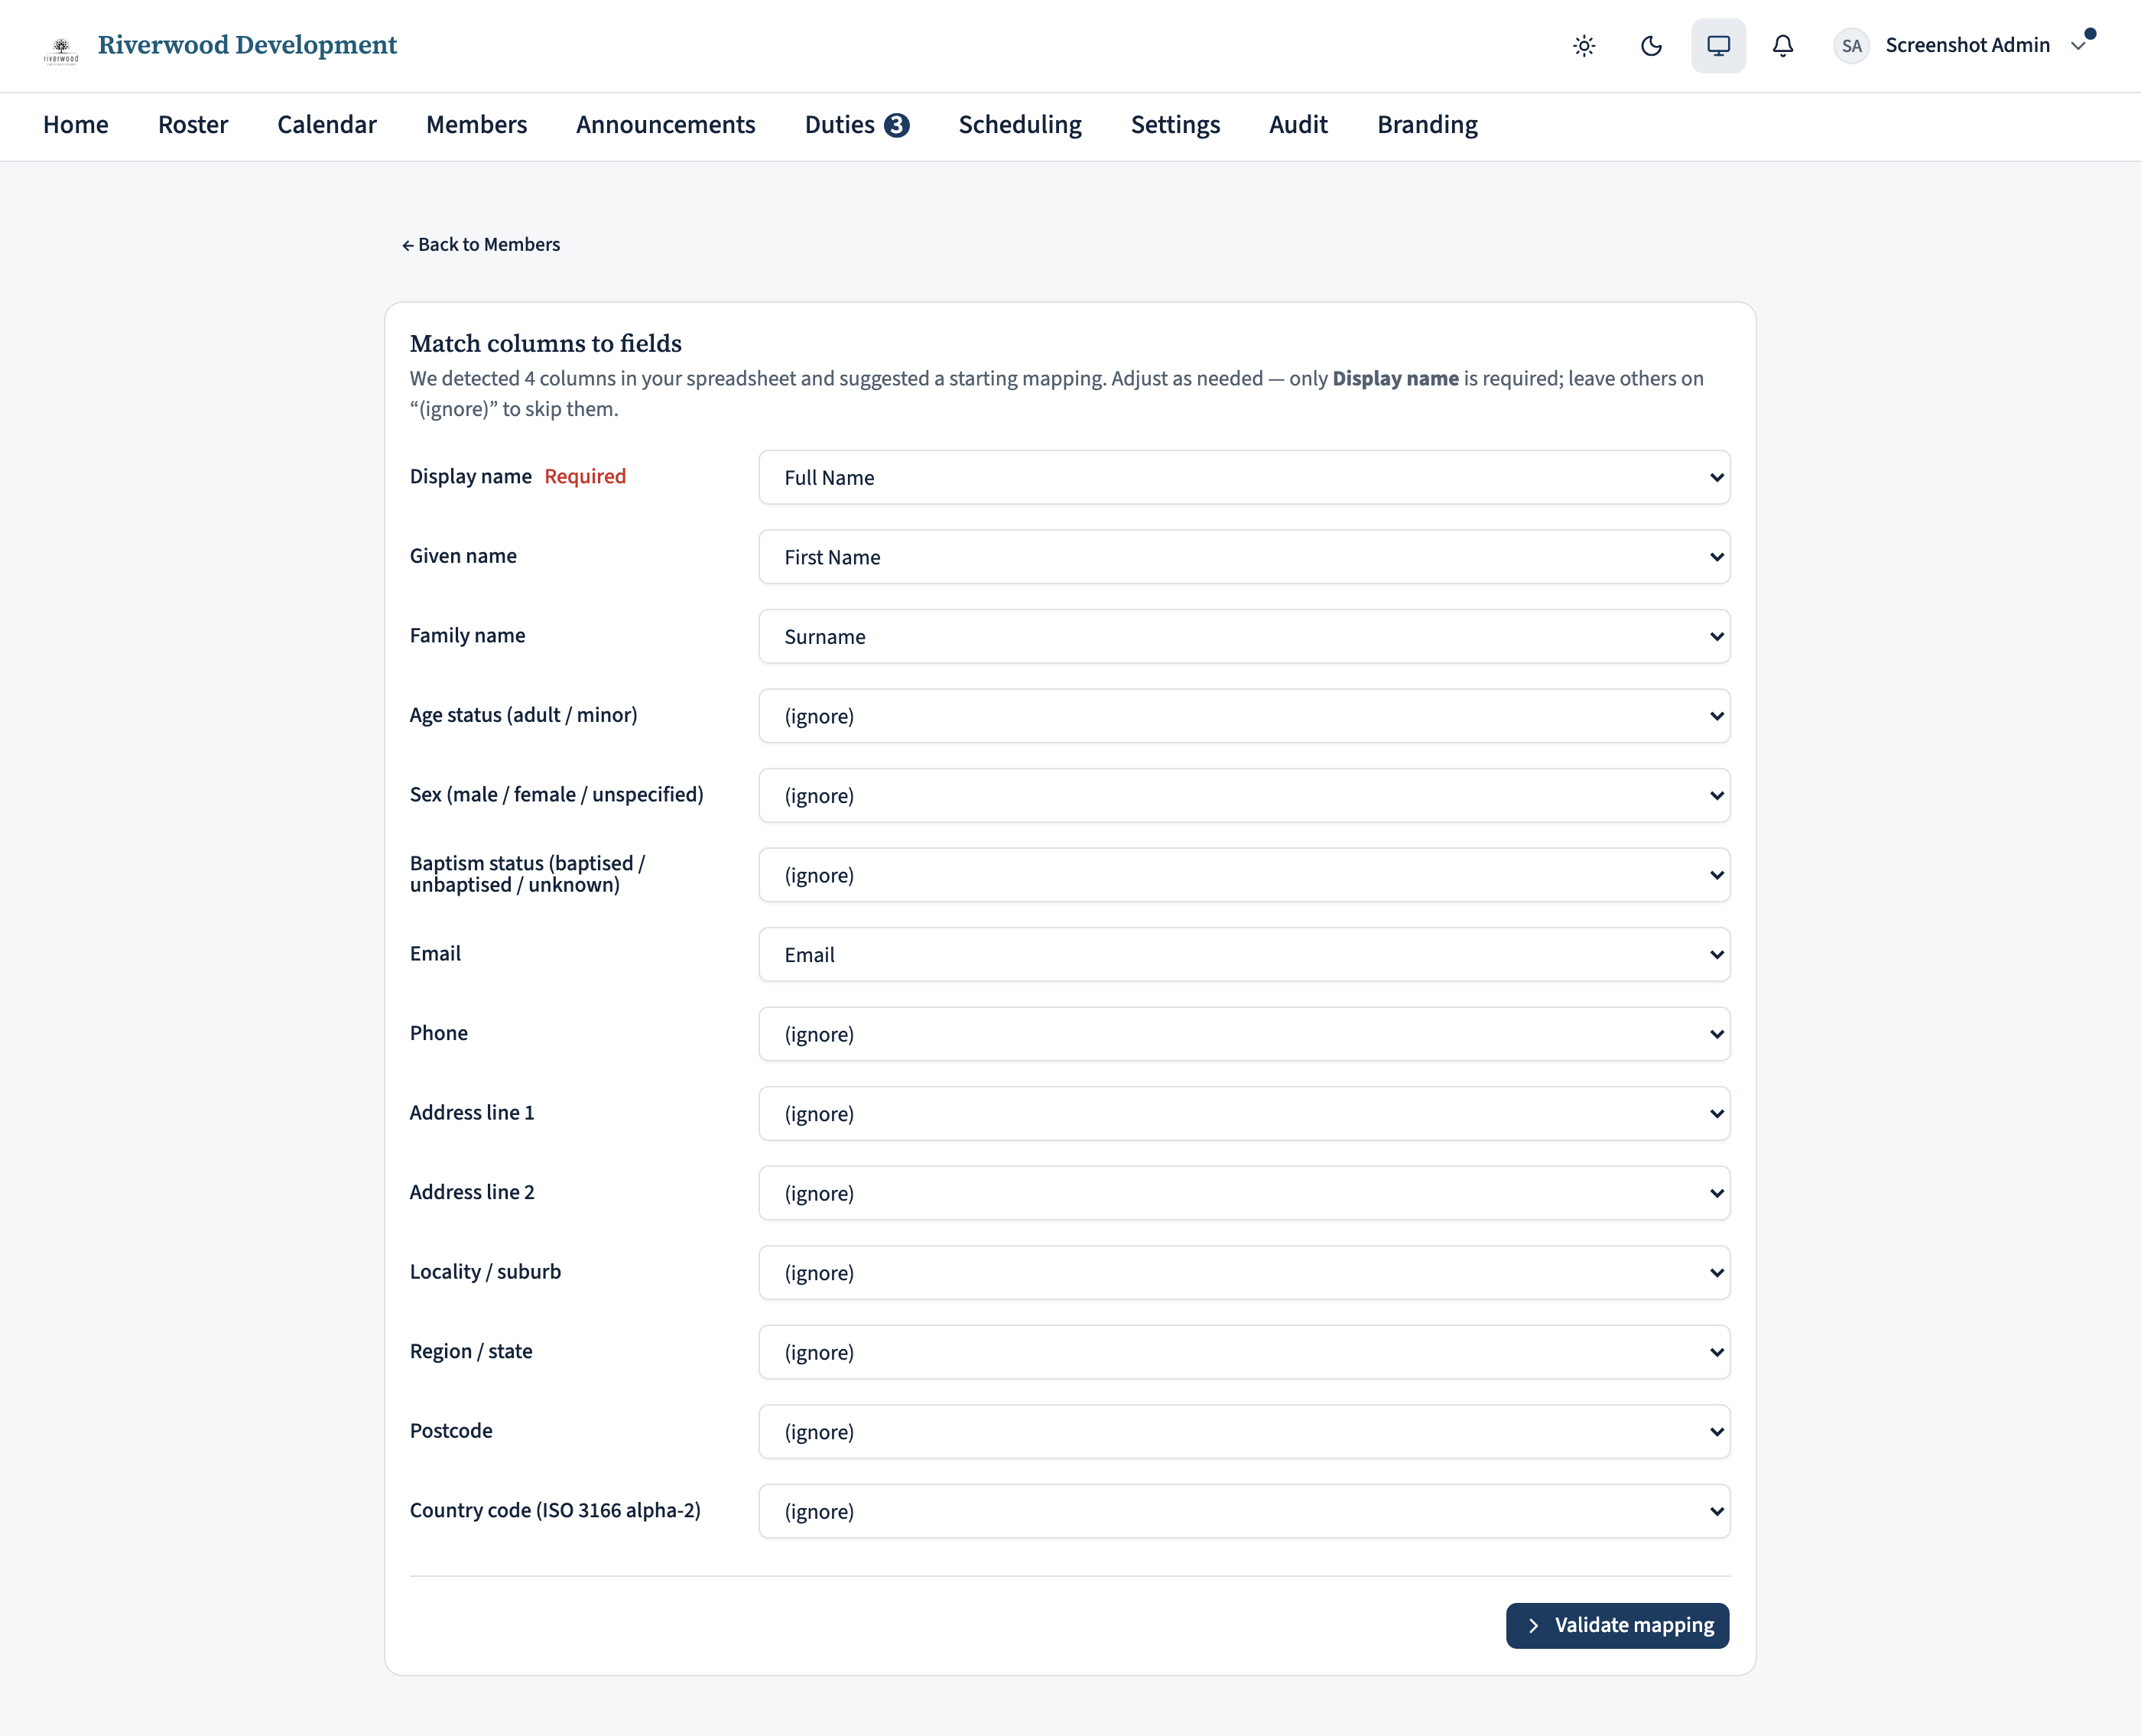
The mapping page is a two-column list: on the left is every CDRoster field the importer supports, on the right is a dropdown of the columns the server detected in your file.
For each field, the dropdown is pre-seeded with the server’s best guess based on header name similarity, so “First Name” auto-maps to Given name, “E-mail” to Email, etc. You can accept the guesses silently by moving on, or open any dropdown to pick a different column.
Two special rules:
- Display name is required. If your spreadsheet doesn’t have a full-name column but has given + family in separate cells, use the family spreadsheet software’s CONCAT to make one, or leave Display name unmapped and let the importer refuse.
- (ignore) means “my spreadsheet doesn’t carry this field”. Every unmapped CDRoster field defaults to (ignore). That’s fine — the person’s profile just lands with those fields blank and they can fill them in later.
Once every mapping is set, click Validate mapping at the bottom-right of the card. The server queues a preview job that returns in a second or two.
Review the preview
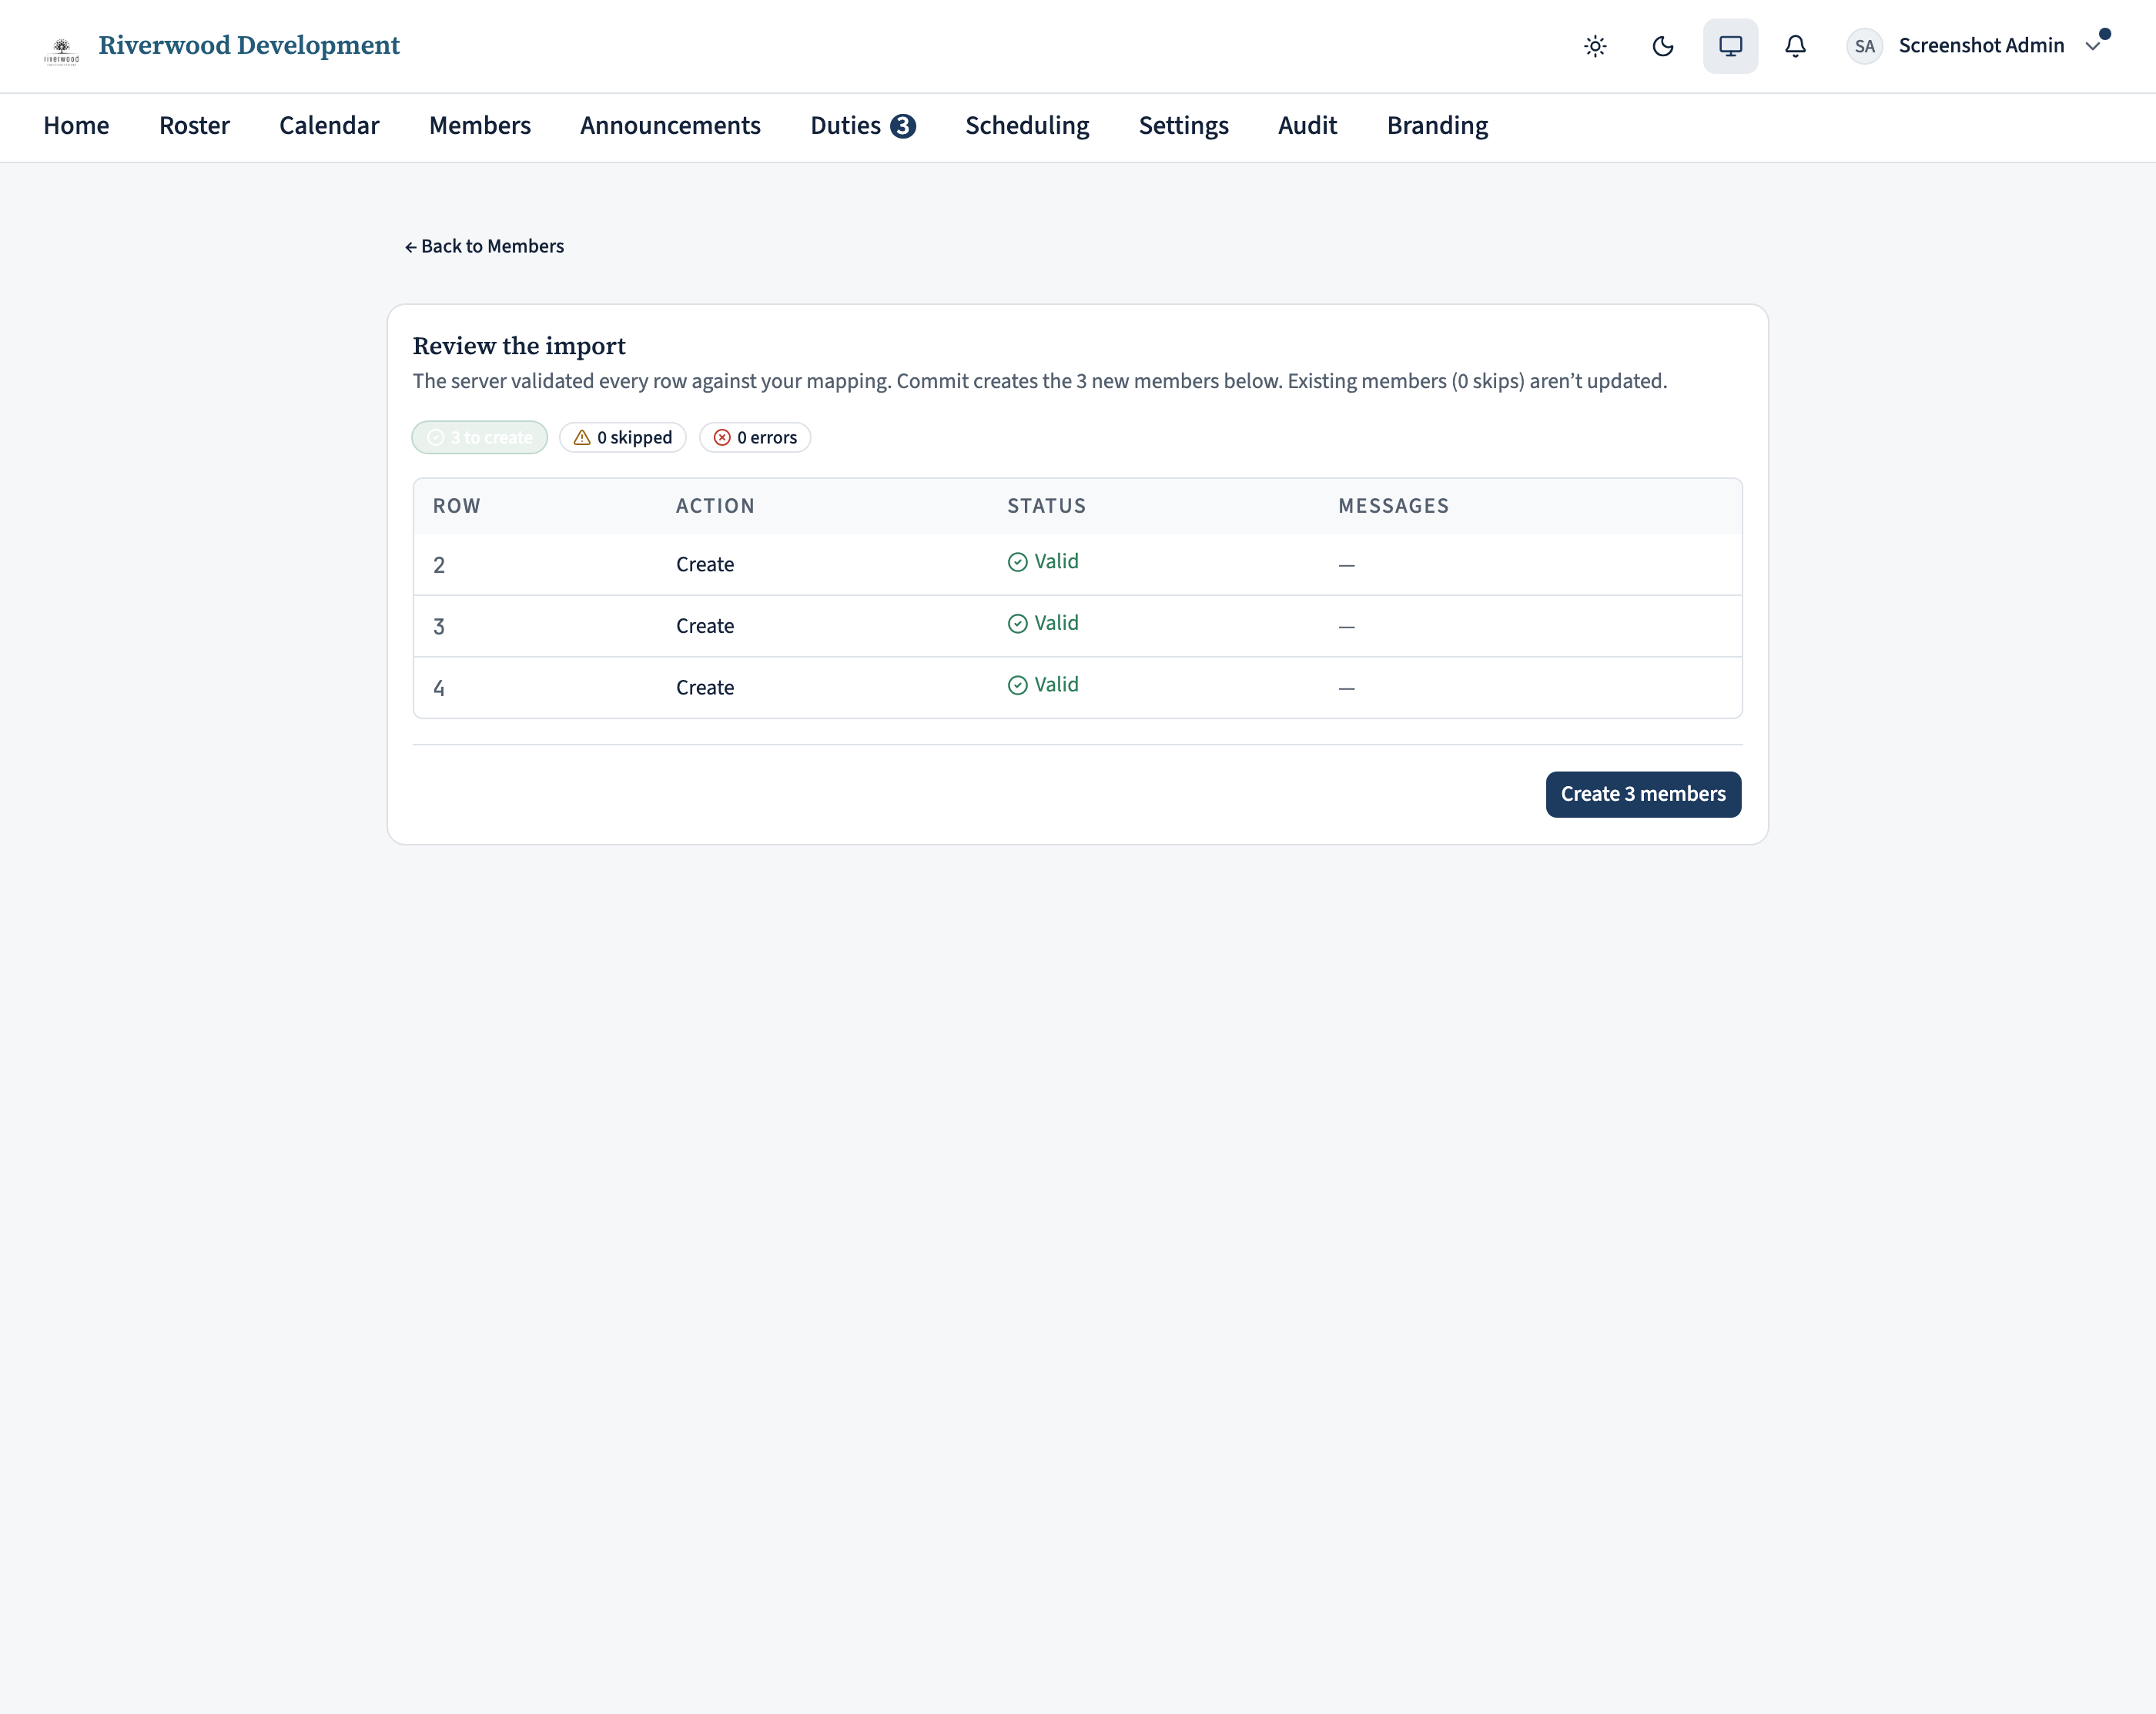
The preview page reads the whole file against your mapping and shows what would happen if you committed right now. Three summary pills give the shape of it:
- To create — new members that pass validation.
- Skipped — rows the server matched to an existing person (typically by email). Commit leaves those records untouched.
- Errors — rows that won’t be created. Almost always a missing display name or a value the server can’t interpret; each error row spells out the reason in its Messages column.
Fix any source-file issues, re-upload, and re-map before continuing. If everything looks right, the commit button on the bottom-right shows the exact count (e.g. Create 3 members); click it to write the batch.
After the commit
The commit runs directly — there’s no confirmation dialog. The card swaps to an Import complete state and you’re free to head back to Members. A few housekeeping tasks are common right after an import:
- Link households. The importer doesn’t create households. From each spouse’s profile page, click Household to create one, then add other family members from the same profile.
- Send invitations. Open each imported member’s profile and click Invite to create account to email them an activation link. A per-tenant bulk-invite is on the roadmap; for now it’s one member at a time.
- Follow up on warnings. Members whose age or baptism status was dropped by the importer show a default value on their profile. Ask them (or their household manager) to correct it after they sign in, or fix it yourself from the Members page.